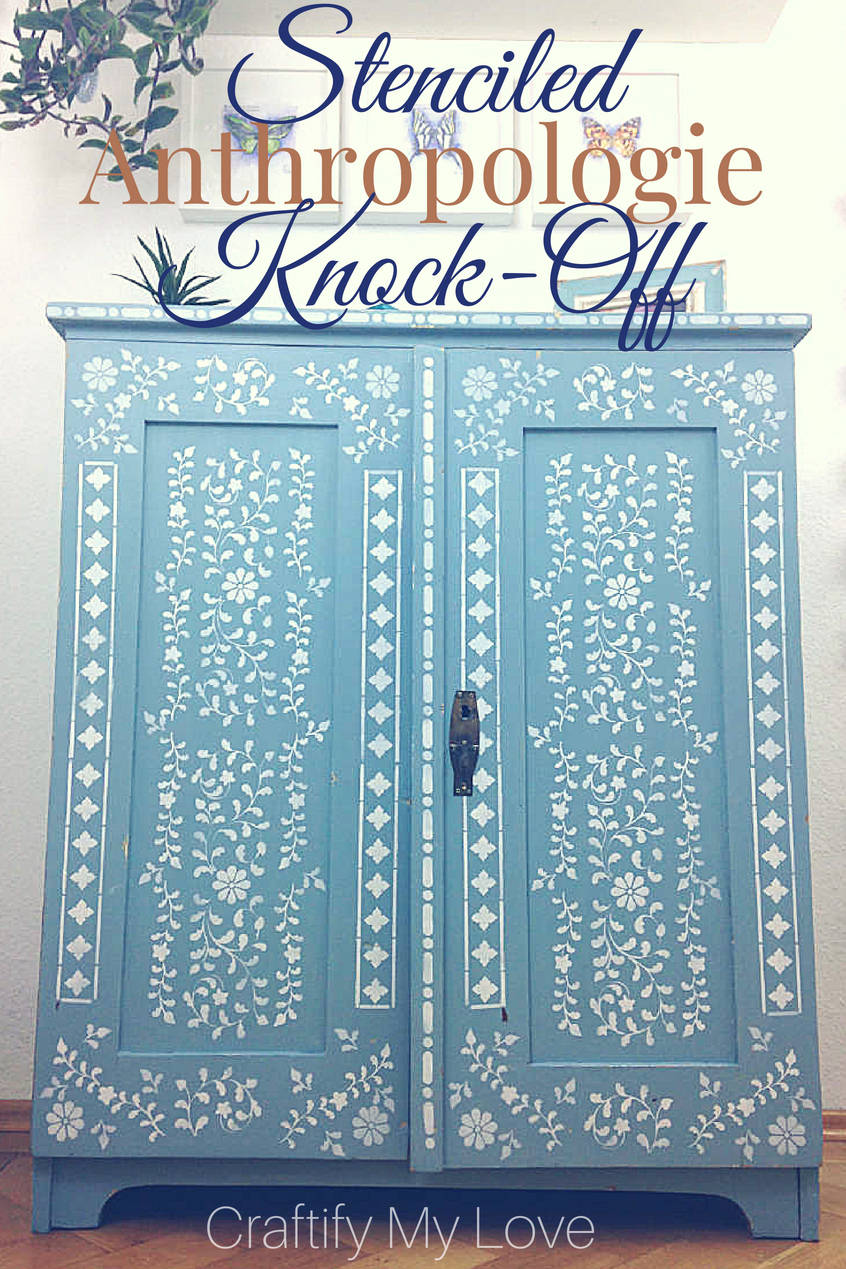
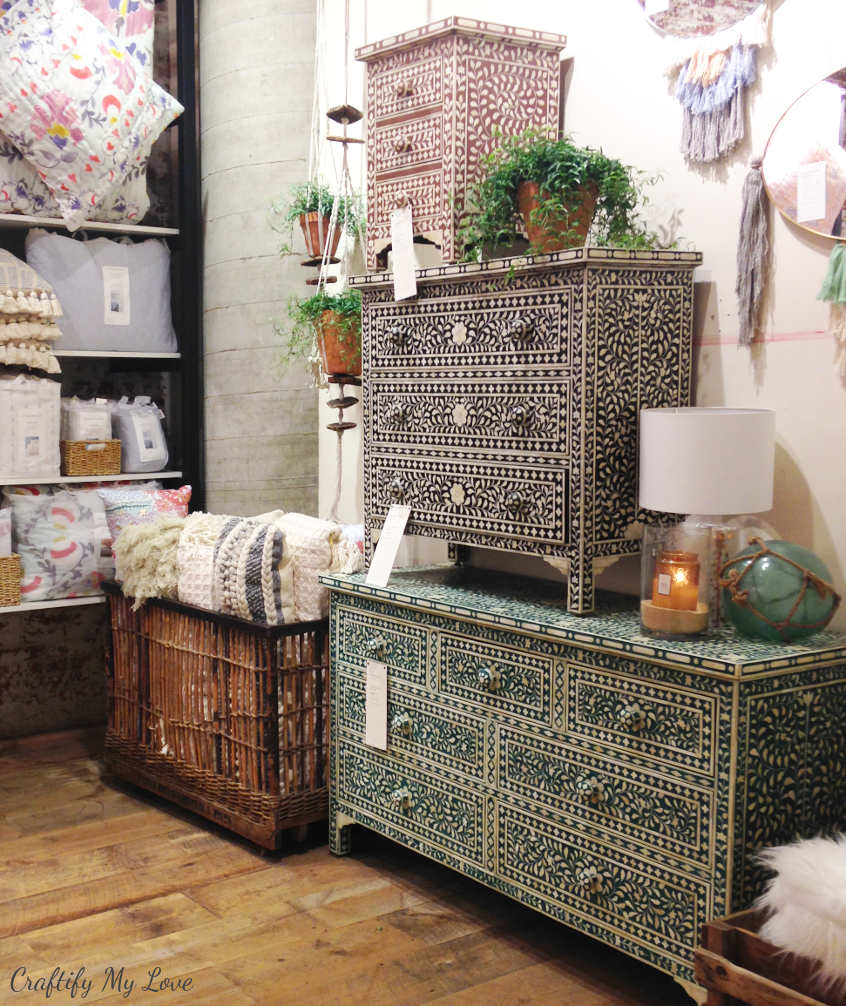
Today I am sharing with you how you can transform any old dresser into an Anthropologie look alike.
Now the fun thing is when I made this dresser (actually it’s more like an armoire), I didn’t even know that you could buy a very similar one for a small fortune at Anthropologie. How can that ever be, you ask?
Because up until this May I’ve never been to an Anthropologie shop. Yep, you read that right. I live in Germany and we don’t have them here around. But of course I’ve had inspiration strike me at one day or other before I started transforming my little cabby into this beaut and I am absolutely going to share with you how and where. In just a minute.
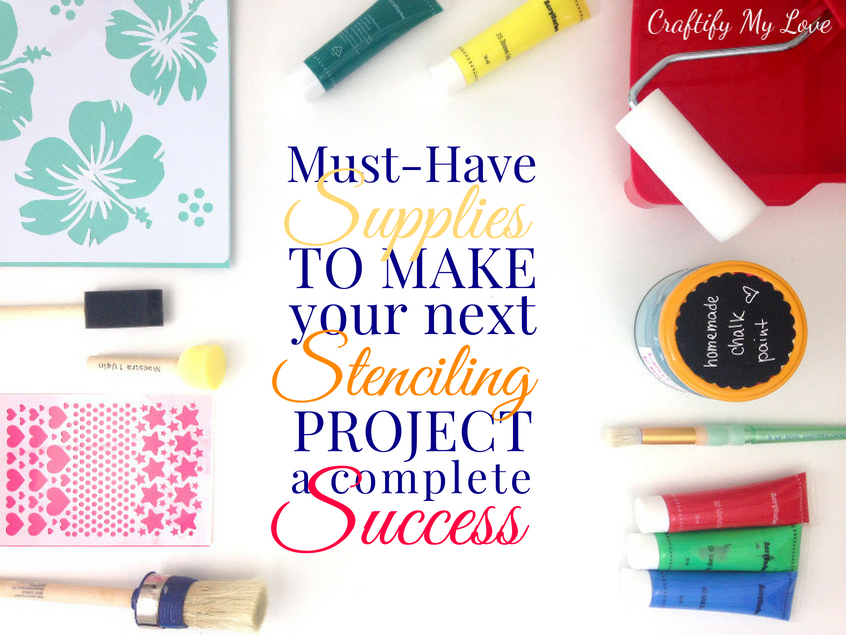
Related: Must-Have Supplies for Stenciling Success
I know that I am a chatty person and that’s not for everybody. I totally understand! 😉 If you’re not interested in my little inside stories simply scroll further down for the tutorial part.
Markus and I have been on a three week holiday in the US this May. We’ve toured the South, visited my best friend Yvonne & her hubby in Atlanta, GA and three awesome blogging friends while on the road: Shirley, Yami, and Lyne. Pay them a visit and say hi from me.
Travelling is so important to me!

During this trip, I’ve found so much inspiration for new projects:
- Coastal Air Plant Decor
- Lyne’s Guest Post for Craftify My Love while I was traveling (Handmade Scrapbook Mini Album)
- Penguin Bookmarks (I saw a little girl with a cute penguin life vest at the beach in Florida)
- Coastal Stenciled Pillow Cases (We had beach themed pillow cases in our Air B&B in Florida and ate a soft shell crab in New Orleans).
This post contains affiliate links. That means if you make a purchase through these links, I may receive a small commission at no extra cost to you! You can click here to read my full disclosure.
Tour de Crafts & DIY Challenges
Usually, I share a different project with each challenge I participate in. But this one, THIS ONE is such a great fit for all these upcoming challenges this week that I SIMPLY HAVE TO share my darling baby blue stenciled cabinet in all three of them!
1. Pinterest Challenge Blog Hop
This awesome challenge is hosted by Erlene from My Pinterventures. The purpose of this Pinterest Challenge is to motivate all the participants of this hop (and you too) to not just pin, but to make it happen! To join next month’s #pinterestchallenge, click here to sign-up ⇒ September Pinterest Challenge.
Look what I have accomplished so far:
- IKEA Hack: Wood Slice Side Table
- Crocheted Boho Hoop Earrings
- A Traditional German Housewarming Gift | Wood Burning Art
- How To Make A Giant Paper Flower + Free Template
- Macramé Spiral Bracelet for Couples or BFF’s
I decided I need to have a cabinet like this when I stumbled over this great Pin on Pinterest. But you might have already guessed that, right? In fact, I even do have two cabinets in my home with that awesome pattern. And, they are like NIGHT and DAY! It’s amazing what you can do with just one stencil! Want to know what I mean by that? See the other one here.
Being that my initial inspiration for that project was from Pinterest (actually, it was one of my early pins in my Woodwork DIY’s Board) YEARS ago, it’s a MUST I share this with you awesome readers & participants of this challenge first.
2. Look For Less
Because of this fun new challenge by my friend Yami (remember? I paid her a visit in ATL) you get to watch a video tutorial on how to flip a cabinet this awesome way.
Voilà: Entry No. 2!
Basically, the challenge is about creating something for little money that you saw for big bucks at one of those fancy home decor or interior design shops.
Video-Tutorial: DIY Anthropologie Look Stenciled Furniture
3. Thrift Store Upcycle
I got this hidden treasure of a cabinet from my friend Yvonne’s mother in law. I know, I know! Now you’re wondering how the heck did I get this cabinet home from Atlanta, GA, right?
I am pretty good with bringing home travel souvenirs (mostly craft supplies, ask Markus lol), but even I am not that good, lol. Yvonne’s hubby is from Germany. They both used to be my neighbors and that is how we met and got besties. And her in-laws only live a couple of streets away. Easy peasy!
So, what is qualifying this project for a thrift store challenge, you ask? Easy! Not everyone has a best friend, who’s husbands family lives next door and gifts you with amazing outdated furniture, right? But everyone does have a thrift store in their neighborhood where there can be found those awesome pieces at any time. Now, there you have it!
You’ll find other creative thrift store projects at the very bottom of this post. Please make sure to check them out, too!
Phewwww…now that was easily the longest intro ever!
As always I’ll keep the tutorial part super efficient for you with lots of photos and little blah blah.
DIY An Anthropology Dresser Knock-off in 5 Simple Steps

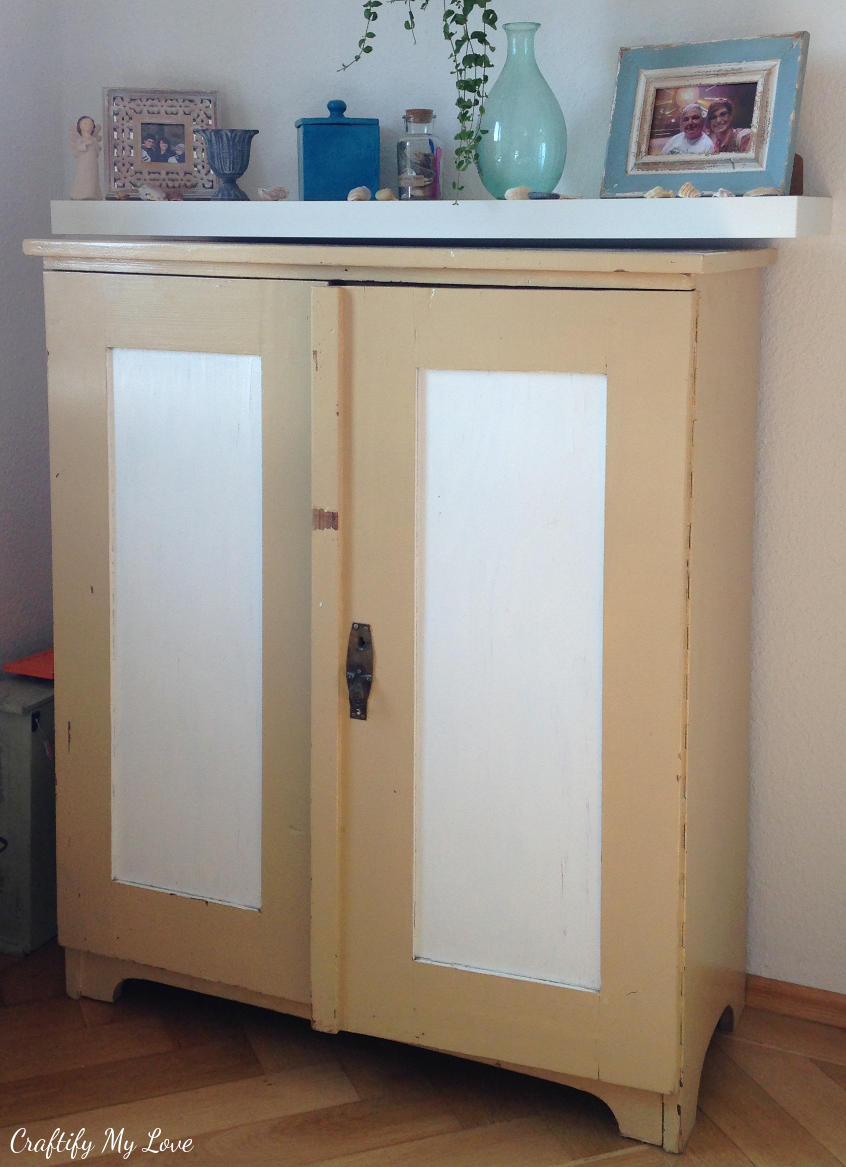
BEFORE- Find A Second Hand Piece Of Furniture
If you are aiming for a 100 % Anthropology look, you will have to find a dresser that has a very similar shape. I didn’t. I used this armoir instead and think, my furniture flip turned out great anyways.
Where to get a piece of furniture for a furniture flip?
- You already have a piece at home you want to transform.
- Score a high potential thrift store find.
- You get lucky and drive by a roadside find.
- Friends, families, or neighbors gift you with it.
Read up on all the creative ways to get a hold of craft supplies for low or no money in my FREE Guide. Heads up: It’s a thank you for subscribing to my newsletter.
1. Necessary Preparations For Your Furniture Upcycling Project
Get All Your Supplies Ready
- Paint for Cabinet (I used my homemade DIY chalk paint in a blueish grey)
- Paint for stenciling (I used a stained varnish in white, for the insides, too)
- Brushes (1 each for the paint, wax, and stenciling)
- Foam Roller
- Stencil (I used the Indian Inlay Stencil from Cutting Edge Stencils)
- Painters tape
- Furniture Wax
- Sander (optional)
- Sanding Paper (optional)
- Painters tray or paper plate
- Kitchen towels
- Wet wipes
- Cardboard, drop cloth, or something similar
- Hand drill (optional)
- New hardware (optional)
Related:
Which supplies are really necessary to make your stenciling project a complete success?!
Frugal Tip:
Cutting Edge Design offers a Stenciling Tools Essentials Kit that is quite handy. Also, they have a promotion going on that will provide you with a FREE Surprise Stencil with any purchase of $ 4.95 value and more. And if you’re not set on the pattern, I’d recommend you browse their Sale section for a great steal!
Clean, Sand, And Remove Hardware
If your rescued piece of furniture was hidden in some attic or a shed for centuries you might need to wipe it down first.
My cabinet has a rustic old latch that is actually not working anymore. I kept it out of time pressure and nostalgic reasons (at least that’s what I am telling myself *add eye-roll here*).
I did this project back in January during my super busy 4-week Craft Room Challenge.
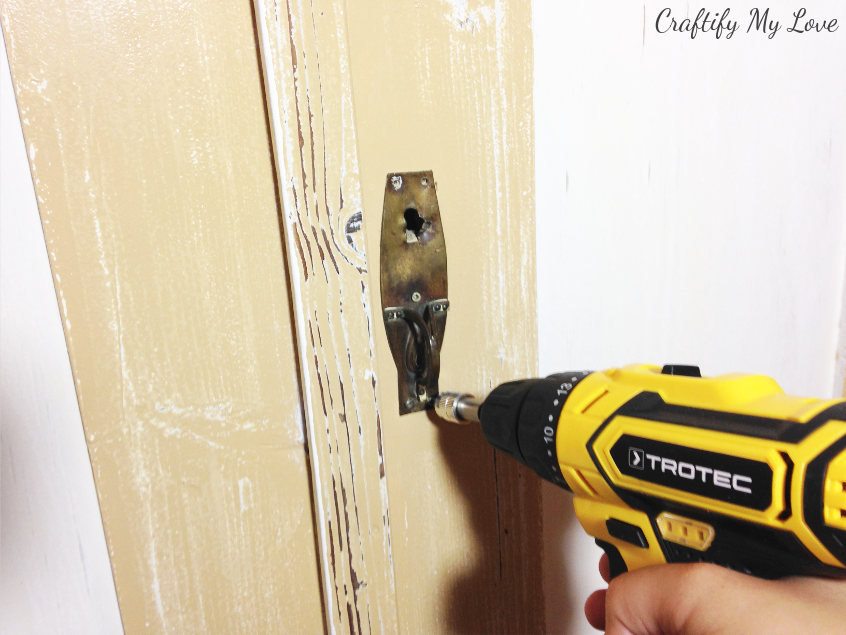
Using a hand drill you’ll detach all the hardware. An alternative would be to cover all the hardware with frog tape.
- If you want to reuse it, store it + the matching screws in a ziplock bag, or
- decide to add some new hardware. In this case, you might need to cover up the old holes. I’ve achieved some pretty good results with wood filler. Apply it according to the package’s directions. Let dry and sand it smooth, so it won’t be visible after you’ve painted over.
Prepare the surfaces by lightly sanding them down. A fine grit sanding paper will do. You don’t need to get rid of the old paint entirely, it’s enough to roughen up the surface. This way the new coat of paint will stick to the furniture better.
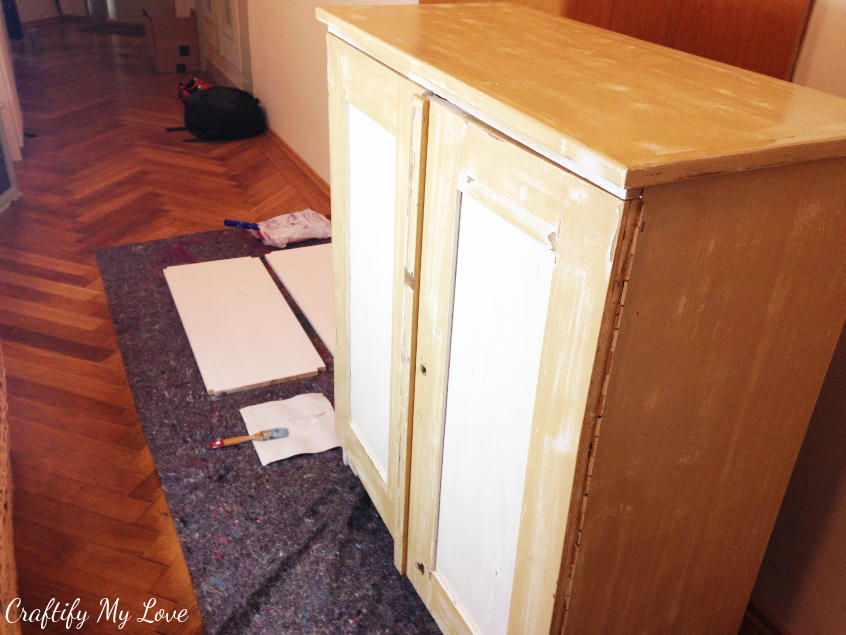
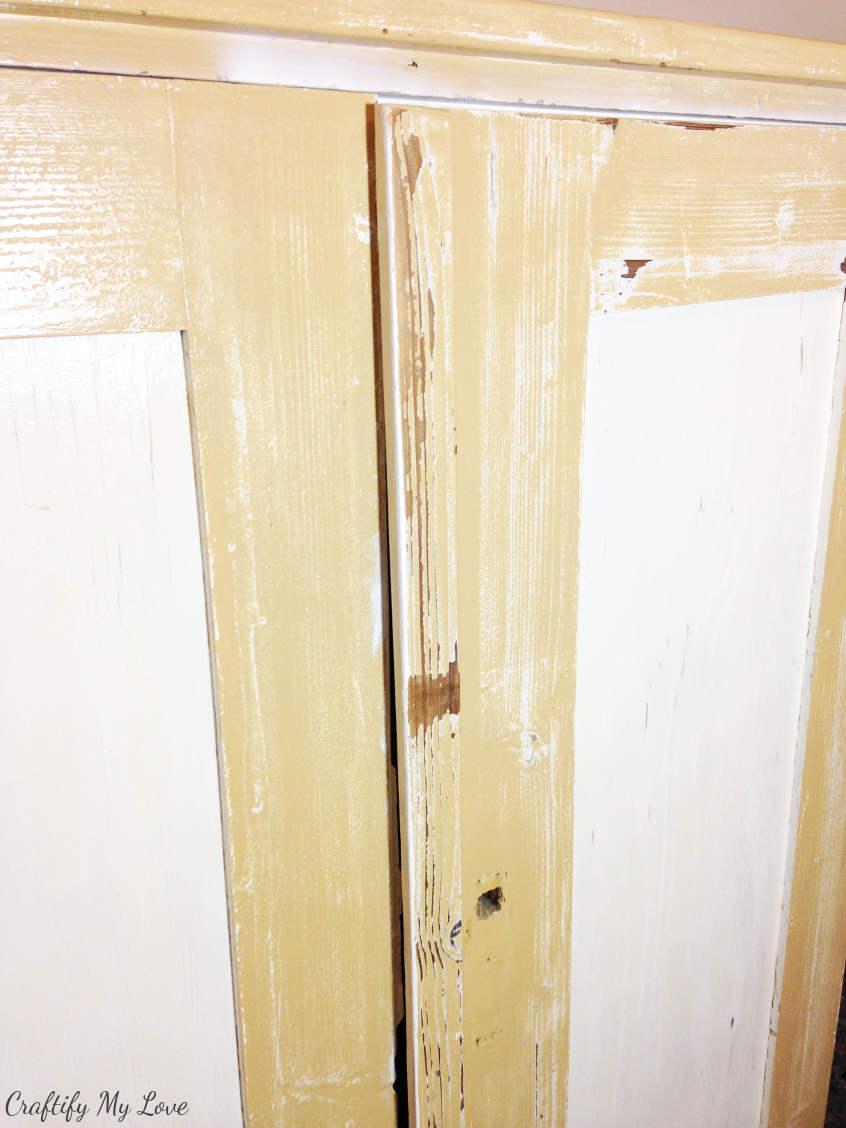
But look closely! If you notice the old paint being somewhat loose in some areas, it’s best to remove all of it in that part by sanding a little longer.
You don’t want your freshly painted and redone work to chip after the slightest bump. Mainly this will happen on its own while sanding – notice the dark brown wood parts on the right door of my cabinet? The old paint splintered right off.
Use a wet cloth and get rid of all the sanding dust.
2. Give Your Anthropologie Inspired Furniture A Fresh Coat Of Paint
Decide if you want to paint the insides, too. I did for this cabinet. But that was a first and I usually don’t bother. It’s basically up to you.
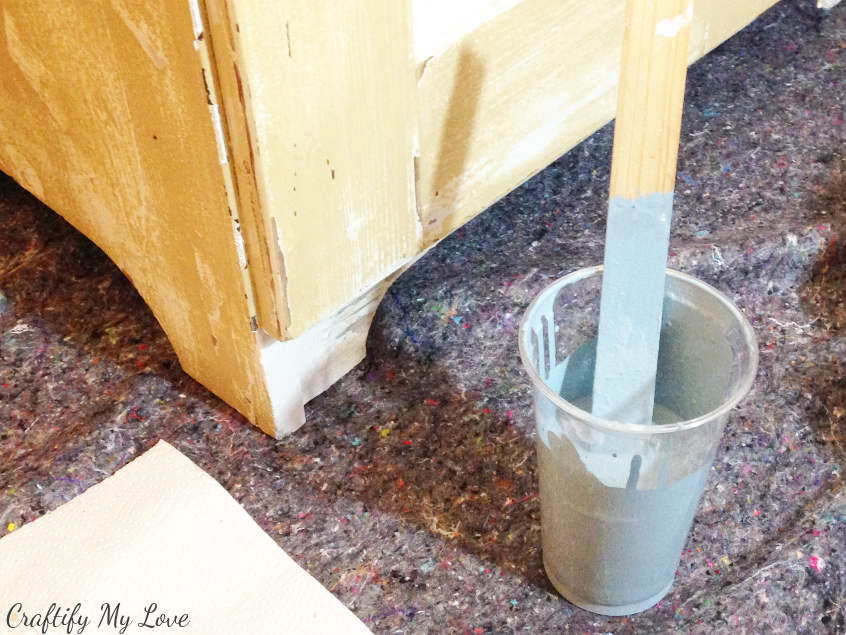
For the outside parts, I mixed a greyish-blue chalk paint myself. Another first. Why? Because I wanted to know if I can do it. And I had a very special color tone in mind.
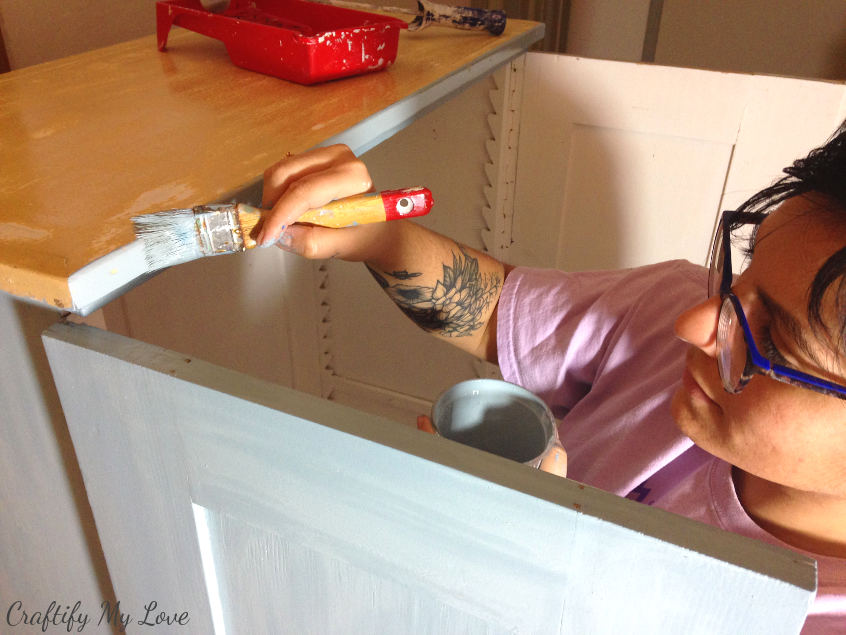
Turns out I did a great job, as I only needed one coat of paint for full coverage results!
You’ll find the recipe for my DIY chalk paint here. In this video tutorial I will show you how to mix your paint using primary colours and a colour wheel.
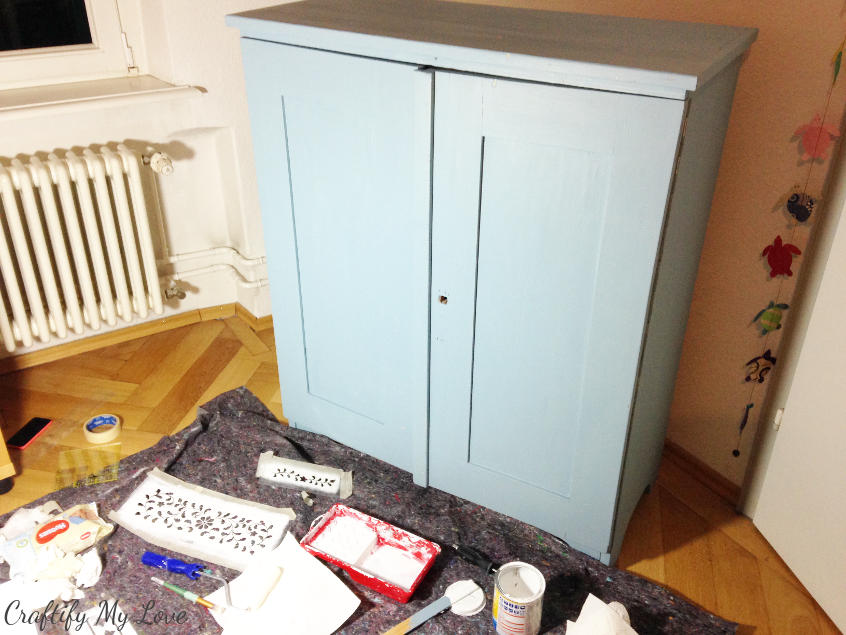
Mix your paint (it is way cheaper than buying a special brand one and stores well in a jar, but do give it a good stir before applying) or use any store-bought paint you’ll like.
Don’t forget to protect your floors, grab your brush and start painting.
Let dry. I did so overnight.
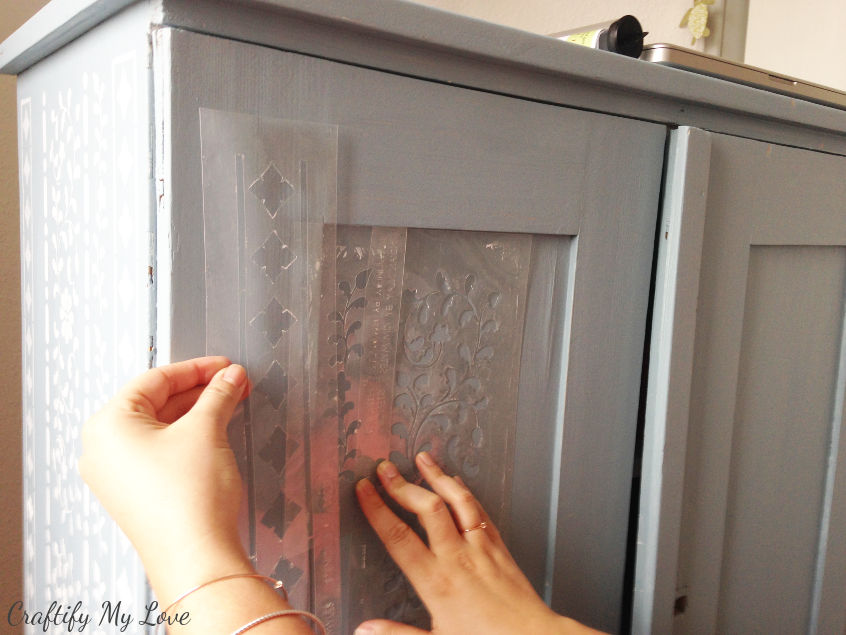
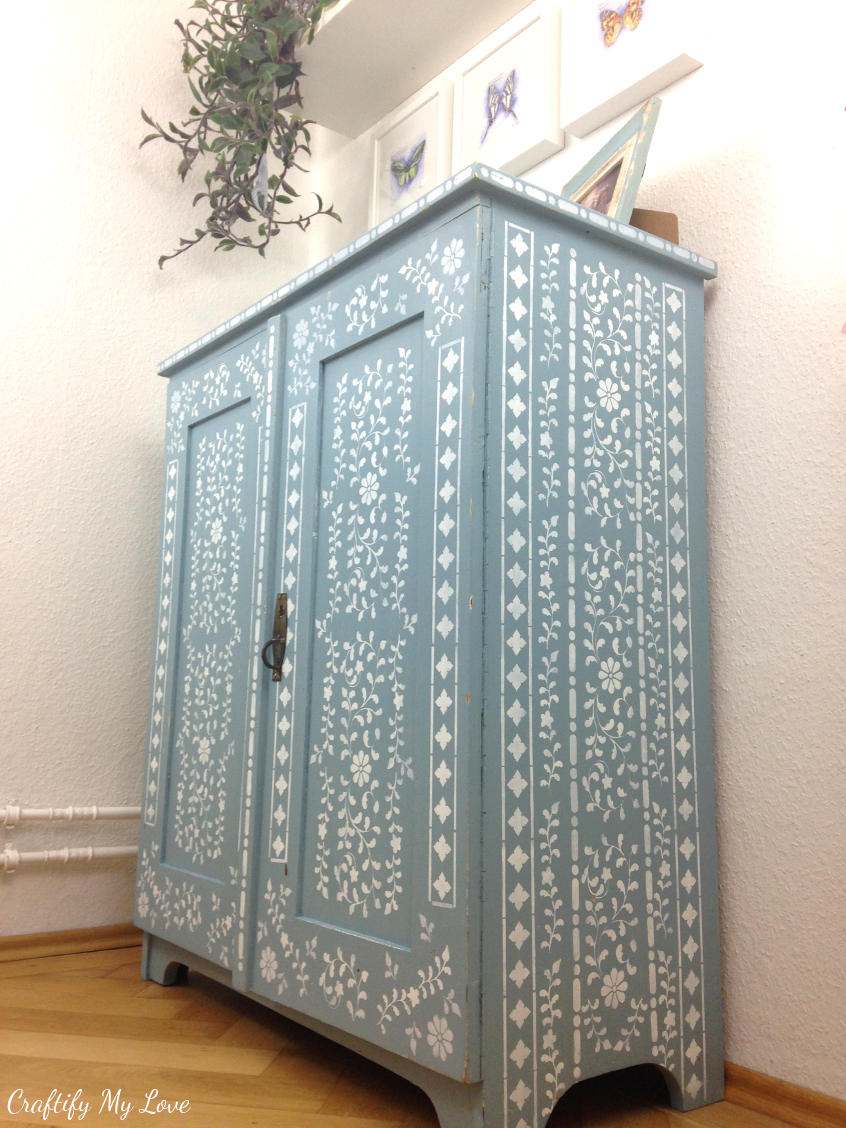
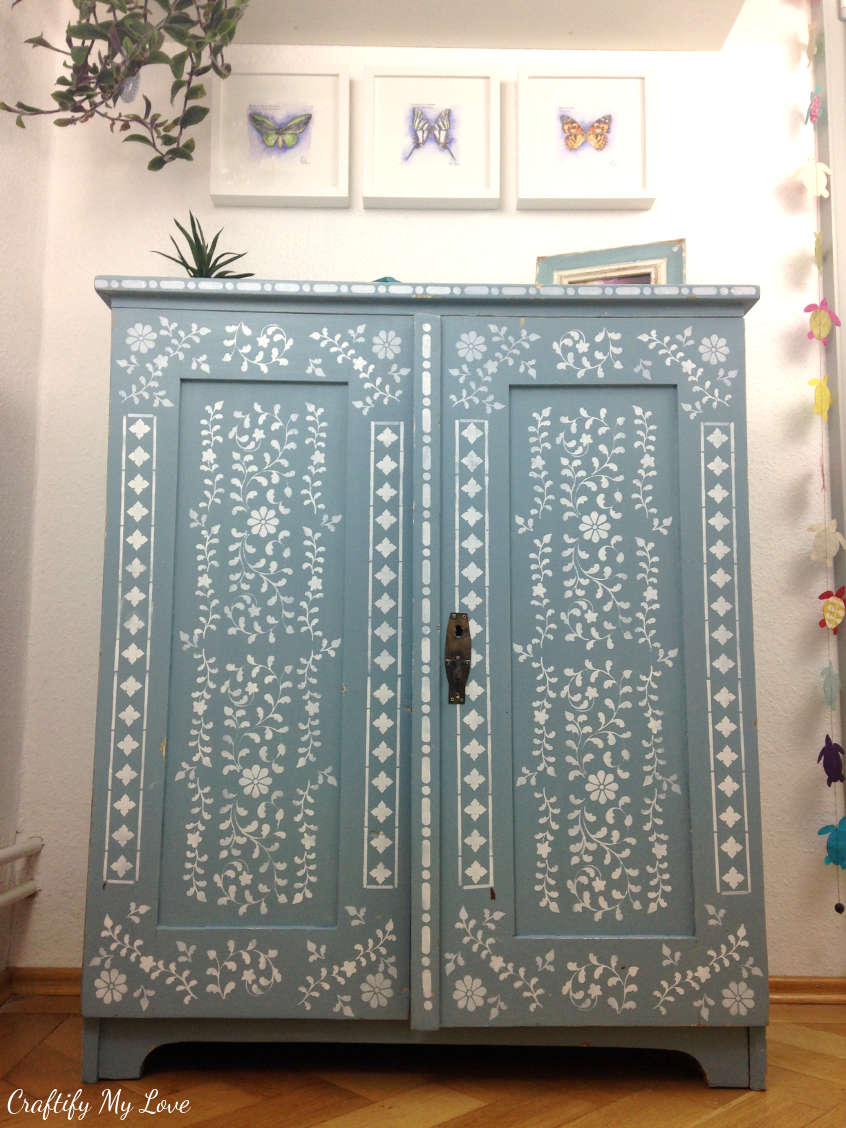
3. DIY A Faux Bone Inlay Using Stencils
I used the Indian Inlay by Cutting Edge Stencil.
Start picturing the pattern you want to create with your stencils at hand. But don’t stress! It’s ok if you have a basic idea and the rest will follow while you are working on it.
Quick Guide to Stencilling:
- Use a stencil brush for small areas and a dense foam roller for bigger stencils.
- Use as little paint as possible. Yes, I am serious about that!!
- Use painters tape to hold the stencil in place.
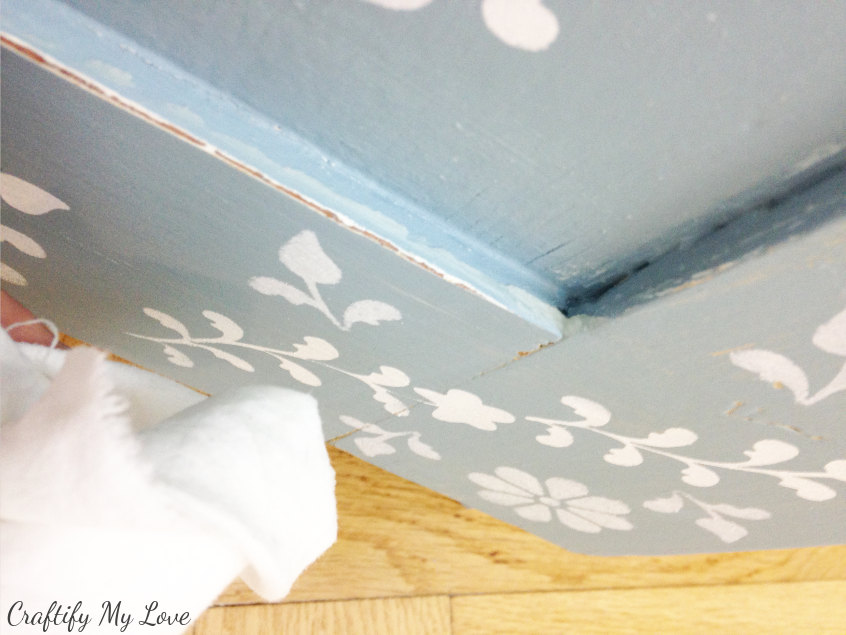
- Don’t freak if you have bleeding! That is when you used to much paint and the paint crawls under the stencil. Have wet wipes at hand and clean up the mess. Repeat the process with even less paint.
- Work from the outside to the inside.
- Fill in empty spaces.
- Clean your stencil regularly. Dried paint will chip away, stick to your foam roller and mess things up.
- Use your stencil upside-down to achieve a mirror-effect in the pattern.
- Step back and look at your stenciled object from a distance. Are you happy with the outcome or do you need more?
Other stenciling projects:
- IKEA Hack Tarva (Frugal tip: Uses the same Indian Inlay Stencil)
- Find all sorts of fun stenciling projects HERE.
- Read up about the must-haves stenciling supplies HERE
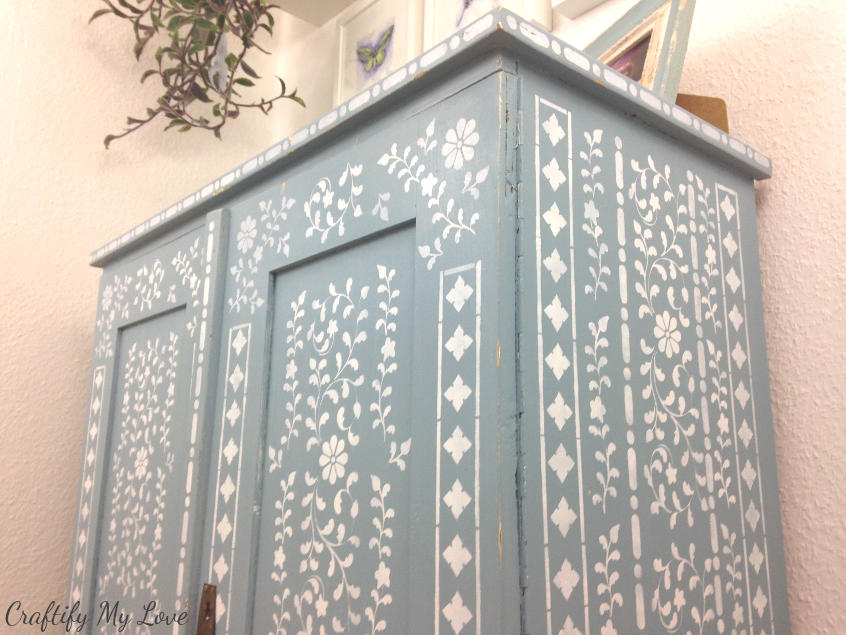
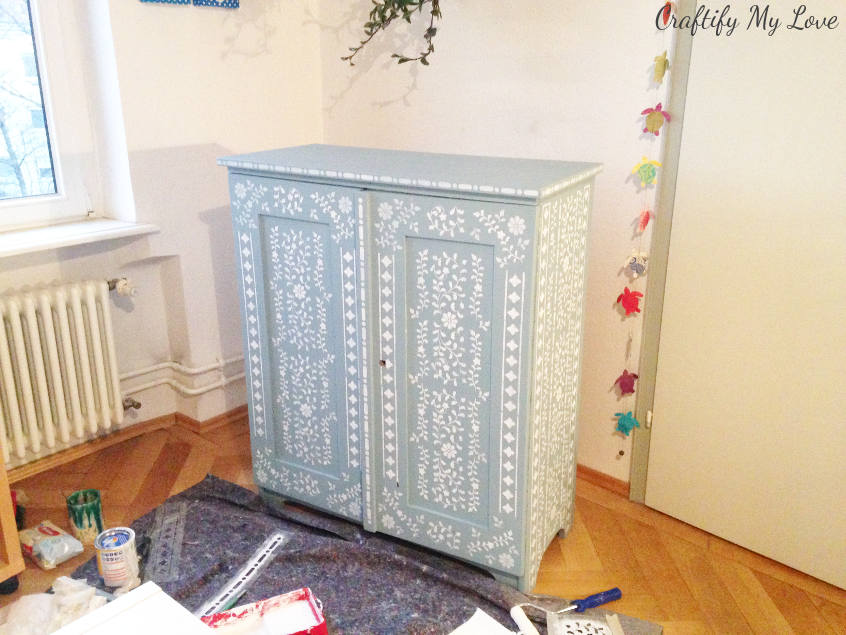
As the last step, I added the top border all around. Markus didn’t think it was necessary but agreed that now it looked sort of finished & complete.
Handy Cheat Sheet for your next stenciling project!
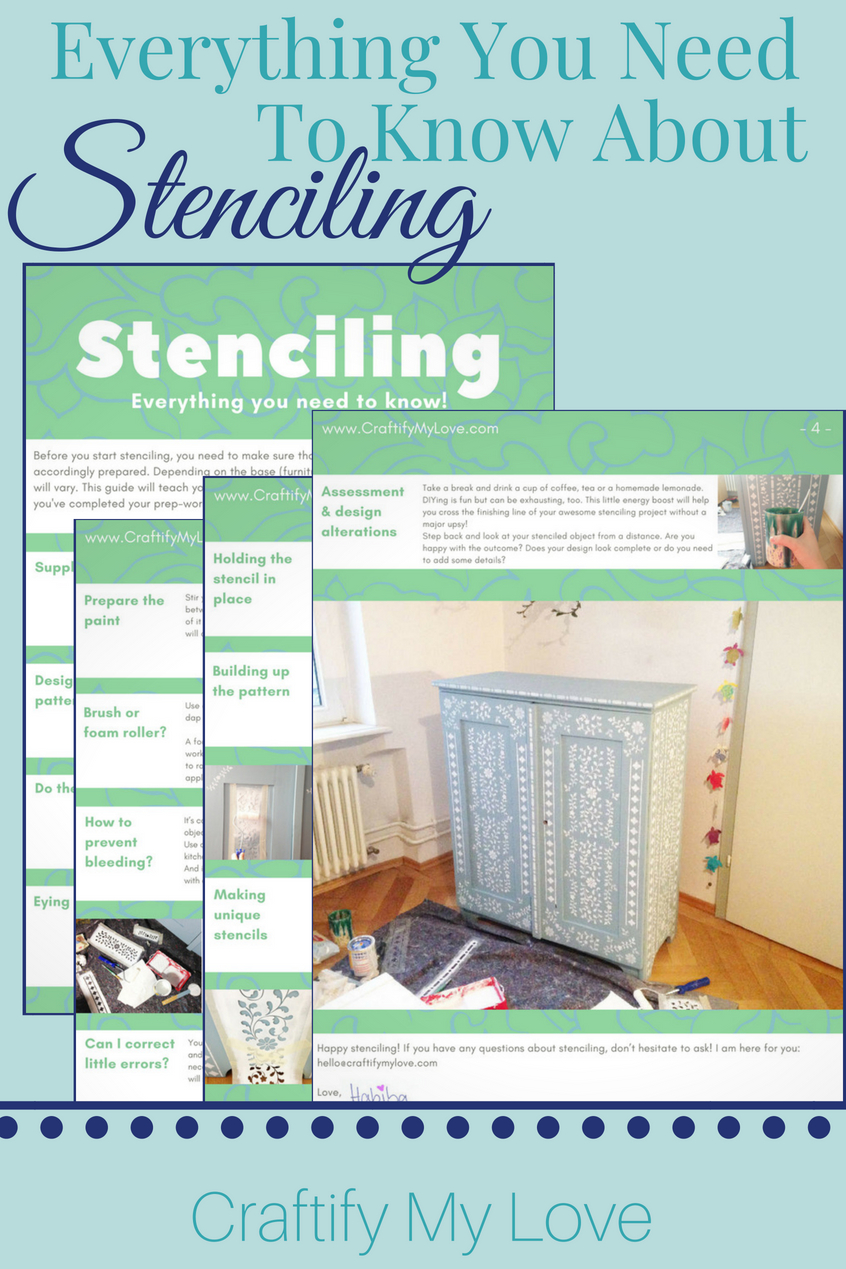
I’ve put together all the MUST Knows about stenciling for you. I added a ton of detailed and self-explaining images and nifty tips I learned during my many stenciling projects. I thought I’d save you the trouble of making beginners mistakes yourself.
Download your example for free today!
4. Artificially Age Your Dresser by Distressing It
This is totally optional! I love the look and almost all of my upcycled furniture projects include this step.
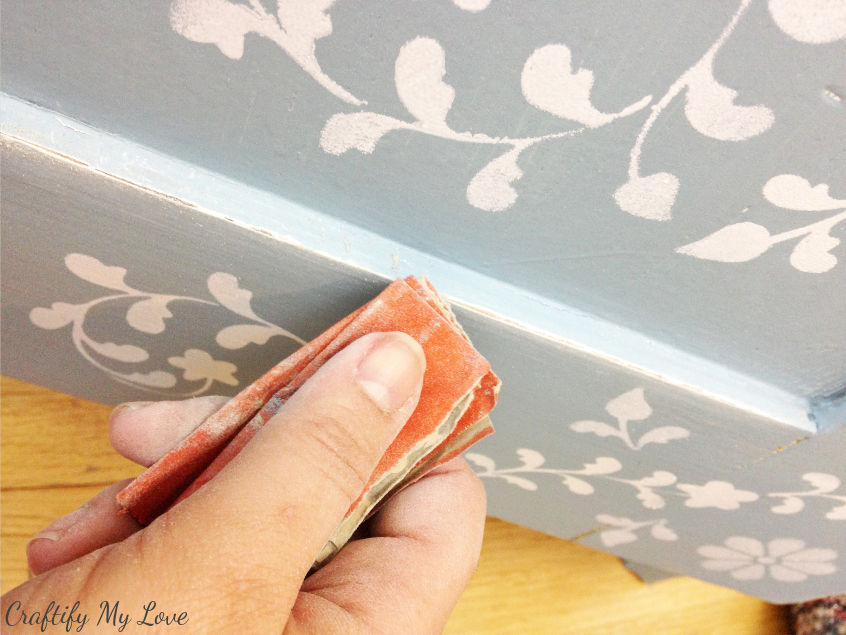
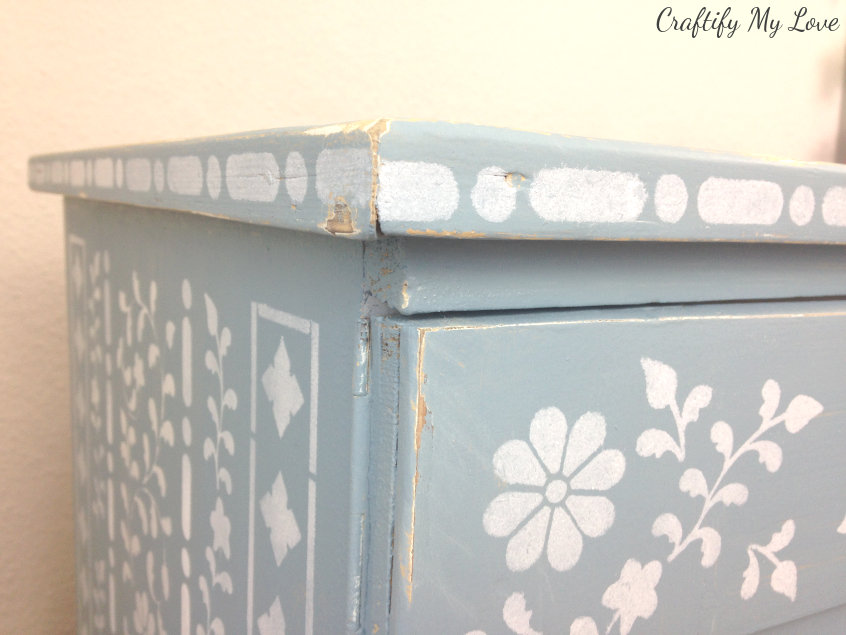
Using a piece of sanding paper you will slightly go over areas of your furniture that would most likely suffer from heavy usage anyways and take away a little of the paint.
By doing so you are speeding up the process that usually comes naturally with time. Also, you won’t mind it as much when the first bump or paint splinter occurs because accidents do happen.
5. Protecting Your Anthroplogie Knock-off Furniture Flip
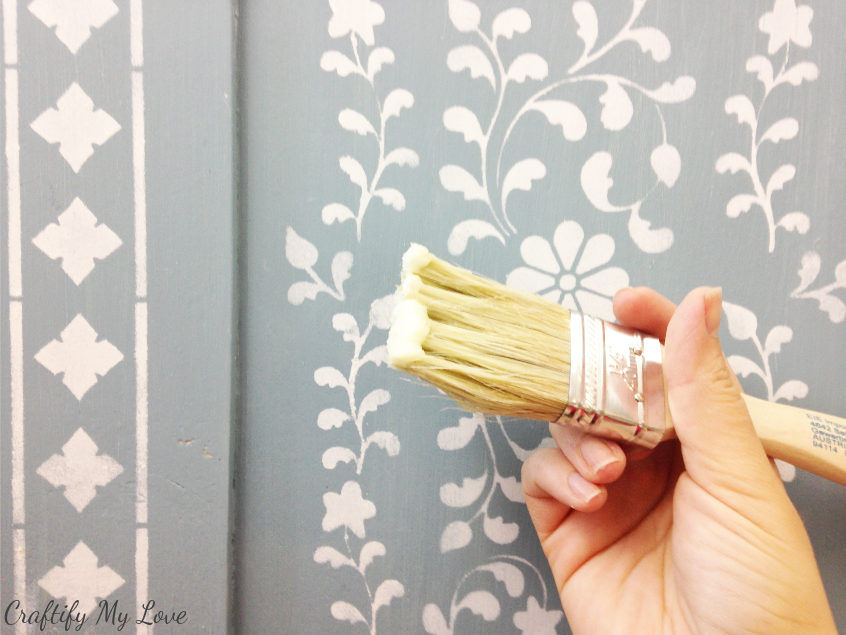
I like to use natural wax to protect my projects from water stains, and other dirt. I explained the simple process in detail and am sharing a nifty frugal tip here.
If your piece of furniture has deeper sections like mine, you’ll most definitely end up having big blobs of wax collected in those corners. Simply remove them with a cloth before the drying period.
You’ve Created A Stunning Anthropologie Hack
Congratulations! By now you will have DIYed an awesome Anthropologie Knock-off to bring the store’s concept into your very own home for very little money!
I think my version looks so much cleaner and even somewhat breezy with this coastal & flowery paint and stencil job. I think it’s quite fitting for my beach themed decor, don’t you think?
Oh, and all the money I was able to save! Here is the comparison. Now, what do you say?
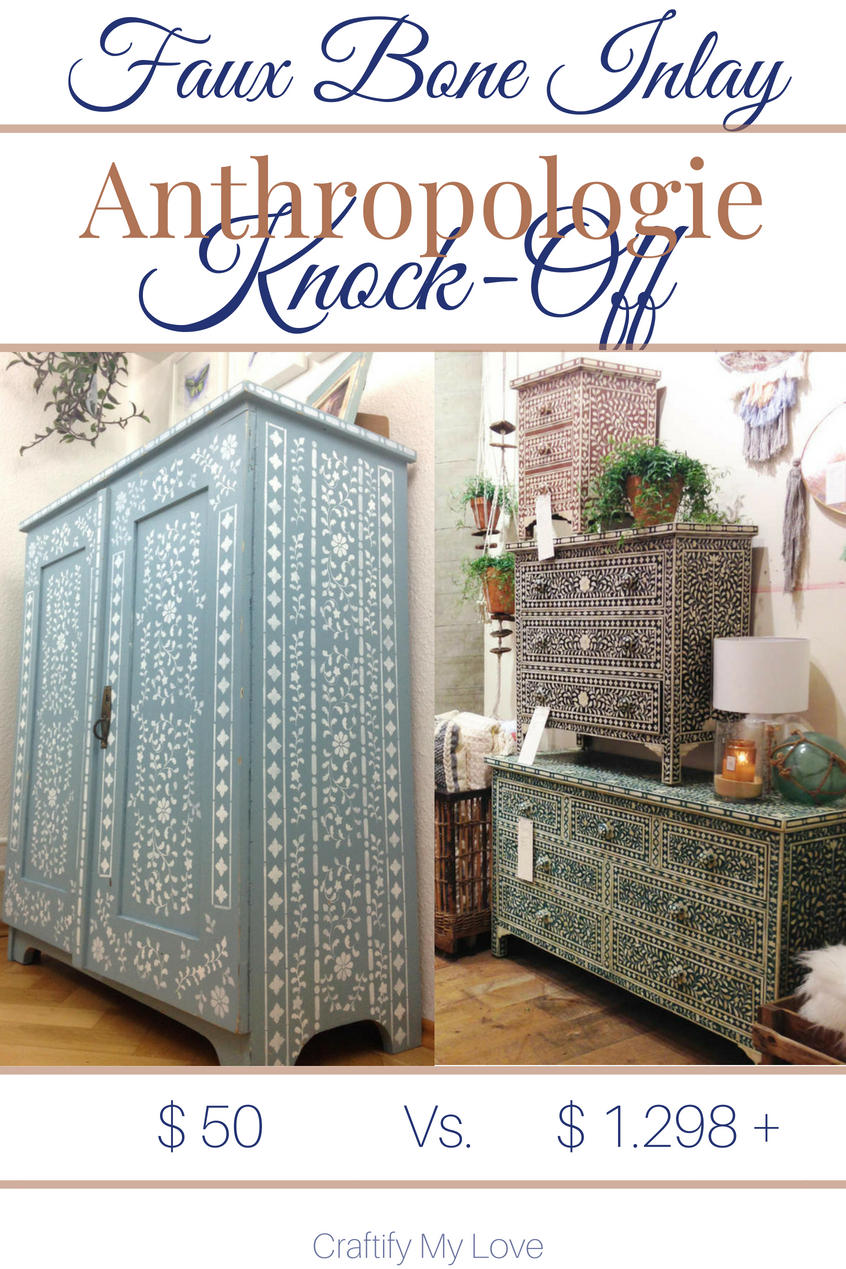
If you’re interested to see how much more storage I gained with this addition to my Craft Room and what I store in it, then click here (read blog post | watch craft room tour).
Now, sign-up for my newsletter & download your Free Stenciling Cheat Sheet.
Happy stenciling!
Love,

PS: Don’t forget to PIN this to Pinterest.
PPS: Please make sure to check out the other great projects of both the Pinterest Challenge and Thrift Store Upcycle Challenge below!
Now, let’s see what other things Pinterest inspired! Head over and visit the other hosts to see what they crafted, cooked, built, or tried!

Erlene – My Pinterventures • Jenny – Cookies Coffee and Crafts Alexandra – EyeLoveKnots • Joanne – Our Unschooling Journey Chelc – Inside The Fox Den • Erin – The Usual Mayhem Beverly – Across the Boulevard • Lynne – My Family Thyme Laurie – My Husband Has Too Many Hobbies • Lydia – Lydia’s Flexitarian Kitchen Gail – Purple Hues and Me • Leslie – Once Upon a Time & Happily Ever After Lauren – Mom Home Guide • Emily – Domestic Deadline Debra – Shoppe No. 5 • Roseann – This Autoimmune Life Terri – Our Good Life • Lisa – Blogghetti Kelli – The Olympic Nest • Rebecca – Hello Central Avenue Bri – Halfpint Design • Cherryl – Farm Girl Reformed Julie – Sum of their Stories • Habiba – Craftify My Love Shirley • Intelligent Domestications
And now for more thrifty goodness!

The Rules:
- Upcycle an item(s) from a thrift store, resale store, or garage sale into a new piece of decor.
- There’s no monthly theme.
- There’s no budget to stick to.
Meet the Hosts
Pili | My Sweet Things – Jennifer | Cookies Coffee and Crafts
Maureen | Red Cottage Chronicles
Jeanie | Create and Babble – Victoria | Dazzle While Frazzled
Deborah – Salvage Sister and Mister – Marie | The Inspiration Vault
Yami – The Latina Next Door – Debra | Shoppe No. 5
Habiba | Craftify My Love – Michelle | Our Crafty Mom
Check out what my fellow upcyclers created below!



This looks beautiful! Great tips for stenciling. I’m still in awe of how amazing this looks. I don’t even look at Anthropology because it’s so expensive. Pinning
And I didn’t even know about Anthropologie up until recently, but yes! They are super pricey. I bet they have other gorgeous goods we could easily copy, lol. Thanks for pinning.
What an amazing transformation. I have tried stenciling once and it turned out awful so am super impressed with your Anthropology hack. Very cool. Pinned.
I’ve wrote down four pages of tricks and tips. Maybe you’re interested in this guide and want to give stencilling another go? It’s so much fun!
This is beautiful! What an awesome transformation. I love the stencil and the colors you used. Pinning.
Thank you Beverly. I’m happy you like it.
That is so beautiful and I actually prefer your design and color scheme. So pretty! pinned.
Awww…that is so nice of you to say. Thank you for your support.
Ah-mazing tutorial Habiba. I have never shopped Anthropologie and don’t even know what they sell but I know that furniture is gorgeous. I like yours the best, seriously! It means more in so many ways not just because you did it yourself but also because of where you got it. Such a nice story. That last step with the top border was the finishing touch, so pretty!
It was such a joy to meet you and Markus this summer. I smile every time I think about it. Now I have to go do an internet search for Anthropologie.
Shirley, it makes my heart go all fuzzy knowing that you’ve actually took the time to read all of this super long post I’ve written. Sometimes I wonder if people are interested in the story behind or want just to read about the story of creation, but then I think: this is my blog, and I do what I want ??I am already daydreaming about my next visit, this is how I enjoyed meeting you and your family!!
Habiba, This turned out so beautifully! It’s always great fun to do a successful knockoff! I love those Anthropologie stencilled chests and this is a great way to get that look! Pinned to share.
Laurie, believe it or not: this was my first knock-off. But I know there will be more! Thank you for your support!
Wow, looks just like the “real” thing. Great job, although I can only imagine the patience this took. Visiting from Thrift Store Challenge.
Thank you Victoria! And yes, it took quite some time, but I think it was worth every minute.
This is so gorgeous. The color and stencil are perfect. All in all a fantastic makeover.
Thank you Deborah! It took me long to get started on this project, but I am so glad I did.
I have never seen an Anthropologie shop either because we don’t have any here in Spain, but I’ve seen furniture from them online and I have to say yours turned out beautifully. Love the soft blue you chose for it.
Hi Pili, great to meet you via this challenge! Don’t you love it how the internet can bring us all together even though we live in different countries? I am happy you like my work and the color I mixed myself.
Woo-hoo! That turned out absolutely beautifully and I actually prefer your version way more than the pricey one! 🙂
I like mine, too, Angela! I wouldn’t mind the busier design of the original, though. But the price is ridiculously high and my man prefers this less loud design, lol. He is more into industrial and loft style home decor so I’d rather not push it 😉
This transformation is stunning! How fun that you finally got to see an Anthropologie! It’s a blessing and a curse however as I always love their stuff but as you said is way too expensive. Great job on this.
Hey Bri! Yeah, I am actually super glad I don’t live near an Anthropologie. But we have similar temptations here in Germany.
It’s gorgeous. What a great job of stenciling. It looks just like “theirs”, even better!
Awwww, thank you, Amy! I know it’s really not 100% like the original but I am super pleased with the result.
This dresser is so neat! I love the chalky blue color you used. Busy print, but so fun.
I like busy and loud. Although I can see that this might be too much for some people out there. I experimented with homemade chalk paint for the first time and it worked super good! Only one coat needed for full coverage.
What a fabulous upcycle! It turned out beautifully! I’ve never been in an Anthropologie store either and I live very close to one!
That means you’ve saved a ton of money, Roseann! I am actually really happy I don’t have one around the corner, lol. I am glad you liked my project.
Habiba, This is such a gorgeous makeover! I love those stenciled chests from Anthropologie. You definitely accomplished that look. You did an amazing job!
Thank you, Lynne! It’s not a 100 % the same exact as the original but I love that by DIY-ing you will always achieve a very unique result. I’m happy you like it.
What an amazing transformation! It looks like a totally different piece of furniture!
It does, right? I had this one in my possession for quite a long time before I actually started working on it. But the design was decided on quite quickly to be honest.
This is gorgeous! I have no idea where I would put a piece like this in our house but I feel like it might be wring to to at least try! Love love love!!
Thank you Julie! My home is like a big mix & match heaven for all those rescued pieces of furniture where I tried out all the new techniques I keep on stumbling over. And it somehow really works! I’d love it if you gave it a try.
Wow! You really did transform your dresser! It looks fantastic — pinning!
Thank you, Lauren for your support. It’s like two different dressers, right?
It looks like two different dressers, right? Thank you for your support, Lauren.
I’ve never been to Anthologie either but I love the look of those cabinets and dressers, and especially your beautiful knockoff that I’m sure is lovely in your craft room. That little cabinet! I loved it before you painted it, too! And the hardware, wow! I’m thinking IKEA has many pieces that would look great with this treatment if I can’t find the perfect little cabinet elsewhere.
That is actually a very good idea, Lydia. Ikea is affordable, you can buy untreated wood furniture that translates into no sanding. Yay! And with a great paint job and wonderful hardware you get a unique piece! ?
I love this! I’m chatty too, lol. I have a dresser I’ve been trying to decide what to do with for ages now. Thanks for the inspiration, this challenge just keeps giving more ideas all the time! Next time you’re in the US, I’m not far from NY and Philly!
I have had the same experience with this challenge – so much great inspiration!!! We have been in NY for three days at the end of the trip to meet my blogging friend Lyne. I’ll definitely be back and it would be awesome to meet up with you, too!
Absolutely stunning! You did an incredible job & I loved the story as well!
Thank you Michelle. I’m sure some people had me rather just do the tutorial, but I love to share the story behind, too.
It’s beautiful. I think your design better than the Anthropologie one.
Thank you for sharing at The Really Crafty Link Party. Pinned.
Thank you, Teresa! I like my dresser a lot! It brings a smile on my face every time I walk by. Thank you for your support in pinning it.
Wow, Habiba. I am just seeing this and it turned out soo good! I love the color that you chose along with the finish fo the paint. You wouldn’t believe that I worked for Anthropologie over a decade ago? I will have to join in one of these Pinterest challenges in the New Year.
Oh, Hilary, it would be glad to work a Pinterest challenge together. I already signed up for January. I’m super happy you like my dresser and how fun that you worked for them. I would love to browse there more often for inspiration but I guess I’ll have to make do. with their website, lol.