I’ve had the idea and the wish to Ombre Stencil a Pillow Cover in ages. I also have almost all of the supplies at home for the same length of time. But as so often, I’ve never gotten round to actually do the frugal and unique DIY home decor project.
Why? Originally, I had planned to make the stencil on my own. I have all the supplies for that job at home, too. But obviously, I never felt the pressing need to actually sit down and hand-cut all those details needed for a crab stencil or a coral stencil, lol.
Two things happened lately, that changed the name of the game…
This post contains affiliate links. That means if you make a purchase through these links, I may receive a small commission at no extra cost to you! You can click here to read my full disclosure. Also, I teamed up with Stencil Revolution for this post. A wonderful company based in Florida, US. They provided me with the beautiful stencils used for this DIY.
- Markus gifted me with my very own cutting machine for Christmas. So it would have been much easier to DIY the stencils myself. Emphasis on the “would have”, lol.
- Stencil Revolution reached out to me and offered me free stencils to try out in future craft projects. They had stumbled over and loved some of my Recent Stencil Projects and the complete guide I offer for FREE: How to Rock your Stenciling Projects.
Monthly Craft Room De-Stash Challenge
So, here was my chance to finally create these awesome stenciled pillow covers with minimum effort. I loved the fact, that it was also a way to work on reducing some of my ridiculously big stash of craft supplies.
All I had to get before I could start was some fabric paint. And as I didn’t use the entire colour palette I’ve ordered, I was able to do this project from solely things I’ve already had at hand + a little investment that was less than $ 10.
A perfect fit for the monthly challenge by C’mon Get Crafty to create a new craft or project from our own stash of goodies!
Let’s Meet the Hosts!!
C’mon Get Crafty | Purple Hues and Me | Craftify My Love
EyeLoveKnots | Margy Meanders | Across the Blvd
Domestic Deadline | Shoppe No 5 | Modern on Monticello | Love Jaime
Salvage Sister and Mister | Love My Little Cottage | Sew Crafty Crochet
This Autoimmune Life | The Inspiration Vault
Check out some more awesome creations you might be able to make from your own stash at the end of this post!
Here are the creative projects I’ve put together for this challenge so far:
-
- DIY Dragonflies: 3 Easy Steps
- Turn a Can into an Upcycled Vase in 10 Minutes
- 10-Minute-Craft: Birds Painted Rock Photo Holder
- DIY Tablet Sleeve with Felt Flowers
- Striped Men’s Hat – Free Crocheting Pattern
- Heather Fall Basket you’ll have all Winter long
- Magical Snowflake Candle Holders + FREE TEMPLATE
- 5-Minute-Craft: Tassel Flowers from Leftover Yarn
- Recycling Project: DIY Lace Candle Holders
- DIY Deer Winter Wreath (that screams Hygge)
- Upcycled Easter Gift Bags
#CraftRoomDestashChallenge
If you’d like to join in the Craft Room De-Stash Challenge, you can request to join our Facebook group here!
Supplies to Ombre Stencil a Pillow Cover
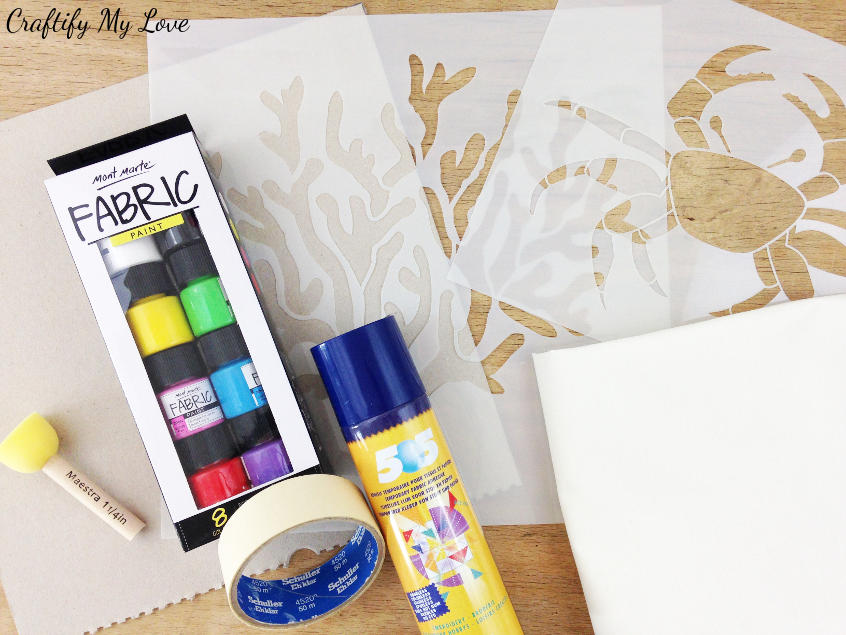
- Pillow covers
- Stencils (I used this crab stencil in 8.5″x11″ and this coral stencil in 12″x12″ from Stencil Revolution)
- Fabric paint (here is another great DIY you can do with fabric paint)
- Painters tray (alternatively you can use a paper plate, too)
- Painters tape or non-permanent spray adhesive
- Sponge brush
- Cardboard
- Kitchen towel or old rag
FREE Resources for You to Become a PRO-Stenciler
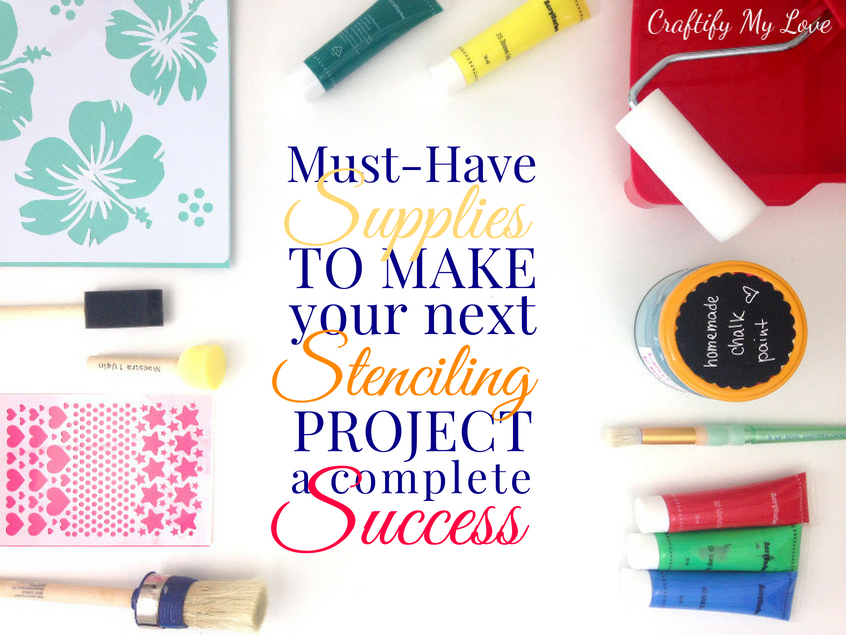
- Grab your FREE Guide on How To Rock Any Stenciling Project HERE. It’s a thank you for subscribing to my newsletter.
- Also, read up on Various Supply Choices and Techniques you have When Stenciling HERE.
How to Stencil a Pillow Case with the Ombre Technique
Whichever you prefer, you’ll find either a step-by-step Video Tutorial on how to DIY stenciled ombre cushion covers or detailed written instructions further down.
Video Tutorial: How to Stencil DIY Nautical Home Decor
If you are a visual learner and enjoy my tutorials, make sure to sign up to my YouTube channel HERE.
Easy to Follow Step-by-Step Instructions on Stenciling on Fabric
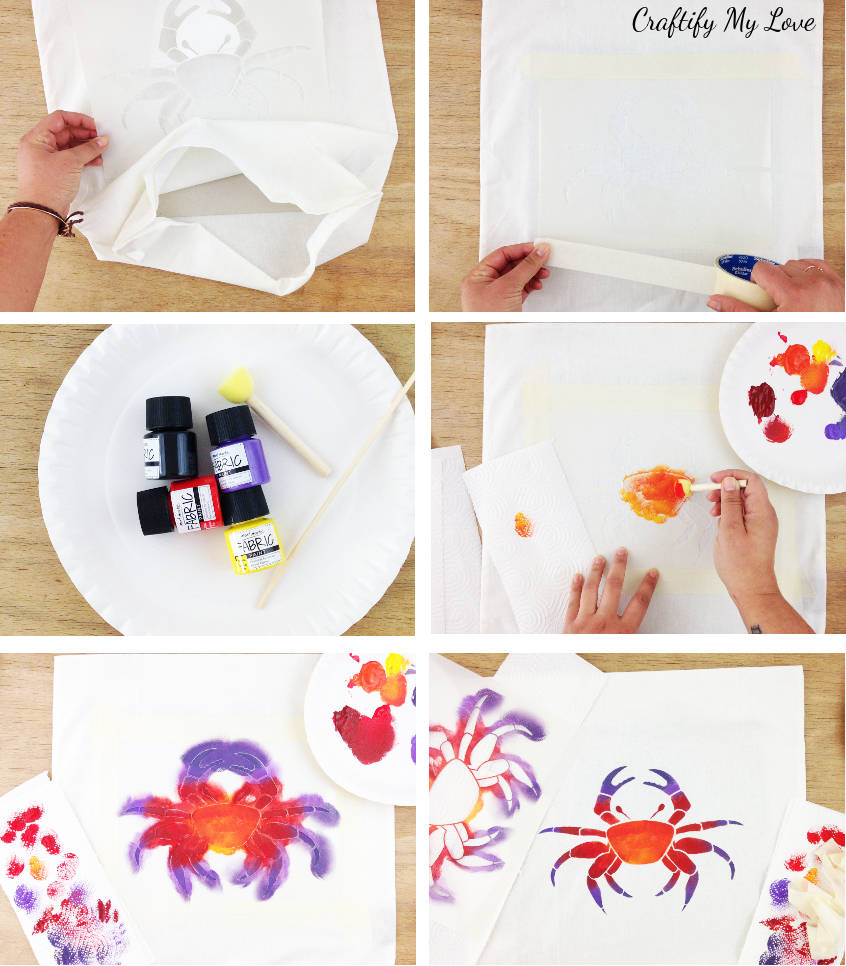
Prep-Work:
- Iron your pillow cases. Trust me, it’s so much easier to work with.
- Place some cardboard inside your cushion cover to protect the back from colour seeping through.
- Arrange your stencil and make sure it stays there using some painters tape or non-permanent spray adhesive.
- Get your fabric paint ready and pre-mix your colours of choice on a painters tray or paper plate. I like to use a colour wheel as a guide. Check out how to use one in my Video Tutorial HERE.
How to Achieve the Ombre Look while Stenciling:
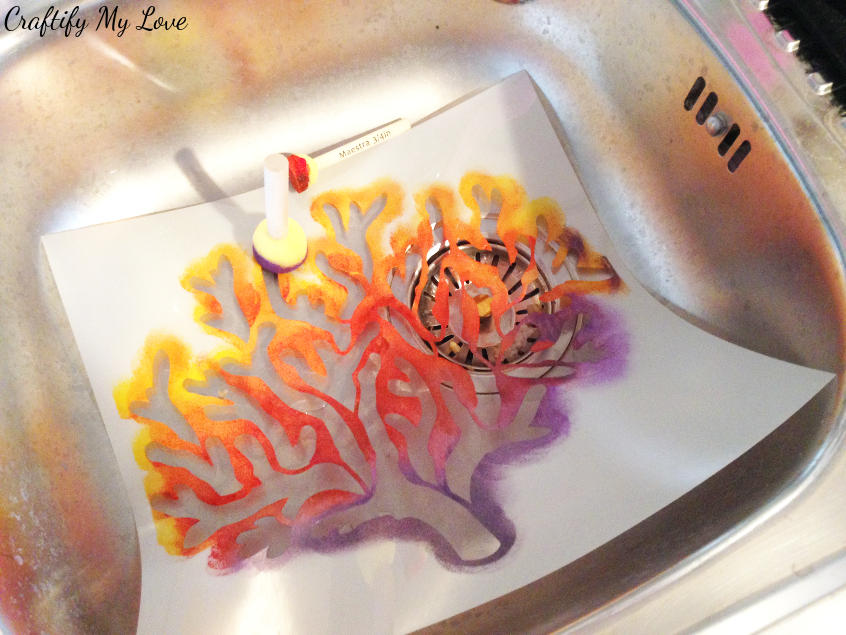
- Start with your lightest colour and work yourself slowly towards the darkest. This way you can use only one foam brush or stenciling sponge.
- Load your pouncer with some of your paint.
- Then dip it on a kitchen towel or old rag several times. This again reduces the amount of paint on your brush and prevents the paint from bleeding out under your stencil >> Read more on that in my FREE Guide on How To Stencil Like a Pro HERE)
- Continuously apply your fabric paint in dabbing motions. If you want to see what I mean by that, check out the Video Tutorial HERE.
- Slightly overlap the different colours with as little paint left on your sponge as possible. This way you’ll achieve the beautiful ombre look.
Finishing Touches for Stenciling on Fabric
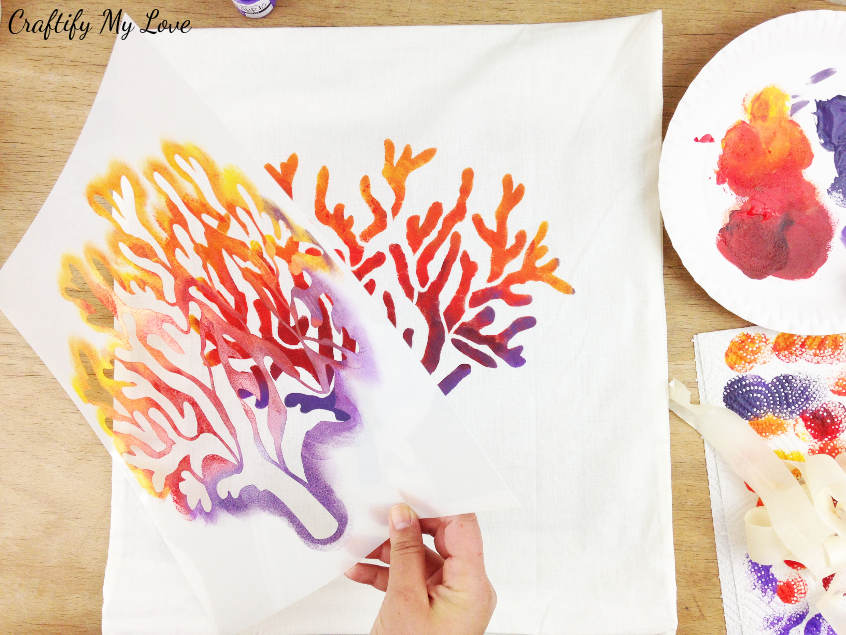
- Carefully remove the painters tape. Make sure to hold your stencil down while doing so as to not smudge your design. The paint is still wet!
- Lift off the stencil while the fabric paint is still wet. This way you won’t risk the dried paint from the stencil ripping away parts of the dried paint on your pillow case.
The outcome: Crisp and clean edges!
- Let your artwork dry according to the directions of your fabric paint.
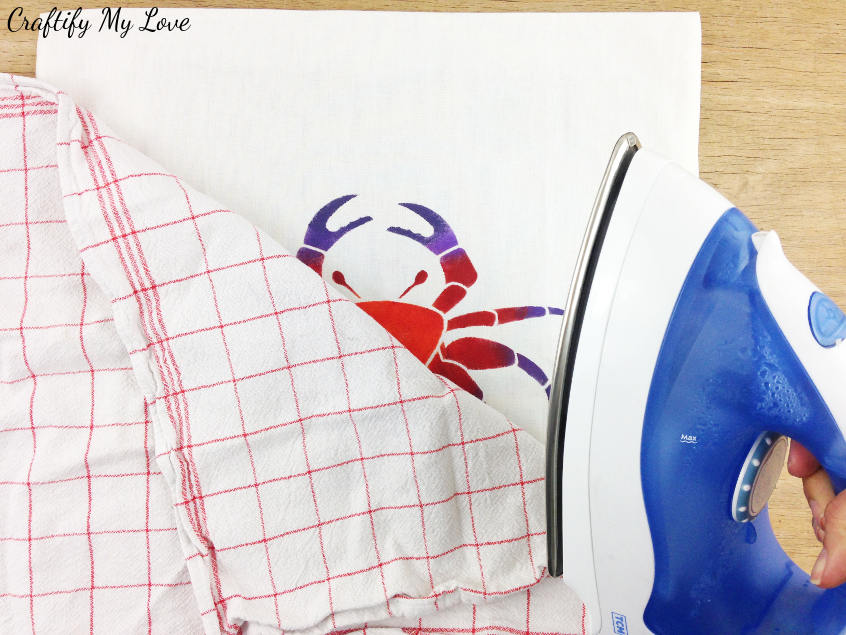
- Find an old dish towel or rag you don’t mind getting a little paint on.
- Cover your stenciled design with it.
- Set your iron on cotton temperature and cure the fabric painted pillow cover for 5 minutes (or according to directions of your brand paint).
- Also, make sure to clean your stencil and foam brush after usage. I only use cold water and my hands. This way you won’t hurt the fine details of the stencil.
- You’ll be able to re-use your supplies for many times more, which ultimately saves money and gives you more options in future crafts.
I even had the pillow stuffing already at hand. I tend to bring home a set of INNER by IKEA whenever I’m there.
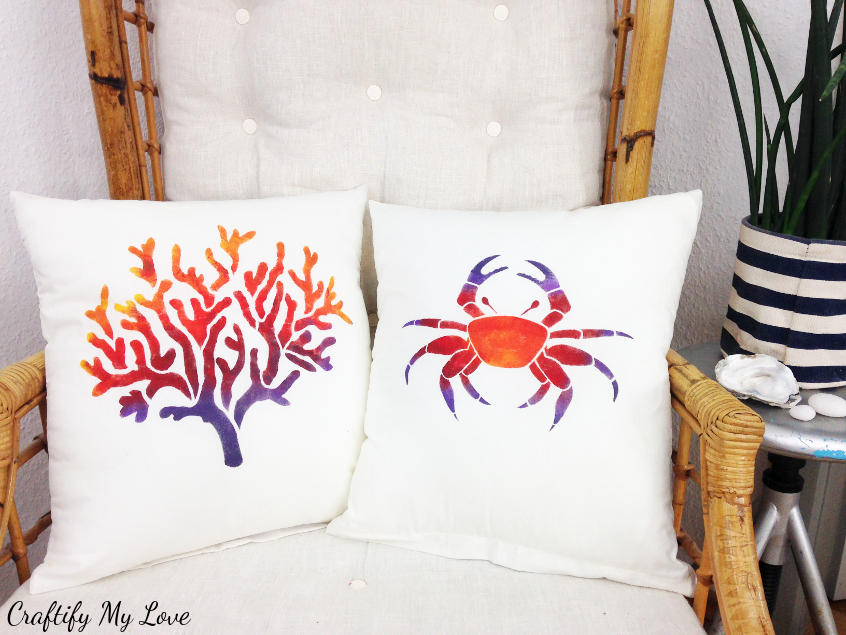
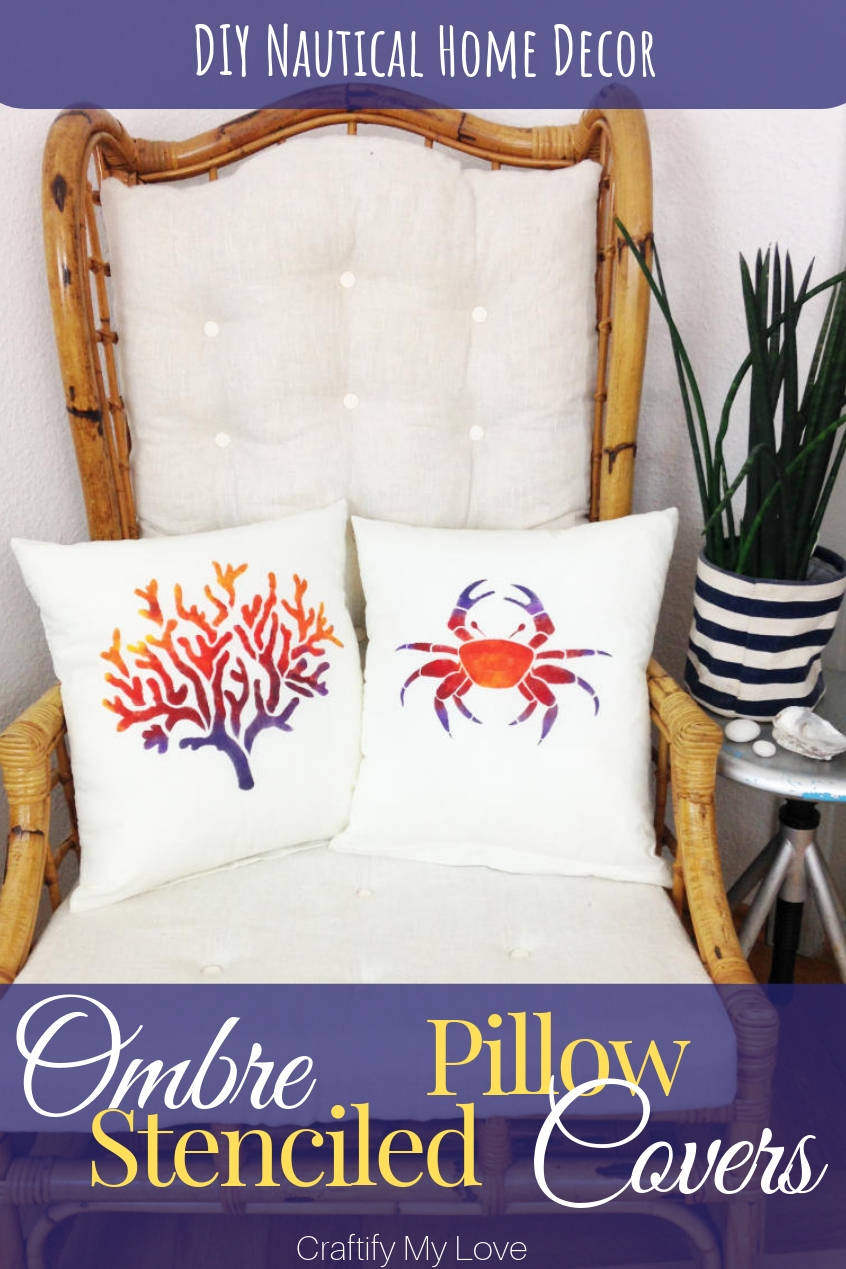
Now, aren’t those two ombre stenciled pillow cases absolutely beautiful? I have placed them on my road-side-find bamboo chair that I have upholstered myself (sadly, pre-blogging times).
Why not take the tour through my …
Coastal Themed Bedroom / Small-Space Craft Room HERE

I hope you’ve enjoyed this tutorial? Have you ever stenciled before? On fabric?
If I’ve got you curious, or even hooked on that new craft, make sure to check out my Other Stencil Projects HERE or hop on over to FaveCrafts.com for even more inspiration. You’ll most probably have some fabric paint left. Check out these adorable DIY Stamped Tea Towels…they might be your next project.
I think, I’ll turn this eventually into a Stenciled Pillow Series. Don’t miss out! Make sure to subscribe to my newsletter here.
Love,

PS: Don’t forget to PIN this for later.
PPS: And now lets see what my fellow crafty de-stashers whipped up from things they already had at hand:
That is such a cute project.
Thank you, Deb. I had super fun making it. Totally love the bright colours!!
Those turned out beautiful. I love the way the colours blended. – Margy
Hi, Margy. I’m happy you liked it. And I’m happy the ombré look turned out as I envisioned it.
What a cute idea for pillows! Love the colors, too!
Thank you so very much, Gail, for always taking the time to leave me a comment.
Your design looked very clean, and well done. Good job!
Thank you, Kristie. Yes, I was very pleased with the outcome.
Stencil Revolution has some great stencils! I love the ombre effect on your pillow – very pretty!
Thank you, Roseann. If I had t had a good idea of my project in mind, choosing stencils would have been very difficult.
These pillows are so cute!! And would never have dreamed stenciling would be such a do-able project. Love the color palette. I have beach guest room. Would love to try to make these for it.
Hi Leslie, great to see you back ?Go ahead and do so, they will be a nice pop of colour in your guest room! There will be a video up tomorrow that’ll show you even better how simple stencilling is!
Love these. I have stencils just sitting around waiting for me to work with them and haven’t gotten around to it. So glad I saw this tutorial first on how to ombre the paint. Can’t wait to try it.
Awesome that you can start right away. What kind of project are you planning to do?
These are fabulous! I love them. Now I want to give this a try. You did a beautiful job with them.
Thank you, Beverly. You’ll enjoy this stencilling spree a lot! Promise. There are so many things you can do.