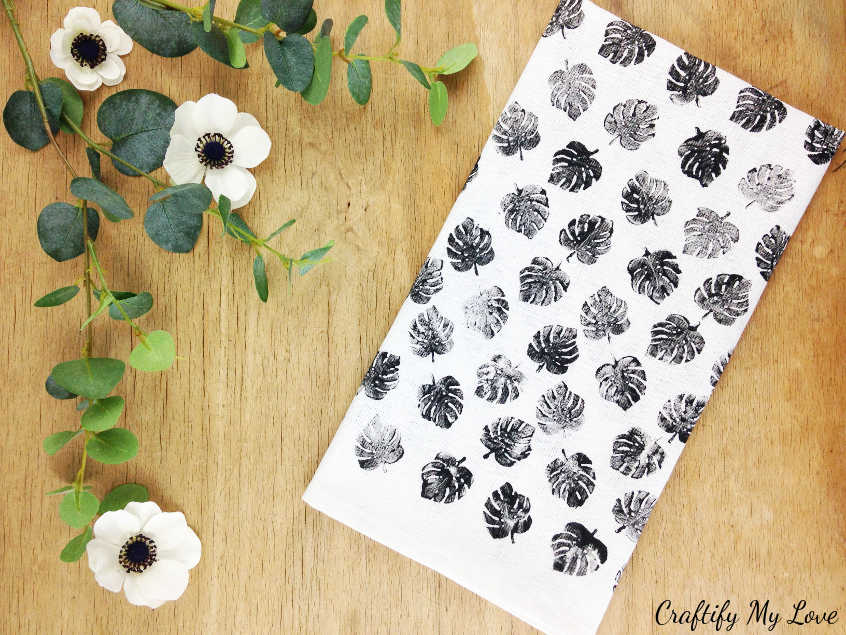
This is my first ever stamping project I share on the blog: My DIY handstamped tea towel sporting a beautiful Monstera plant leaf pattern. Wait, that’s not even true!!! But I didn’t use a real stamp for this project.
I’ve had stamps at home in forever. But so far I only had been using them as some sort of fun & games activity at work to bring out the creative juices in my team members whenever we were stuck in our thought process. But never have I done a DIY project with them. Thanks to my very own blog hop Bring on the Crafts, I finally have gotten round to use wooden stamps on fabric.
And I already have many more ideas popping up in my head. Just wait and see, and don’t forget to subscribe to my newsletter so you won’t miss them. You probably know by now that I love to dabble in all sorts of craft & DIY techniques and that focusing on just one thing will probably never happen to me, lol. I simply lack that gene or something.
But same as probably you, too, I get nervous when I try out a new creative technique. And it gives me the thrills when I see my crafty project is actually working out and going to be super cute!
What I learned from this project is …
that the art of stamping is very similar to using a stencil. Yet it’s the exact opposite as to where you place the paint (does that make any sense?). And as I am totally into stenciling (find all my pretty stenciling projects HERE) and even have a FREE Guide on How To Stencil Like a Pro for you, this project went very smoothly.
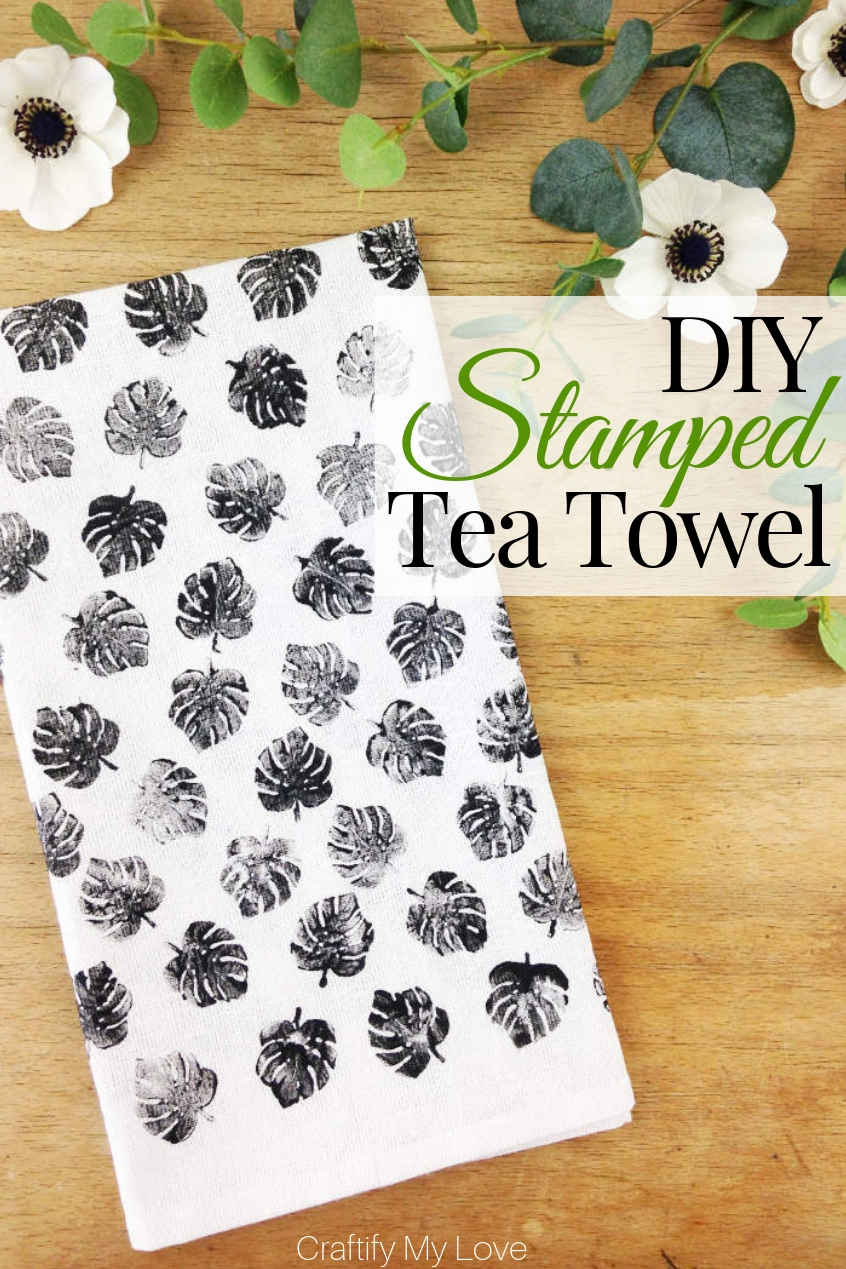
Now, let me show you how to hand stamp tea towels which by the way are awesome DIY gift ideas!
Bring on the Crafts — A Craft & DIY Blog Hop
On the first Friday through Sunday of each month, a group of DIY and crafty bloggers join forces. Together Marie from The Inspiration Vault and I, the creative mind behind Craftify My Love, we bring you the #BringontheCrafts blog hop. Each blogger creates a fun craft or DIY project to share that follows a monthly materials theme. May’s theme is Stamps! Each blogger chooses their own craft to make as long as they love it and it uses Stamps in the project.
Our May Co-hosts
Jenny at Cookies, Coffee and Crafts
Heather at Glitter on a Dime • Marie at DIY Adulation • Michele at Coastal Bohemian • Beverly at Across the Blvd • Gail at Purple Hues & Me
Join in on the fun! If you’d like to participate next month, you can request to join our Bring on the Crafts Facebook Group. Next month’s theme is Fabric!
Not a blogger, but a creative mind none the less!? Don’t worry, share your awesome creations in our Craft Cult Facebook Group. This is also a great place to ask craft & DIY related questions and find inspiration for your next project.
Want to see what other projects I’ve made for this challenge?
-
- How To: Sparkly Spring Painted Flower Pot
- DIY sparkly butterfly or fairy wings
- Easy NO-SEW Butterfly Family Costume
- Floral Cardboard Cut-Out Sign: Be Happy
- How To Make A Fall Fairy Garland
- Butterfly Themed Couples Costume for Halloween
- Simple & Elegant Single Maple Leaves Fall Wreath
- DIY Hygge Mini Christmas Trees
- Hand-Printed Recyclable Gift Wrapping Paper
- DIY Mini Envelopes from Recycled Handlettering Practice Sheets
- DIY Jewelry – Dried Flowers Wood Pendants
- DIY Felt Flower – Anemone (1 of 5)
How to DIY Handstamped Tea Towel
Supplies to Make a Hand Stamped Dish Cloth
This post contains affiliate links. That means if you make a purchase through these links, I may receive a small commission at no extra cost to you! You can click here to read my full disclosure.
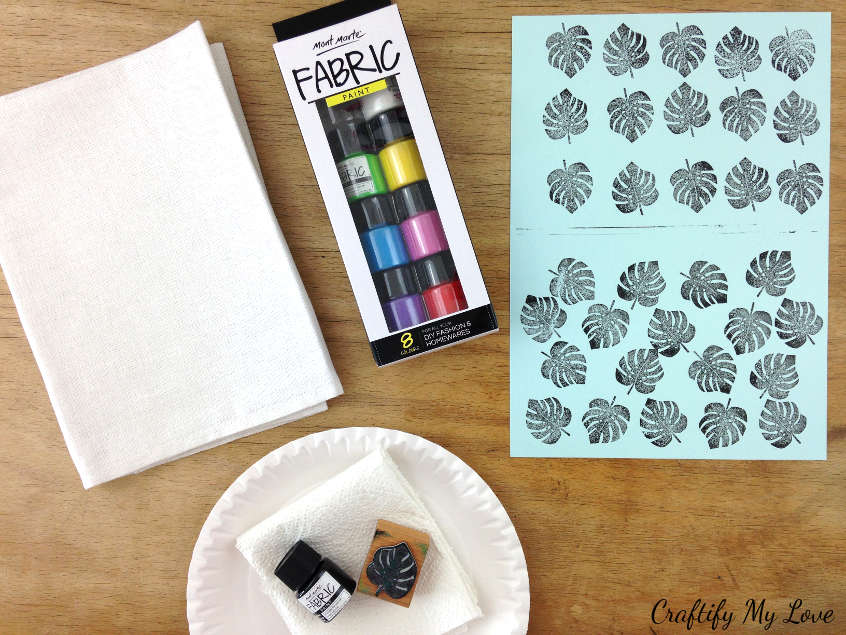
- Cotton or linen tea towels (I liked this set of 12 flour sack dish towels)
- Fabric paint (you can do many crafts with one pack: here is a set of Ombré Stenciled Pillow Covers you could make, too)
- Monstera Plant Stamp (I can’t remember where I bought my monstera plant wood stamp, but I found a very similar stamp that actually comes in two sizes for you)
- Painters tray or paper plate
- Paper towels
3 Simple Steps to DIY a Stamped Tea Towel
Tip: I decided on a pattern before I started this project. And so should you! I simply used a piece of paper, my stamp and a regular stamping pad and tried different things (see photo above).
1 – Prepare for Stamping and Build up the Pattern
- Put your colour choice of fabric paint on a painters tray or a paper plate (Note: I needed two as the first one got really mush with time and I ended up having paper bits on my stamp)
- Dab the stamp into the paint.
- You might need to stamp on a paper towel before you stamp on fabric to get rid of excess paint.
- Start stamping happily away and try to stick to your design.
This is the somewhat tricky part of stamping: Don’t use too little or too much of your fabric paint (this is very similar to stenciling). You’ll get the hang of it after a little time. And honestly, the unevenness of the pattern creates the charm of a handmade product!
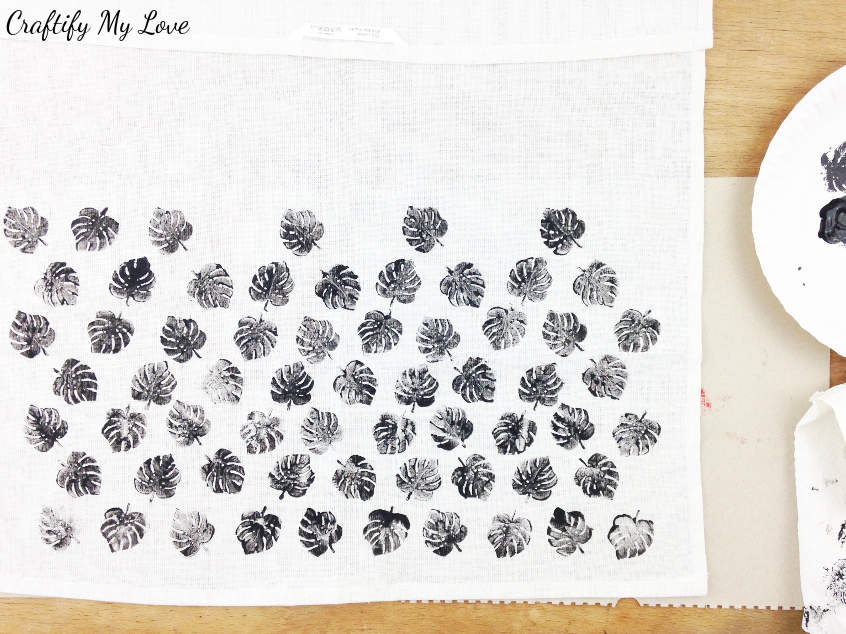
I was pretty soon fed up with always twisting and turning the stamp, so I did all the leaves pointing in one direction of a row first and added the inbetweens second.
2 – Clean your Stamp Regularly for a Better Outcome

As I mentioned before: Blotches and different intense stamps are totally ok as they make your DIY tea towel unique. But, once in a while there will be too much paint on the outside of your stamp or in the little nooks in between.
If you don’t clean that up you’ll end up with a blob op paint rather than a pretty Monstera plant leaf (or whatever motive you chose). Simply take a kitchen towel and wipe off the excess paint. Make sure to swipe into the crevices using your fingernail or some other thin object.
Tip: Actually wood carved textile stamps work best on fabric, but I couldn’t find mine and had my mind set on those Monstera plant leaves anyway, lol.
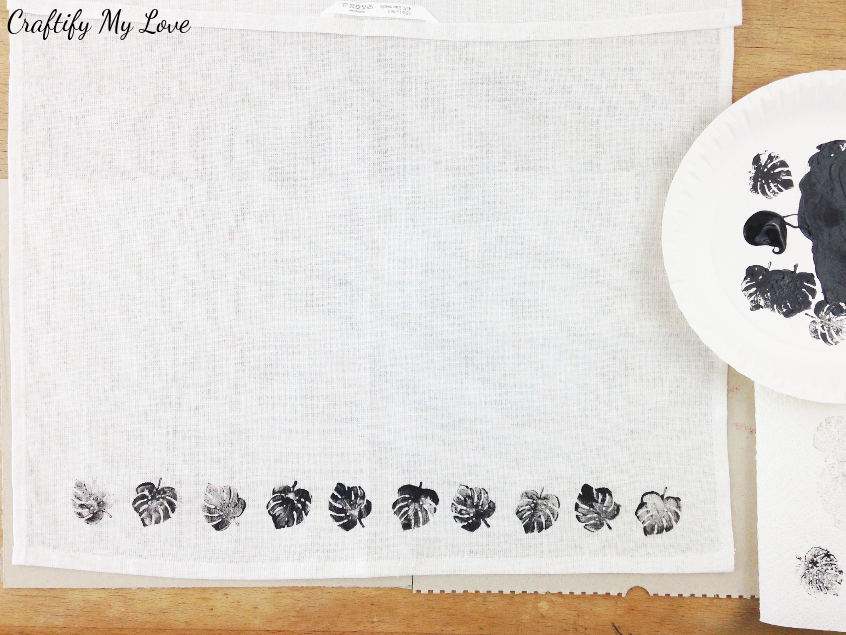
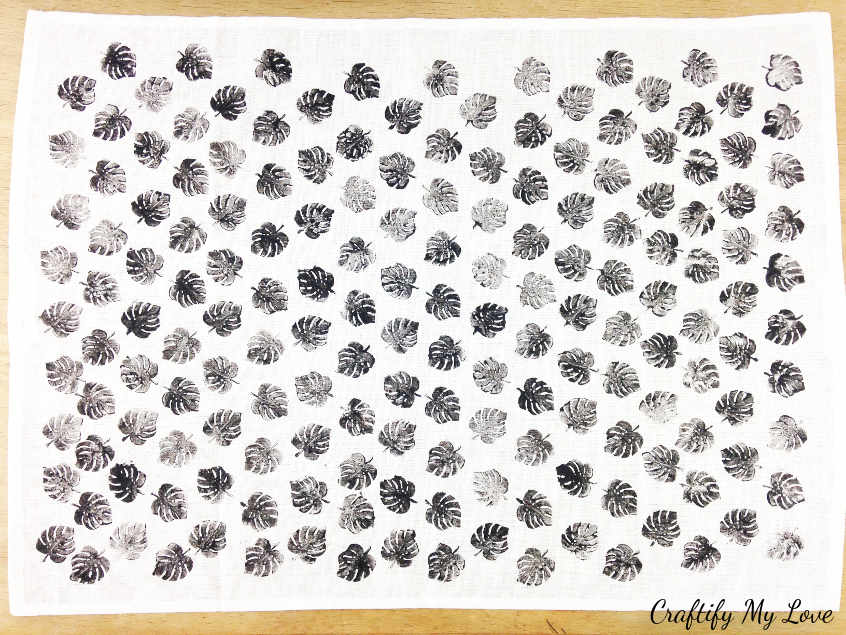
Now, doesn’t that look impressive?
I must admit, that after the first attempt (see the hardly visible Monstera leaf to the bottom right?) I had a thought in mind that was something like this: Might as well stop right now and throw the lot in the bin.
And thoughts like that are only human. And if you have them, too, that’s ok. I simply want to encourage you to keep on going. The end result will be stunning and you’ll be super proud of yourself. Trust me!
3 – Iron your DIY Tea Towel to Cure the Fabric Paint
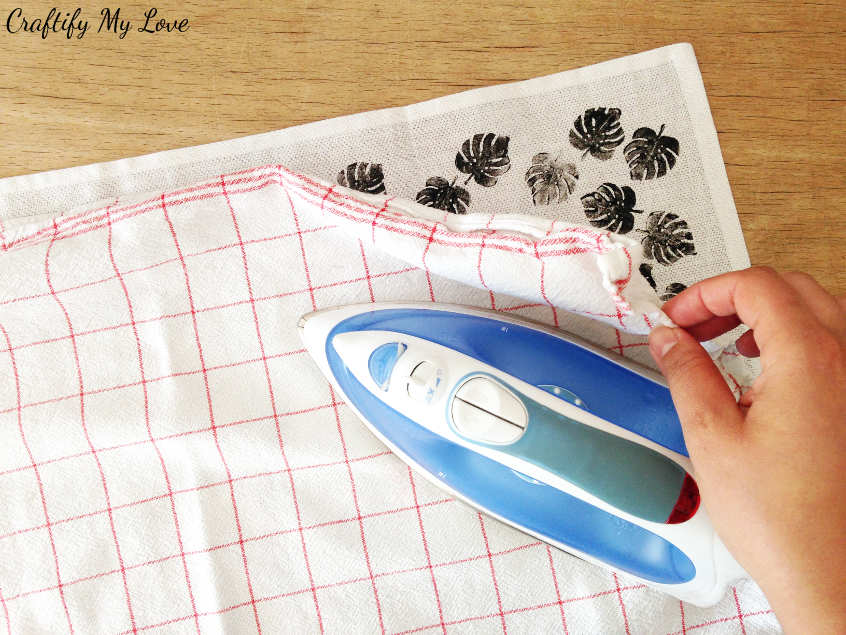
I think every brand of fabric paint comes with slightly different instructions. So it’s best to read the directions and stick to them. Mine requires 5 minutes of ironing. To protect your iron, use a run down dish cloth. And to protect your working surface, of course use an ironing board or a thick towel. My iron wasn’t on when I took this picture 😉
And, you’re done!
You might like these Other Projects using Stamps, Stencils, and Paint, too. And if you want to find even more inspiration on DIY Tea Towels check out FaveCrafts.com.
Love,

PS: Don’t forget to PIN this to Pinterest.
Now let’s see all of those amazing Craft and DIY Projects!
Looks like you had fun designing your tea towels, Habiba! How cute! What a great way to personalize those plain flour sack towels using stamps!
Thank you, Gail. And yes, i really had fun and I have 9 more of those tea towels to work with ?
Love Love Love these towels! They are so cute and you can make them for anything.
Right? For any occasion, with any design, in any colour. I love them, too!
The design is very pretty with that leaf. It’s totally a great gift too. Nice work.
Thank you, dear! Can’t wait to give other motives a chance and see how they turn out.
This is such a pretty project! I love crafts like this that make great handmade gifts. Definitely pinning for holiday gift ideas!
Thank you, Heather. I enjoy making handmade gifts a lot, too.
Thank you for this tea towel ideal! I can’t wait to try it. I have alot of stamps setting in my closet for a few years and was wanting to use them. I like the way you list All the details, including the ironing afterwards. From Felecia
Dear Felecia, I’m super excited that you’ll make some lovely tea towels yourself. Have fun and enjoy the creative process. Best, Habiba