
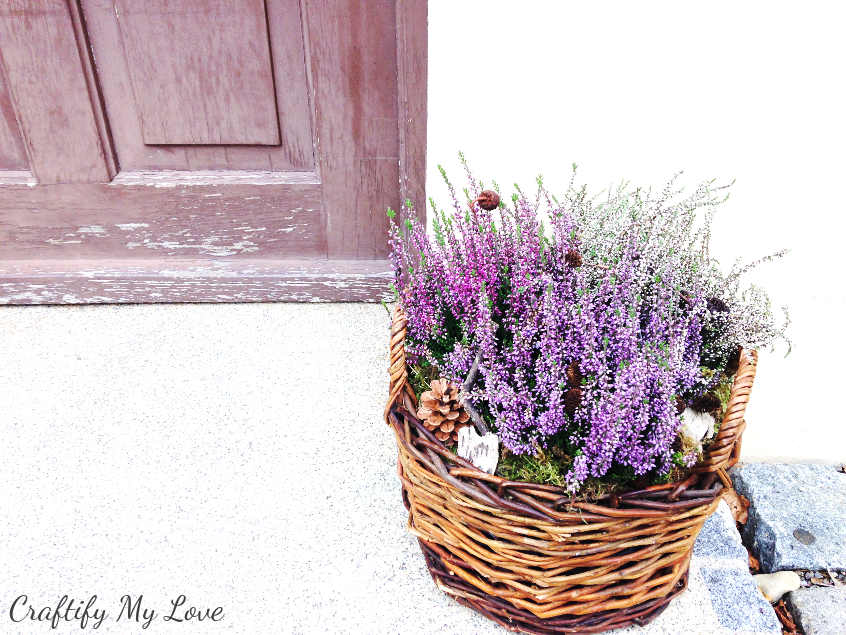
A couple of weeks back, I made this pretty Heather Fall Basket that will easily last me through all winter. Honestly, I can’t wait to see how it will look, all sparkly on those crisp winter mornings with a layer of frost or later in the winter even covered up in snow.
Creating things gives me always so much energy. Especially when I make useful things, that are efficient. By that I mean they either last a very long time or can be reused over and over again. And it’s a plus if I can make other people happy, too.
I live in an apartment building and have lovely neighbours, who always appreciate my little decorating efforts to our front porch. Also there is quite a view passersby who might like this little arrangement, too.
This Heather Fall Basket will sure bring a smile to many people!
My godmother is moving into a much smaller house and recently invited me over to see if I’d like to rescue some of her treasures. While I rummaged through her entire house, attic, and basement, I found the wonderful old basket for this project, a cute little china cabinet I updated, three little old drawers I turned into shelves, a very impressive but also sad picture frame that became a beautiful chalkboard. While there I picked some flowers in her garden to make these darling keepsake wooden pendants.
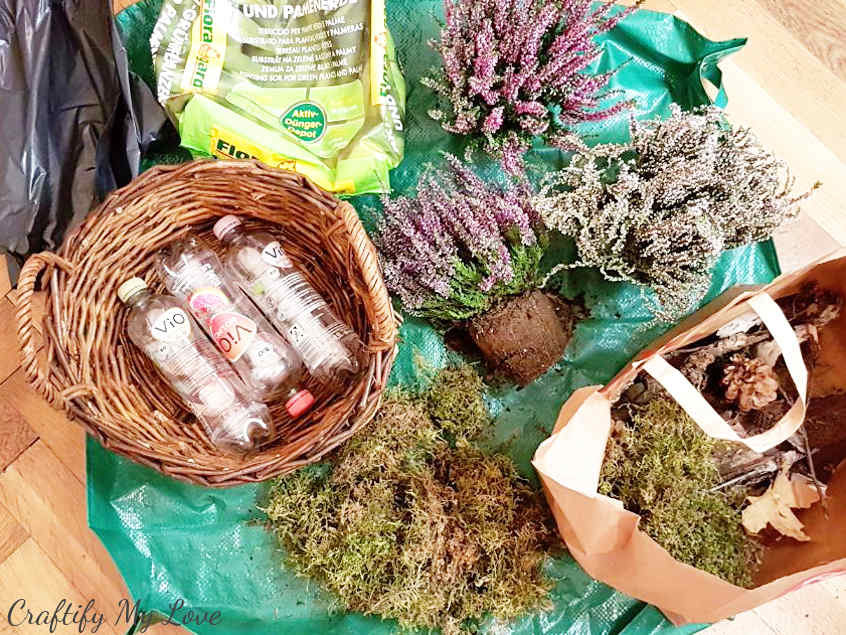
While grocery shopping the weekend after, I found three pots of heather for 2,50 Euro each. Soil I had at home. Moss, birch bark and little twigs as well.
I never come home empty-handed from a nature walk.
So this was the perfect project for Megan’s monthly Craft Room De-Stash Challenge (although this month it’s not my craft room but my garden shed that get’s de-stashed, lol). At the bottom of this post you can check out other stunning crafty projects my fellow blogging friends came up with.
10-Minutes-DIY: Heather Fall Basket

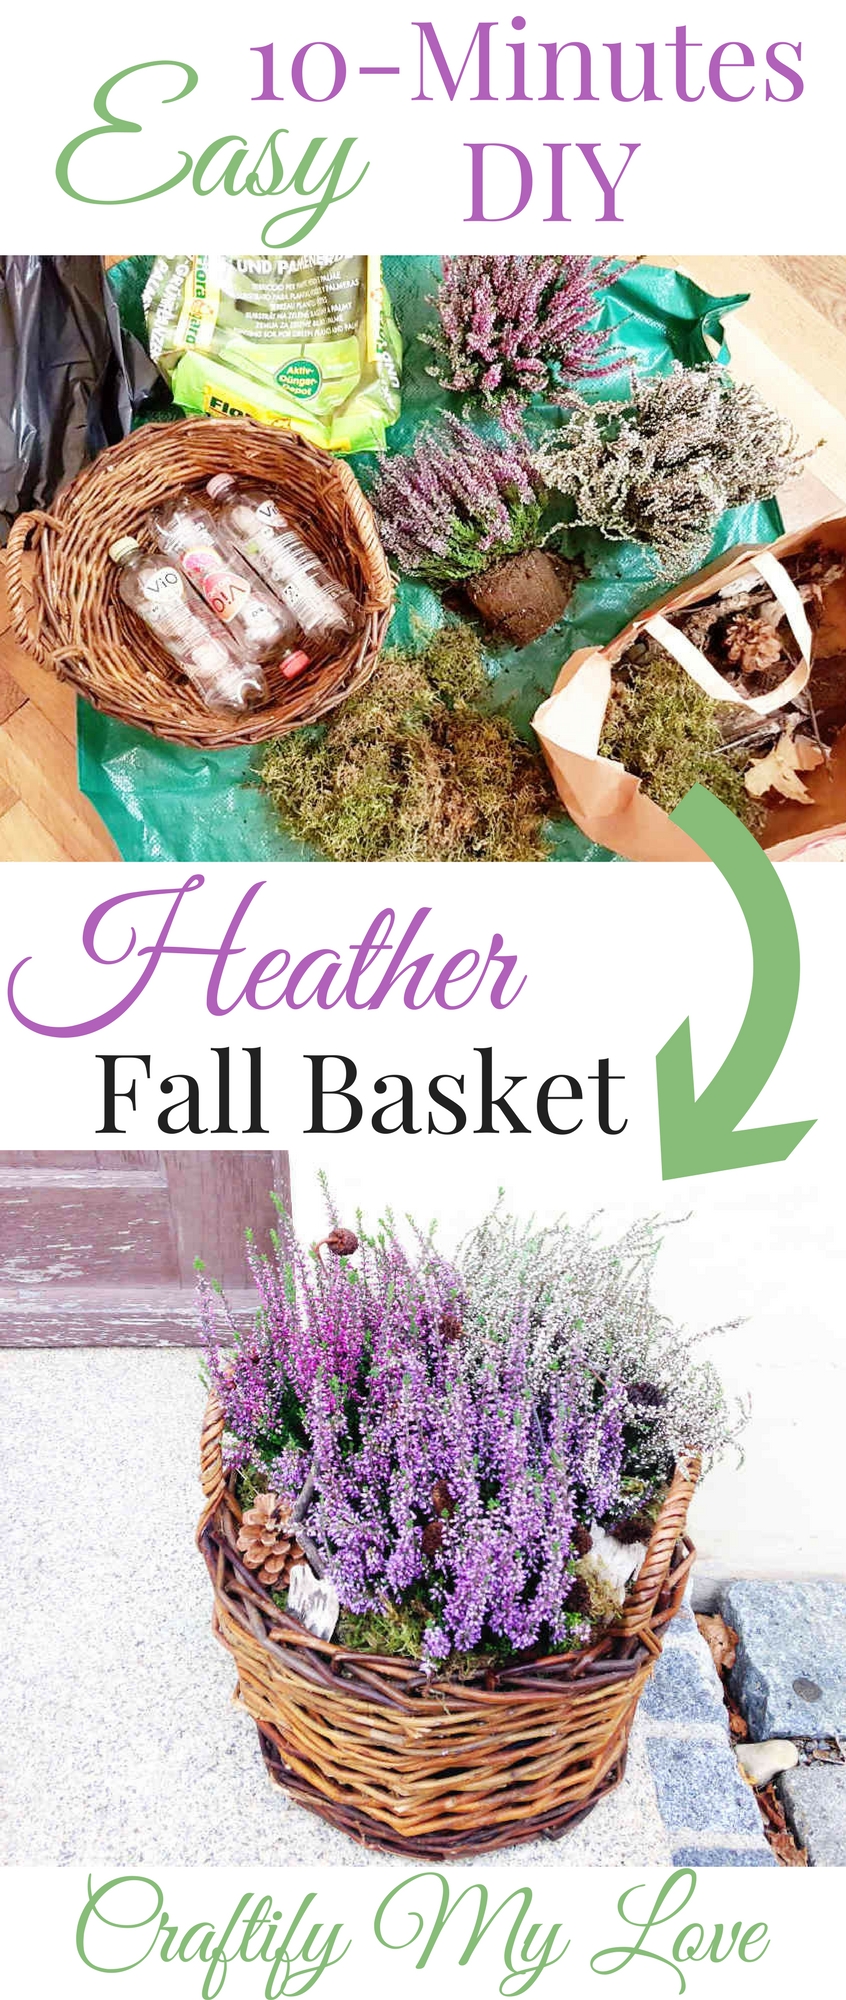
Supplies for Heather Fall Basket
- Willow basket
- Spacers to lift the heather plants up (I used empty plastic bottles)
- Garbage bag
- Potting soil (is heavy – I like it delivered)
- Moss (collect it on a walk or get it here)
- Twigs, pine cones, bark (collect it on a walk or get it here)
3 Simple Steps to your Heather Fall Basket
Yup, you read that right!
It’s as simple as three tiny steps to make this fall decor for your front porch and it probably won’t take you more than 10 minutes to do so.
Step 1 – Add Soil
In my case the basket was very deep and the little heather bushes not tall enough. In order to lift them up, I simply placed three empty lemonade bottles in the bottom of the basket.
On top I added the garbage bag to prevent the basket from getting all dirty. I punched in a couple of holes for drainage with a scissor, as I will leave the basket outdoors and you never know how much it’s going to rain in the fall here in Germany.
Then add a first layer of potting soil. Don’t fill it up to the brim just yet, as you’ll need room for the three root balls of the heather bushes.
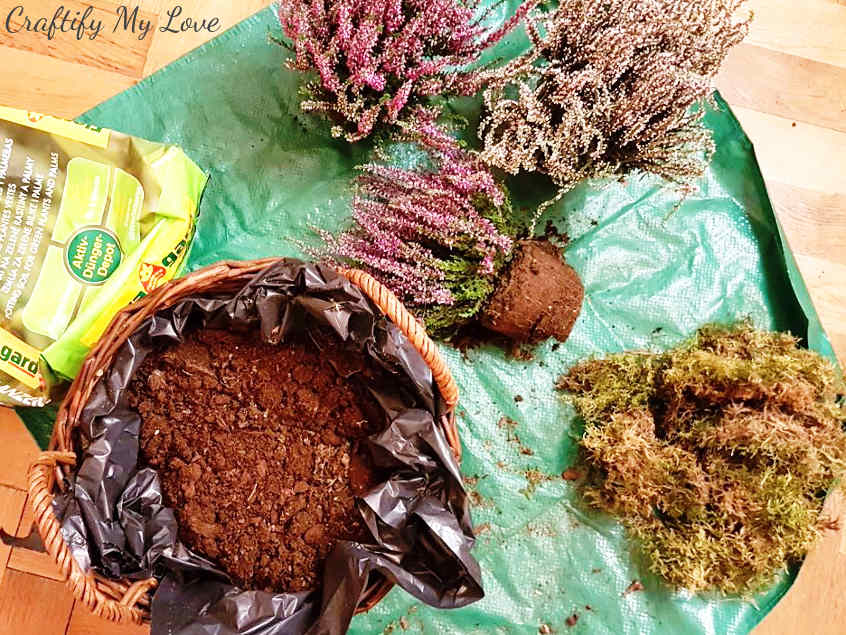
Step 2 – Plant Heather Bushes into Basket
Now, you’ll be placing the three heather plants in a triangle shape into the basket.
Make a small pit by pushing the soil a bit to the side and set the first heather bush into the basket. Push some of the soil around the root ball. Repeat with the other two heather plants and fill gaps with more soil.
Push the soil down firm and give the plants water.
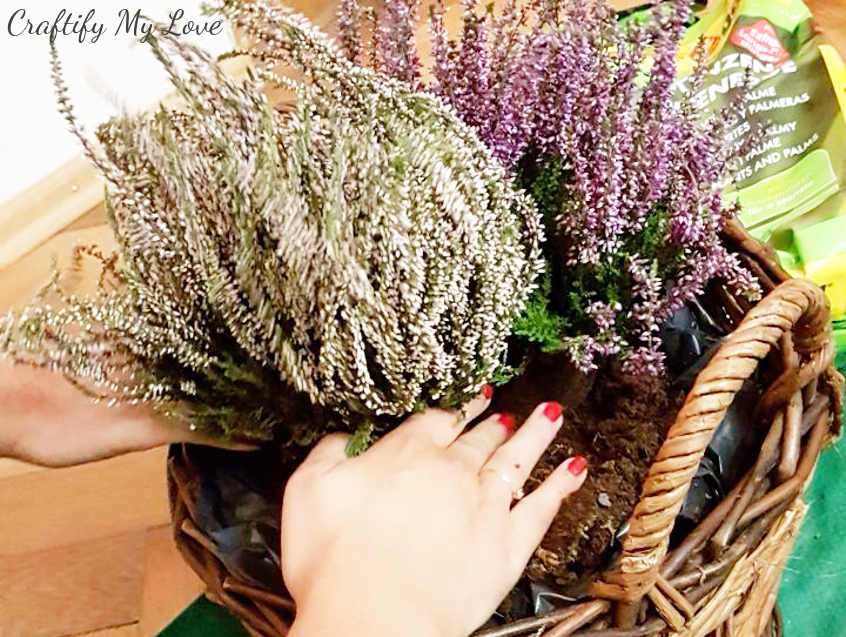
Step 3 – Decorate
In between your three little heather plants, there will be soil peeking through. You can easily fill this up with moss you collected on a walk. Or you can buy some moss in a crafts shop or order it online.
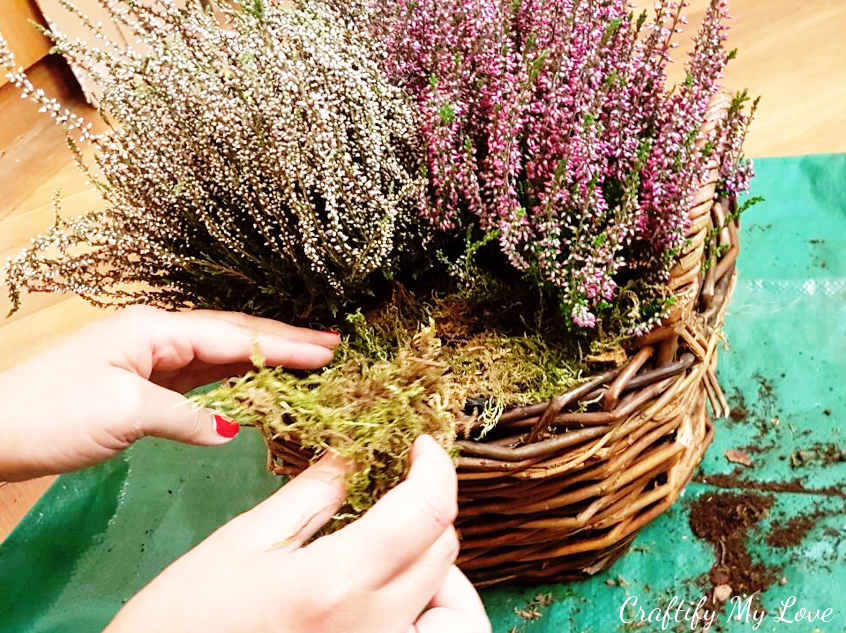
Some pine cones or pieces of birch bark look nice, too and will help the transition for this Fall Basket into a Stunning Winter Decor.
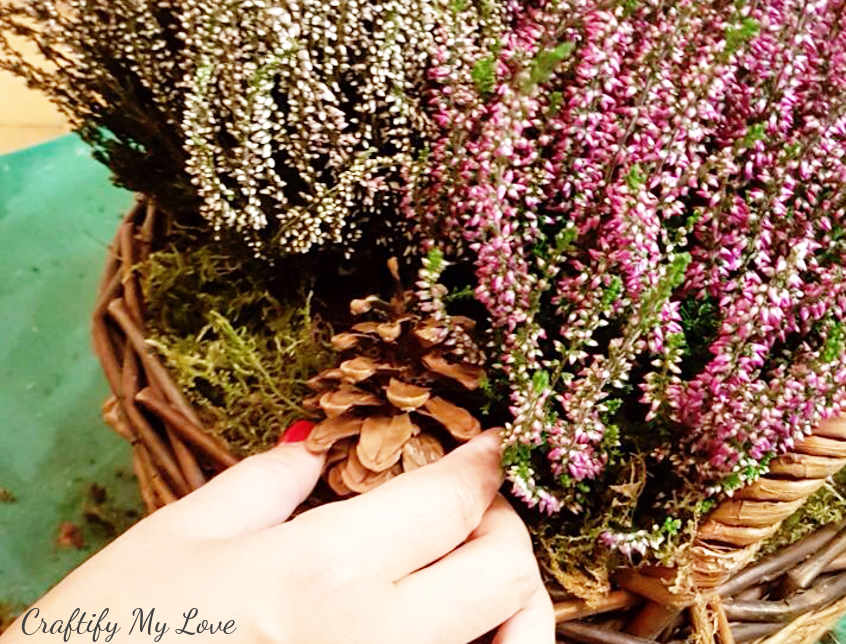
In front of my house there are many trees that carry twigs with those tiny cones. I love to collect them and use them in my crafty projects every once in a while. I think the little cones make the twigs look more elaborate, don’t you think?
Click here to see how I used these twigs as a base for an Everblooming Rose-Bush.
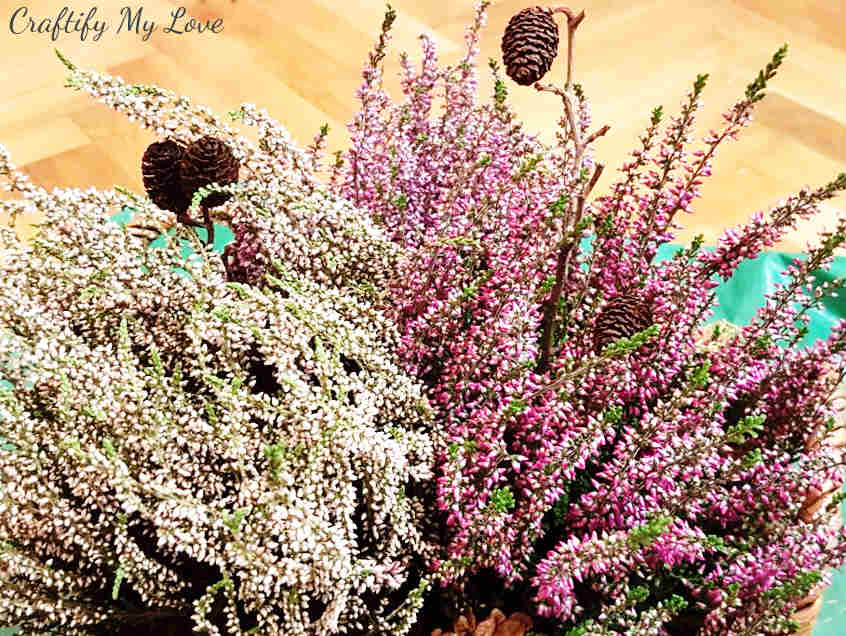
And, you’re done!
How long did it take you? I bet it took you less than 10 minutes, right?
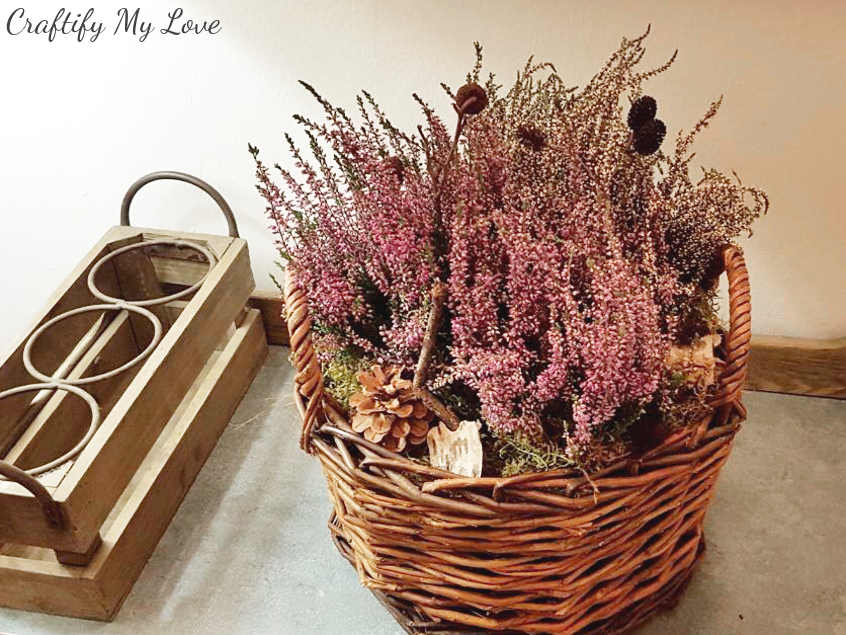
Now go find a happy place for your handmade Heather Fall Basket, where many people can see it and will find joy in it.
Love,

PS: It’s January now and we’ve had finally some snow here in Germany. Look how gorgeous the basket looks with a little snow dusting…

Additional Fall Decor you might like:
The Easiest Fall Leaves Wreath, Ever!

Easy Neutral Fall Wreath by The Inspiration Vault

Monthly Craft Room De-Stash Challenge

If you’d like to join in the Craft Room De-Stash Challenge, you can request to join our Facebook group here!
INLINKZ:
Your heather basket is so pretty! I don’t think I can grow heather in Texas – only Mexican heather which doesn’t look nearly as pretty!
Oh, I didn’t think about that. But makes perfect sense. With the heat and all that. You could go for artificial and add a little spray paint for the heather colour.
That’s such a sweet little basket, and would not only bring a smile, but a bit of cheer too. How lucky you were to be allowed to go into your Godmother’s house & pick what you wanted!! So fun! I love baskets too, so this was a fun craft. Pinned. Visiting from the Challenge.
Thank you Florence for these lovely words. It was like being locked up in a candy shop over night, simply heaven.
This is very pretty! Love the look of Heather.
Thank you Sheri. I love the delicacy of the little flowers.
Your basket is beautiful! I love the idea of creating an arrangement for frost! Thank you for the step by step directions. -Marci @ Stone Cottage Adventures
‘Visiting from the de stash challenge…
You’re most welcome Marci! I am happy you like the idea and have a new project for your home.
This is so pretty. I love the delicacy of the heather. It is too hot where I am but I like your suggestion of using faux heather for the same look.
Thank you my dear. I’ll keep an eye out for faux heather. What do you usually decorate with this time of year?
I love the colors you used in this basket Habiba! And that was a great way to use empty plastic bottles! I’m going to try that trick next time!
Thank you Yami, when in need, you get creative, lol.
This is beautiful Habiba! I don’t think I can grow heather where I live, but faux heather would be perfect
Thank you my dear. Faux heather it is then 😉
I bet this will look so beautiful with a little snow on it. I love how you added the moss and pine cones to the heather for some added interest. There are tons of pine cones along our street, so I can totally do this.
I can’t wait for some snow to arrive in Germany and I am planning on taking pics and adding them to my post.