I have two very special little ladies in my life: My god-daughter and her sister. I love crafting things with them and for them. Last Christmas I wanted to add a little something to my Christmas present and decided to make a Messy Bun Hat for the little fashionista, that is the sister of my god-daughter.
I have short hair ever since I was 9 years old. I think short hair suits me very well but sometimes I am a little sad that I don’t get to sport a messy bun or a high ponytail. So whenever I find inspiration for stylish hair accessories for long hair I save it to Pinterest as I know my little girls will love it if I make something for them.
Pinterest Challenge
Same as probably you, too, I tend to PIN a gazillion pins a day and end up recreating only very little things out of them. Luckily, there is a thing called Pinterest challenge where my friend Erlene challenges me and many other crafty people out there (and you, too) to go through our pins and decide on a project to do. And actually, make it!
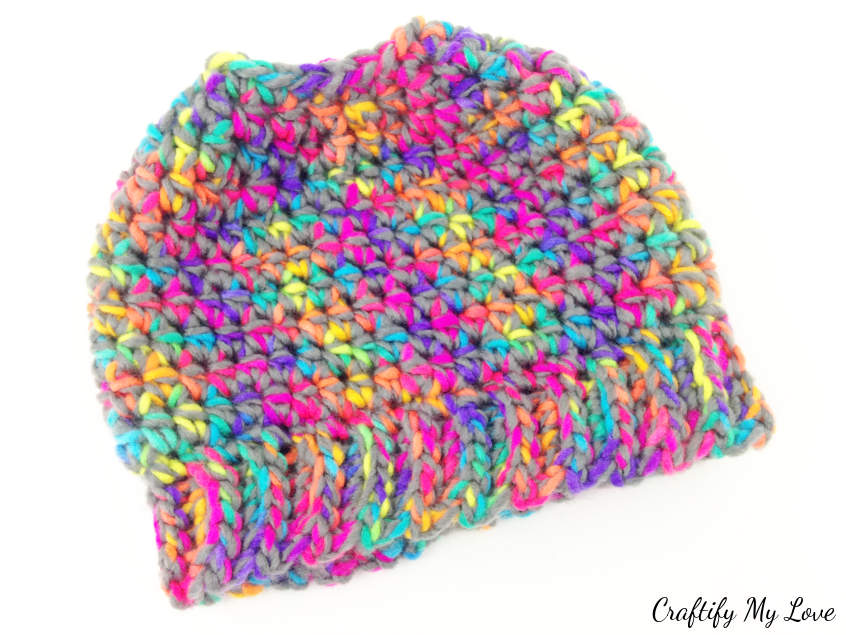
 I saved this image of a messy bun hat on Etsy.com for grown-ups and decided only a view days before Christmas to DIY a similar hat for little girls. Keep on reading to find the simple pattern I came up with for free + some must know crocheting hacks, too.
But first, let me show you what awesome projects came to life because of this challenge:
- IKEA Hack: Wood Slice Side Table
- DIY Stencilled Anthropologie Dresser Knock-off
- Crocheted Boho Hoop Earrings
- A Traditional German Housewarming Gift | Wood Burning Art
- How To Make A Giant Paper Flower + Free Template
- Macramé Spiral Bracelet for Couples or BFF’s
To join next month’s #pinterestchallenge, click here to sign-up ⇒ April Pinterest Challenge
Let’s meet this month’s Pinterest Challenge hosts!
Erlene – My Pinterventures • Jenny – Cookies Coffee and Crafts
Debbee – Debbee’s Buzz • Lynne – My Family Thyme • Pili – My Sweet Things
Bri – Halfpint Design • Julie – Sum of their Stories
Erin – The DIY Nuts • T’onna – Sew Crafty Crochet
Beverly – Across the Boulevard • Kristie – Love My Little Cottage
Roseann – This Autoimmune Life • Terri – Our Good Life
Ali – Home Crafts by Ali • Cherryl – Farm Girl Reformed
Leslie – Once Upon a Time & Happily Ever After • Kelli – K’s Olympic Nest
Lauren – Mom Home Guide • Joanne – Our Unschooling Journey
Shirley – Intelligent Domestications • Gail – Purple Hues and Me
Audra – Renewed Projects • Habiba – Craftify My Love
Kristie – Teadoddles • Marie – The Inspiration Vault • Susan – Suzerspace
Lydia – Lydia’s Flexitarian Kitchen • Maria – Simple Nature Decor
Sam – Raggedy Bits • Emily – Domestic Deadline • Marci – Stone Cottage Adeventures
Alexandra – Eye Love Knots • Alayna – Alayna’s Creations
Terrie – Decorate and More with Tip
Find the hosts’ Pinterest Challenge inspired projects below.
Supplies for a Crocheted Messy Bun Hat
This post contains affiliate links. That means if you make a purchase through these links, I may receive a small commission at no extra cost to you! You can click here to read my full disclosure.

- Crocheting Hook I (US) or 5,5 (metric) and J/K (US) or 6,6 (metric) – I love to have the most common sizes at hand with this Set of Crochet Hooks.
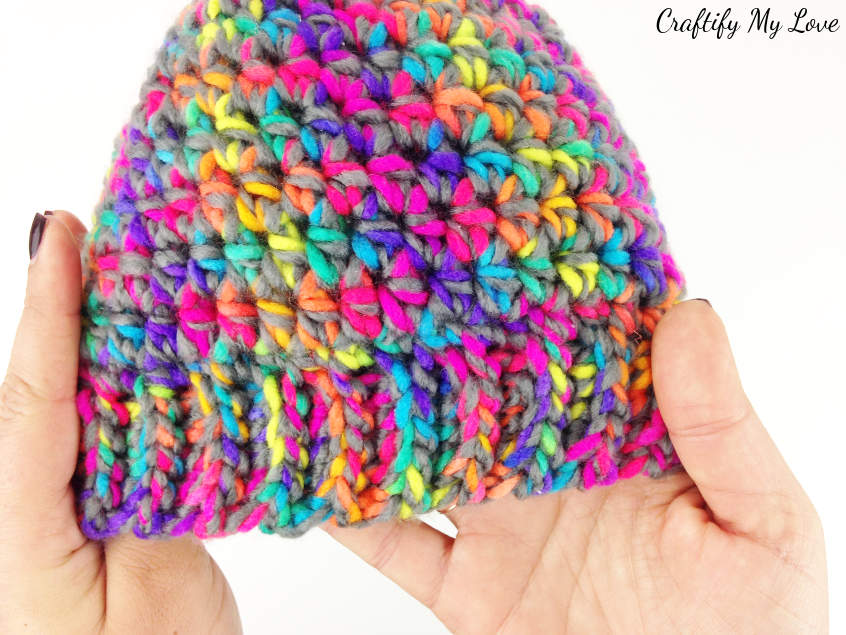
- Chunky Yarn (5) – I found a darling rainbow yarn mixed with grey at our local dollar store.
Tip: If you can’t find the same exact one, you can achieve the same look, if you crochet double strand using a rainbow yarn and a grey yarn. - Scissors
- Darning Needle (optional) – you could use a thin crocheting hook e.g. size C (US) or 2,5 (metric)
- Stitch markers (optional but very handy)
Stitches Needed for a Ponytail Hat
- ch – chain >> Video Tutorial HERE
- sc – single crochet >> Video Tutorial HERE
- BLO sl st – Back Loop Only slip stitch >> Video Tutorial HERE soon
- BLO sc – Back Loop Only single crochet >> Video Tutorial HERE soon
- FLO – Front Loop Only >> Video Tutorial HERE soon
- hdc – half double crochet >> Video Tutorial HERE
- invisible dec hdc – invisible decrease half double crochet
- yo – yarn over
If you are new to crocheting, you can make this hat, too!
- Take my FREE Crochet Class for Beginners HERE.
- Download handy Crocheting Cheat Sheets HERE (they are a thank you for subscribing to my newsletter).
- Find more Simple Crochet Patterns HERE.
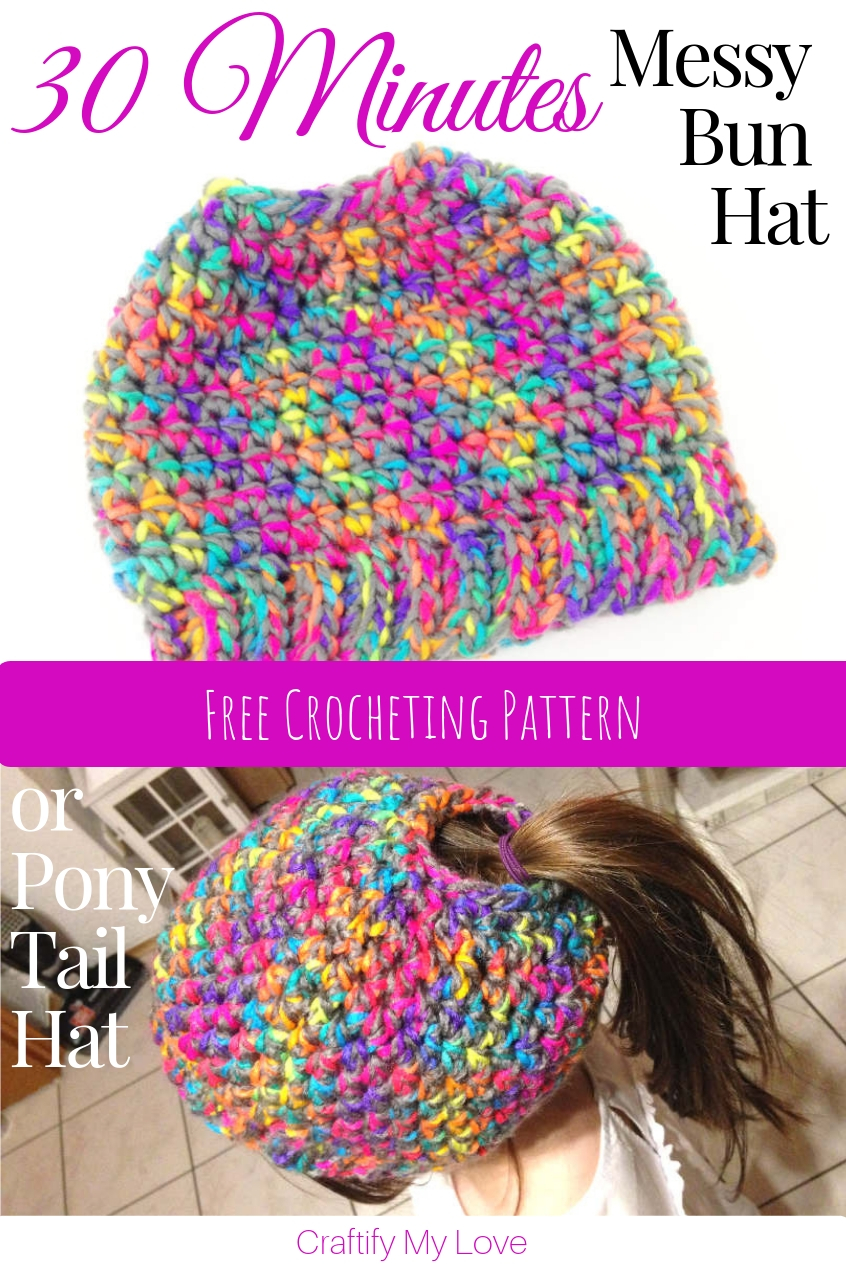
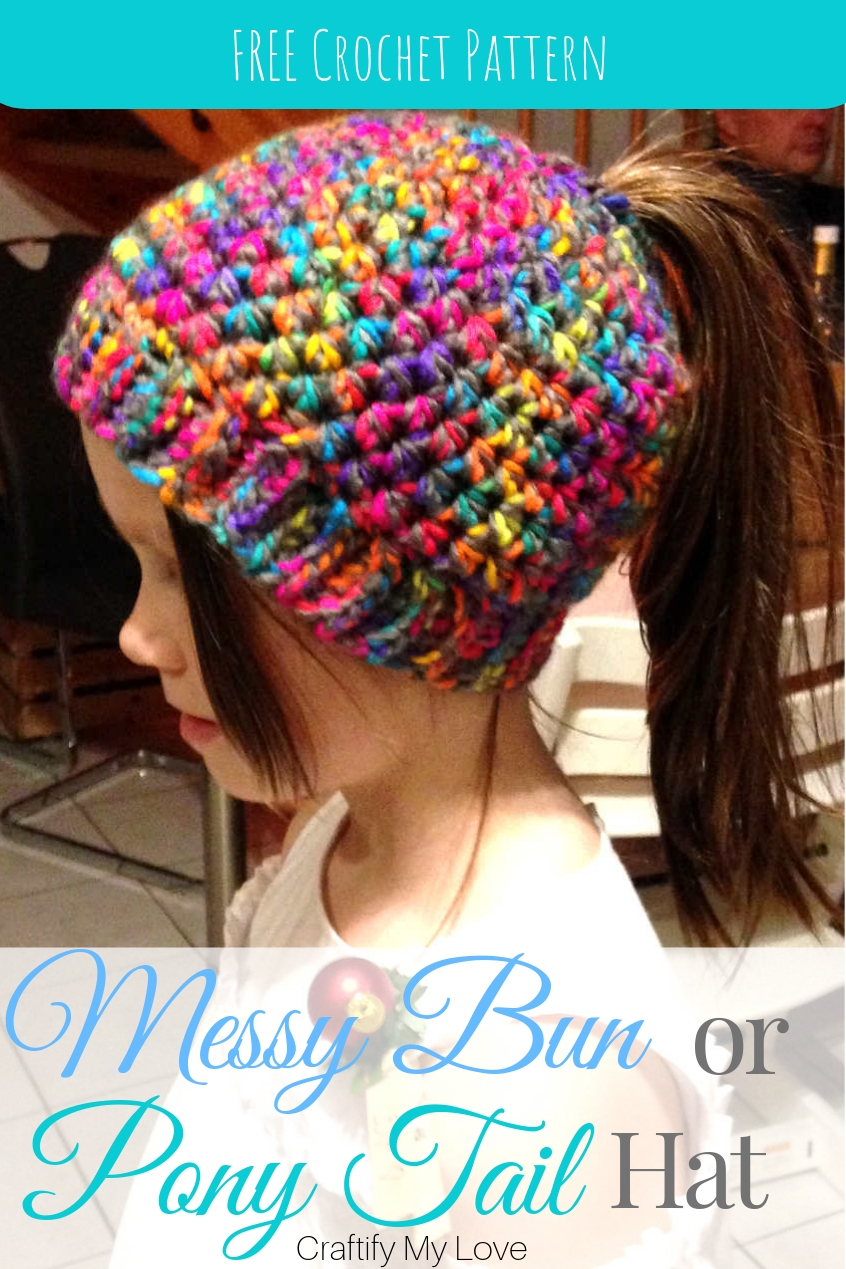
How to Crochet A Messy Bun Hat or Ponytail Hat for Little Girls
You’ll find the free pattern split into four parts (band, seam, body, crown). I feel it’s easier to follow along this way. Also, it gives you the option to choose a different stitch for the body of your hat if you want to.
If you are a crocheting beginner, you will still be able to crochet this hat. Only, it might take you a little longer than 30 minutes. Make use of the FREE Crocheting Video Course for Beginners HERE and learn how to crochet with me.
1 – How to Crochet the BAND
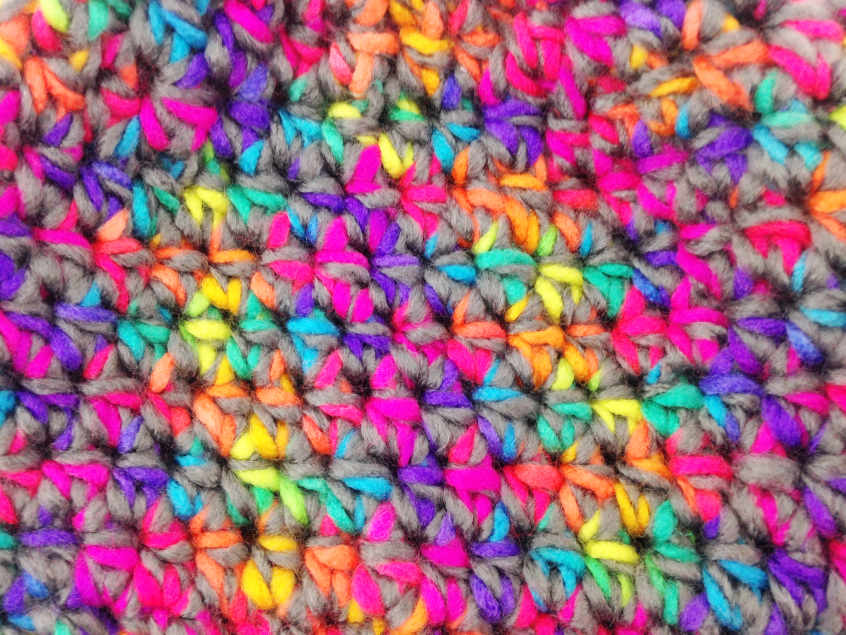
Did you know you can crochet a faux knit-pearl-knit-pearl-band using the following technique?
Hook: Use your crochet hook I (US) or 5.50 (metric). It’s smart to invest in a Set of Crochet Hooks.
Tip: Lena is 8 years but a very delicate little girl – if you want to make sure the hat will fit your little girl (or want to make a hat for yourself) multiply the head circumference by 0.7.
- Row 1 (RS): Ch 6, working in the back bump of the foundation chain (makes a nicer edge – I’ll be showing you this in a video soon), sc in the 2nd ch from hook, sc in each ch across. Turn.
- Row 2: Ch 1, BLO sl st in each st across. Turn.
- Row 3: Ch 1, BLO sc in each st across but not into last st, sc in both loops of last st. Turn.
Repeat rows 2 to 3 until your band measures 14’’ unstretched (remember: head circumference times 0.7). Make sure you’re ending with a row 3 rep. Do not fasten off.
Continue on to the seam.
2 – How to make the SEAM
Info: We’ll be using a version of the mattress stitch, but rather than sewing the band together with a darning needle because we have cut off the yarn, we’ll be crocheting the band together mattress stitch style. This way we can continue on with the body of the hat without having to weave in all those loose ends #efficiencyrules. I’ll be showing you this in a video soon, too.
With right sides facing outwards, bring the first row up to meet the last row. Your working yarn should be on the inside of the band. Ch 1, insert your hook from the front to the back into the FLO of the first row. Insert your hook from back to front into the BLO of the last row, yo, pull up a loop and pull it thru all loops on your hook to complete a sl st. Repeat across the short edge of the band.
Now, you’ll be continuing on to the body of your messy bun hat.
3 – Crochet the BODY of your Hat
Hook: Change to your crochet hook J/K (US) or 6.50 (metric) now. For more flexibility get Crochet Hooks in the Most Common Sizes.
- Row 1: Sc around the body. I ended up having 42 stitches. It might be different for you, though. (42)
- Row 2 – 6: Hdc around. Now, a stitch marker or a piece of yarn might come in handy to not lose count of your rows.
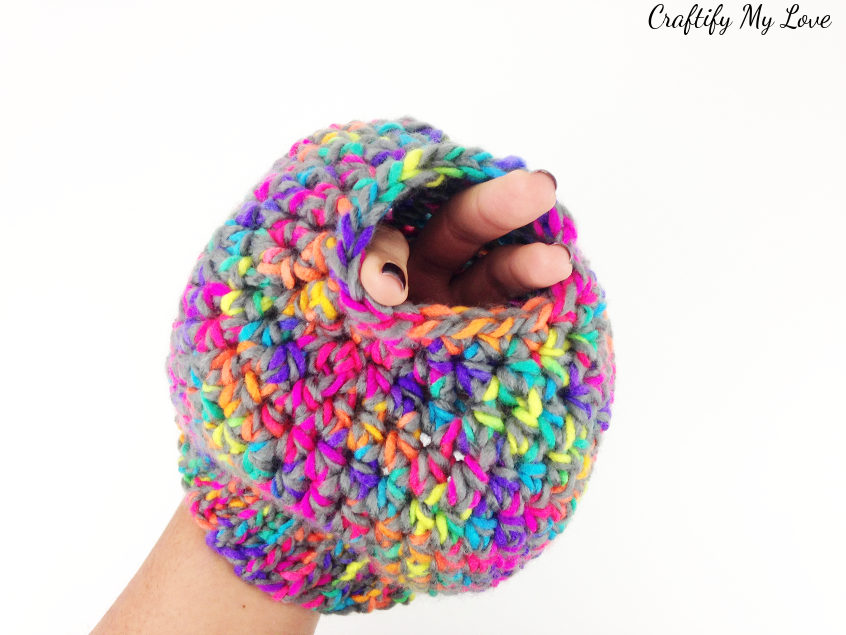
It’s time to work the opening for the ponytail or messy bun.
4 – Making the CROWN
- Row 7: Invisible dec hdc every 5th stitch (in total 8 times) – (34)
- Row 8: Invisible dec hdc every 2nd stitch – (24)
- Row 9: Invisible dec hdc every other stitch – (12)
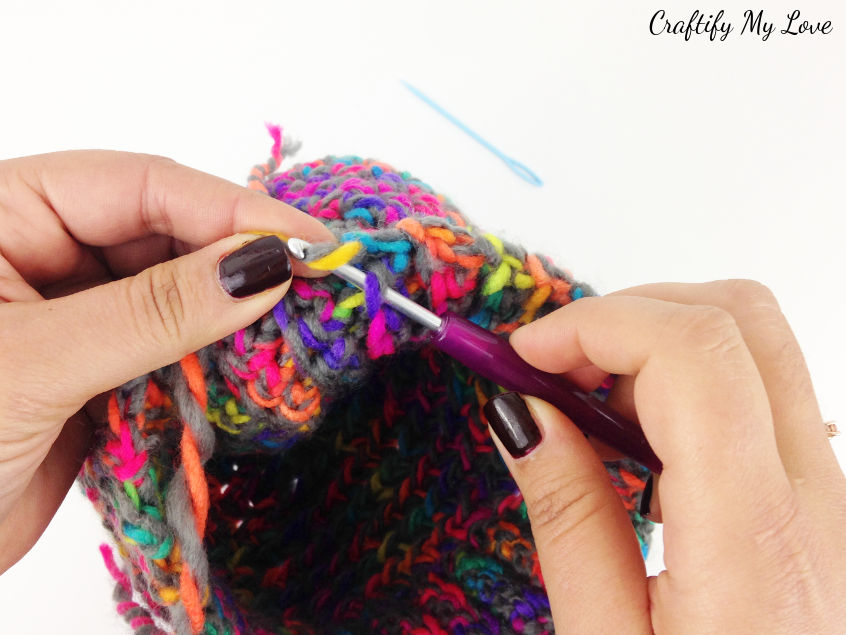
- Row 10: For a nicer edge (see image above or below) sc around, sl st, fasten off.
And, you’re done!
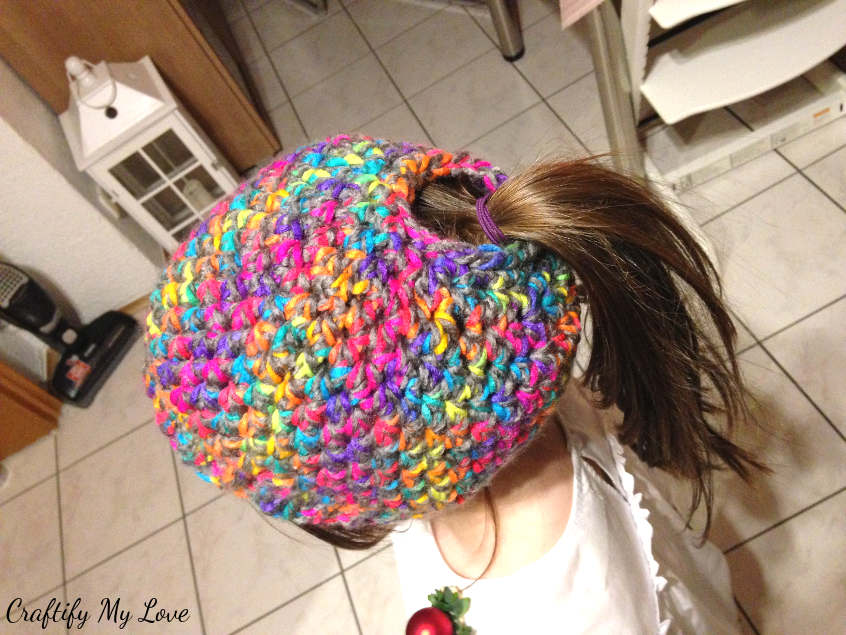
I just love this little girl. She even wore her DIY Gift Tag as a brooch the entire Christmas day. See the red Christmas ball & greenery combo attached to her chest in the picture above?
Crocheting HACKS I wish I had known when I started crocheting
Now, it’s time to weave in the ends.
Tip: When using a chunky yarn, you might find it difficult to thread the yarn through the eye of your darning needle. You can easily use a crochet hook (try which size works best for you – I have used the size C (US) or 2,5 metric out of my Set of Crochet Hooks) to pull your cut off yarn through various stitches of your work’s inside.
Here is another tip I wish I had known when I started crocheting:
If you have left-over yarn, you might want to keep it together with the banderole (the paper snipped with all the handy information) for future reference. I used to be ending up with a box full of yarn skeins and separate banderols lying next to them *add massive eye-roll here*. You could store yarn & directions in a freezer bag or – for a greener option – you can simply use a stitch marker to join those to elements securely.

What DUH-moments did you have ever since you started crocheting? Share them in the comments.
My friend Kerstin just told me the other day that this quick & easy messy bun hat is her daughters favorite at the moment. She wears it day in and day out. On her way to school or when playing in the outdoors in the afternoon. That makes me very happy!
If you are looking for other crocheting projects, click HERE to browse my Collection of Easy Crocheting Patterns. Or hop on over to AllFreeCrochet.com.
Love,

PS: Don’t forget to PIN this for later.
And now let’s see what my fellow co-hosts of this months Pinterest challenge decided to make:
The colors of the yarn is so pretty. I would love this. I have had short hair for a very long time too and I let it grow a little longer for the messy bun because it just makes life easier and I really like it. But sometimes I really miss my short hair too. It’s a struggle. This is so cute!
Thank you, Jenny, for the sweet reply. The struggle is real, lol.
Love the colors you chosen for the hat. I love the hat to where when wearing your hair in a ponytail.
Thank you, Terrie. One day I might be able to sport a messy bun, too. As of now I make them for my long haired loved ones, lol.
I have been wanting one of these messy bun hats. Love the color yarn you’ve chosen!
Thank you my dear. Now you can make one for yourself. I’ve added tips on how to make it adult size. You could start with maybe 8 chains rather than 6.
Great tip to use a stitch marker to secure the label to the leftover yarn. D’uh! Why didn’t I think of that!? I think we have the same store here in Spain. Or maybe they just carry the same products because the brand label looks familiar.
Hi Lydia, I didn’t realise you’re so close. Compared to the others in the US you’re round the corner. The shop is called T€DI.
This is so adorable and how sweet of you to make for your god-daughter! I admire anyone with the talent to crochet! I used to go between short and shoulder length hair when I was younger. But now, I’m just trying to keep what hair I have, lol!
At first crocheting seemed awfully difficult, but it is really not. I have a free course if you ever want to give it a go, Gail. BTW my decoupage eggs worked. And I mentioned your hack in the video.
These hat turned out beautifully. pinning
Thank you, Maria. Super kind of you to share.
What a cute hat! Crocheting is one craft I have never taken up, but I love to see what others make!
Hi Cherryl, I have quite view skills I’ve never acquired but enjoy swing others do. Thank you for stopping by.
That yarn is such a nice and colorful choice. My teen daughter needs one of these and just learned to crochet, so this is a great project for her to try!
Yasssss, Ali! This pattern is really super easy. Send my love to your daughter. I’m sure she’ll be making a wonderful hat for herself to wear!
I could use one of these! So practical. I like the rainbow yarn you picked for yours, very pretty.
Thank you, Audra. Maybe you’ll find the time to DIY a hat for yourself next weekend.
This is an absoluetly gorgeous hat! And practical, too. Perfect combo. Makes me rethink retiring my crochet hook.
You should totally go for it!
Habiba, I have a craft bucket list and one of them is to learn how to crochet. Thank you for providing video tutorials for people like me. My hair is always in a messy bun so would love to try this because I hate wearing stocking hats with my hair down and it looks ridicoulous with my hair up.
Kelli, I think this would be a good beginners project. And I’m convinced you can learn how to crochet. I created the video series for my British friend who is now happily crocheting away everything she wants.
Also, let me know when you have any questions while giving it a try.
I love your detailed instructions.
I’m glad you do. I figure if I want to teach something I need to make it understandable, right?
Wow! Super cute for the messy bun and I love the idea of the spot for the ponytail/bun to poke out! You are so talented with the crochet hook. I have never had the patience to follow a crochet pattern but your tutorial seems so easy to understand.
Ever since I understood how crocheting works I feel more confident in simply giving it a go. I don’t like to follow patterns either as I seem never to get the number of stitches right as written in the pattern. I simply start, observe how my work changes row after row and write it down for others. But I encourage everyone to not stress if it is not a 100 percent, does that make any sense?
I haven’t crocheted a hat in a while – looks like a great pattern! Love those colors!
Thank you my dear. Most importantly it’s a simple pattern ?
I don’t crochet, but you shared some great tips for those that do. This yarn is so fun and perfect for this messy bun hat.
Thank you, Erlene. I love learning something new every day and I try to pass on my knowledge , too.
I love a good messy bun beanie! This one is so cute, and that yarn is really pretty!
Thank you, my crocheting friend. It’s really basic but the yarn makes it special.
I love the yarn you selected, so colorful! I have made a few of these fun hats, my girls have very long hair and I go back and forth with different lengths.
It’s awesome that your girls get to ‘order beautiful crocheted hats from you.
Sure Wish I could print this pattern for my 12 year old daughter. I can’t even copy and paste? Can you help me out
Hi Amy, I had no problem to copy and paste the pattern. Why don’t you send me an email to habiba@craftifymylove.com and I’ll send you the copied pattern.
Trying to size this pattern for a 6 and a 4 year old. When I looked at the sizing charts then look at your instructions, I am wondering how a 14 inch band would fit your 8 year old. Most of the sizing charts say 18, 19 and 20 inches circumference. Need some help please. Love the hat and the patter looks so easy. Thanks
HElene
Dear Helene, I am so very sorry for the late reply! My maternity leave is still going…I sure didn’t expect motherhood being so hard on you and adjusting to the new role taking so long. But I did sew a little something for my precious boy today and wanted to make sure to make quick notes for an upcoming tutorial and thus found your comment! As I mentioned in the post, Lena is a very delicate little girl. She is tiny and thus her head, too. I recommend you either measure your hats recipients head and multiply the head circumference by 0.7 or you go by the recommendations of sizing charts if you don’t have the chance to take actual measurements. I hope that helps? I am very glad you love the hat and enjoy crocheting along my pattern. Love, Habiba