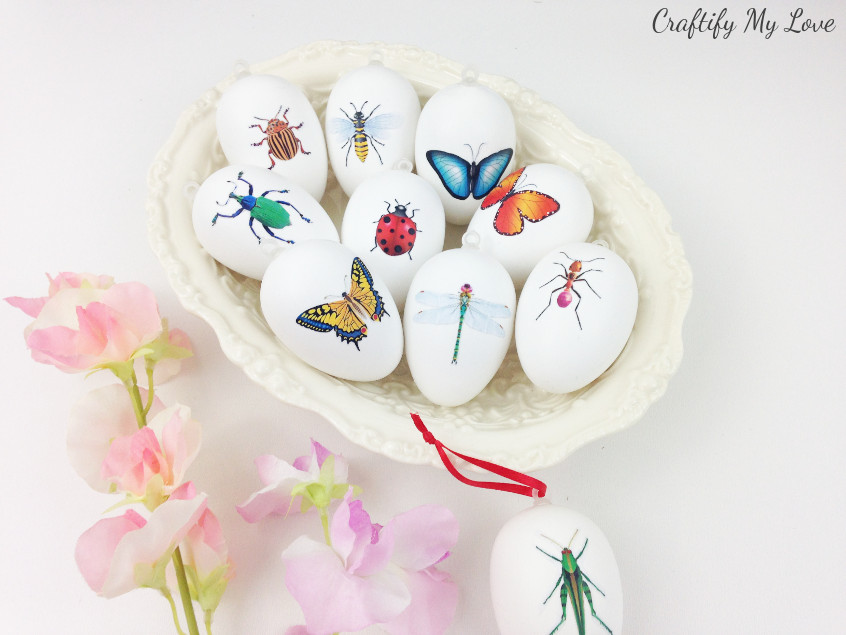
I wanted to participate in a fun YouTube challenge last week and decided to make these Insects Decoupage Easter Eggs for it.
My friend Yami, The Latina Next Door is challenging us crafty peeps out there monthly to create The Look For Less. I bet you, too, have been drooling over way too expensive home decor before, right? Our goal is to recreate these desirable objects for only a fraction of the cost. And, you won’t believe how much money you can save by DIY-ing your home decor on a budget and how close to the original you can achieve the look of your DIY dupe.
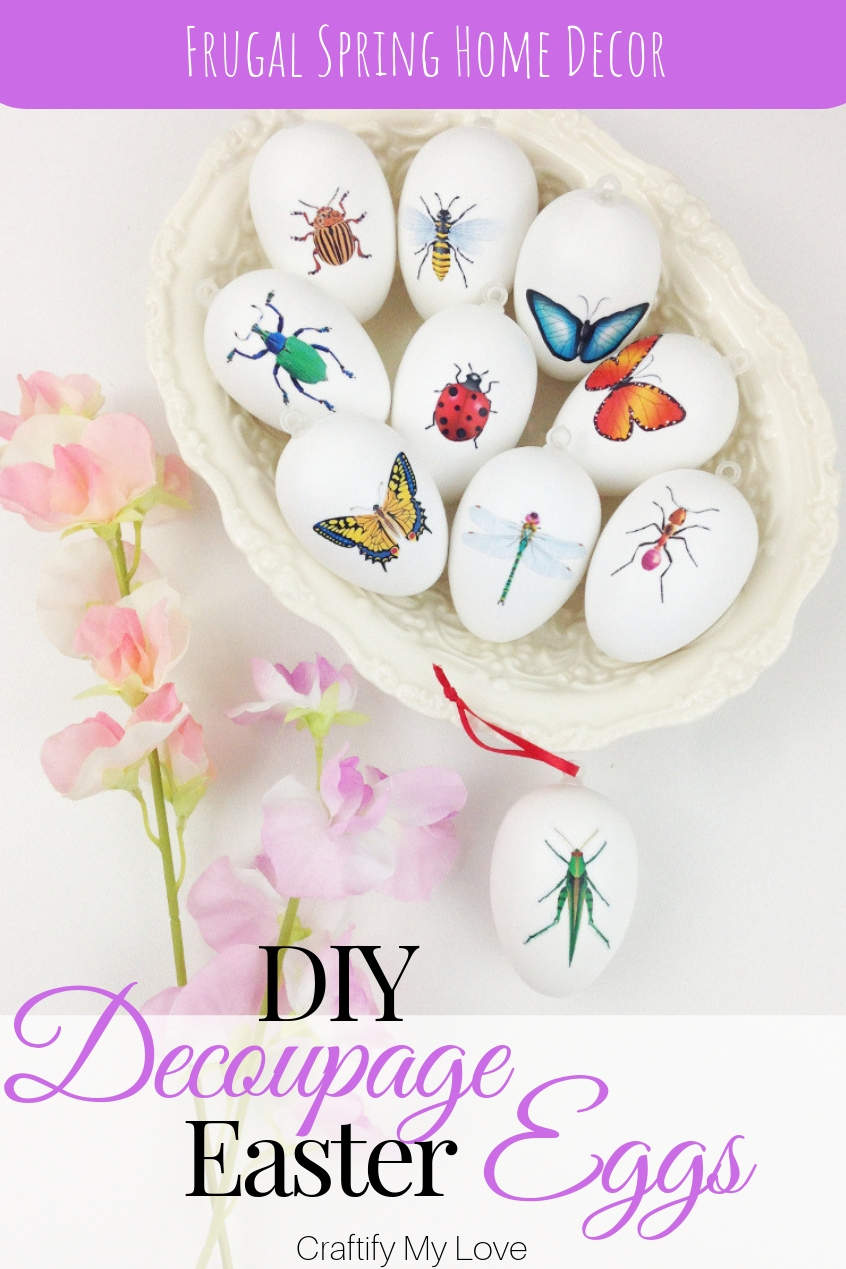
Keep on reading to learn how much money I saved on this frugal Easter craft.
Related:
Check out this DIY Anthroplogie furniture knock-off from a previous month. I was able to save almost $ 1,300 on it!!! Yep, you’ve read that right! Here is the video tutorial for you.
But now, let’s get to todays frugal craft, shall we?
Supplies to DIY Insects Decoupage Easter Eggs
This post contains affiliate links. That means if you make a purchase through these links, I may receive a small commission at no extra cost to you! You can click here to read my full disclosure.

- Faux plastic eggs in white (I was lucky enough to find 10 for $ 1.50 at my local drug store)
- Mod Podge – here is an awesome set for multiple purposes
- Brush set – I love having several brushes at hand, so I can get my craft on whenever creativity hits me 😉 Also, buying bundles often saves you a lot of money!
- Craft Tweezers
- Scissors (the smaller the better!)
- Super thin satin ribbon
- Watch the video HERE to learn about super clever hack using a kitchen towel roll.
Frugal Craft Tip:
Read up how to get FREE Ribbon in my FREE Guide to Craft Supplies for LOW or NOW Money as a thank you for subscribing to my newsletter.
And lastly, you’ll need Insect Vector Graphics. Here are some FREE Resources for you:
- Abstract vector created by Layerace >> Freepik.com
- Nature vector created by macrovector >> Freepik.com
- Or simply google „Insects vector graphic free download“
How to Make Decoupage Easter Eggs

Video Tutorial: DIY Insects Decoupage Easter Eggs
If you enjoy Video Tutorials, make sure to sign up to my YouTube channel HERE.
Nifty Tip: I will be sharing an amazing (dare I say) life-changing hack using a kitchen towel roll.
Step-by-Step Instructions:
- Get your supplies ready & print vector graphics of all the creepy crawlies you love.
- Cut them out – as close to the edge as possible.
- Apply a thin layer of Mod Podge to the faux plastic egg.
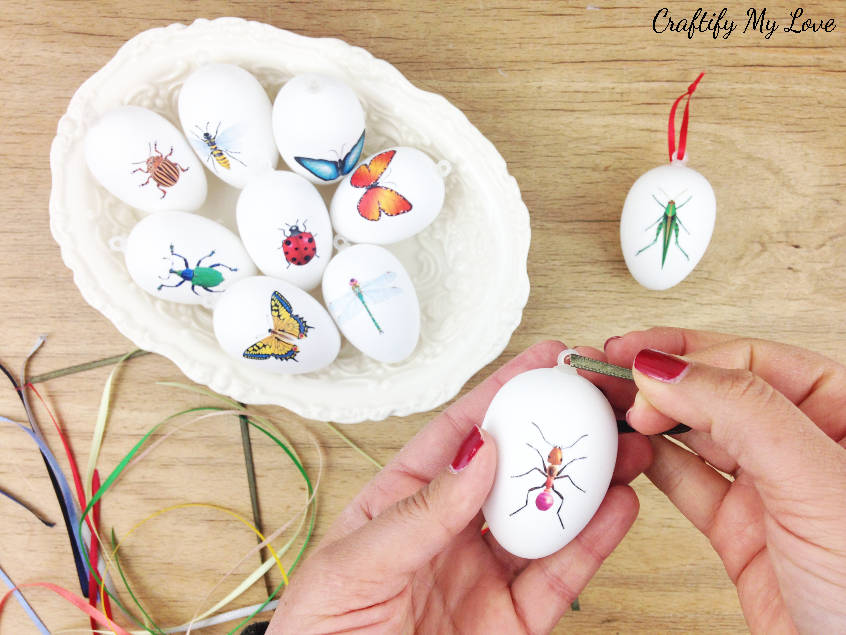
- Place the cut-out insect print on your egg and press on lightly. Tweezers come in handy now.
- Cover the cut-out with Mod Podge. Make sure to always stroke from the insight to the outside.
- Let dry.
If you plan on hanging your decoupage Easter eggs on a branch I’d recommend you add the same or a different motive on the back of your egg. I do and I did.
Now, what I haven’t shown you in the video tutorial above is how to add the satin ribbon and where to get it for FREE. You can read that up in my FREE Guide on Craft Supplies for LOW or NO Money HERE.
By the way, the little orange and pink ant turned out to be my favourite…who would have known.
Related: Here are more SPRING Projects or Easter Crafts I am sure you’ll like. You can find other Decoupage Ideas over at FaveCrafts.com.
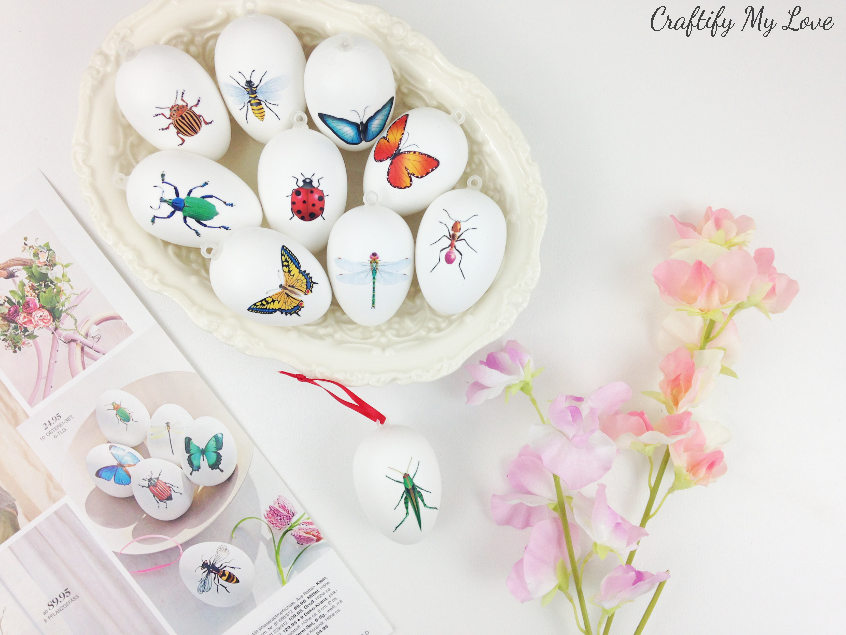
And here is the comparison:
The inspiration I found in a German home decor catalogue called Impressionen VS. my Look for Less DIY project.
I could have bought 6 butterfly & insects Easter eggs for $ 28. But I’d rather made 10 decoupage Easter eggs myself for $ 1.50, some supplies I already had at hand, and a little craft time invested.
What do you say? And which one is your favourite?
Happy Easter,

PS: Click HERE for DIY Bunny Ears Headband Tutorial.
PPS: Don’t forget to PIN this for later.
These are sooo pretty Habiba! I especially love the butterfly ones.
Thank you, love! There was a time I would have only made butterfly ones. But my style and taste changed
These are so pretty! Featuring when my link party opens up tonight. Thanks so much for sharing.
Thank you my dear. That is awesome news ?
Love this! Pinning! ? I am hoping to make some decoupage eggs soon.
Lauren, that would be awesome. Have you decided on a motive or theme, yet?