
There are many tutorials out there on how to crochet a round basket. But what if you can’t find the one that is just right for you? Maybe you want to work with a different yarn or you want a different size? Or you want to use a different stitch to create a unique design?
How to crochet a basket in any size and with every yarn you want. Handles or no handles.
I have the answer for all these maybes! I am sharing with you the basic adjustable pattern for a crocheted basket. I will teach you step-by-step how to alter the pattern to fit your personal need. And if you are now thinking: But I have never crocheted before, can I really do this? The answer is: YES, you can!
This post contains affiliate links. That means if you make a purchase through these links, I may receive a small commission at no extra cost to you! You can click here to read my full disclosure.
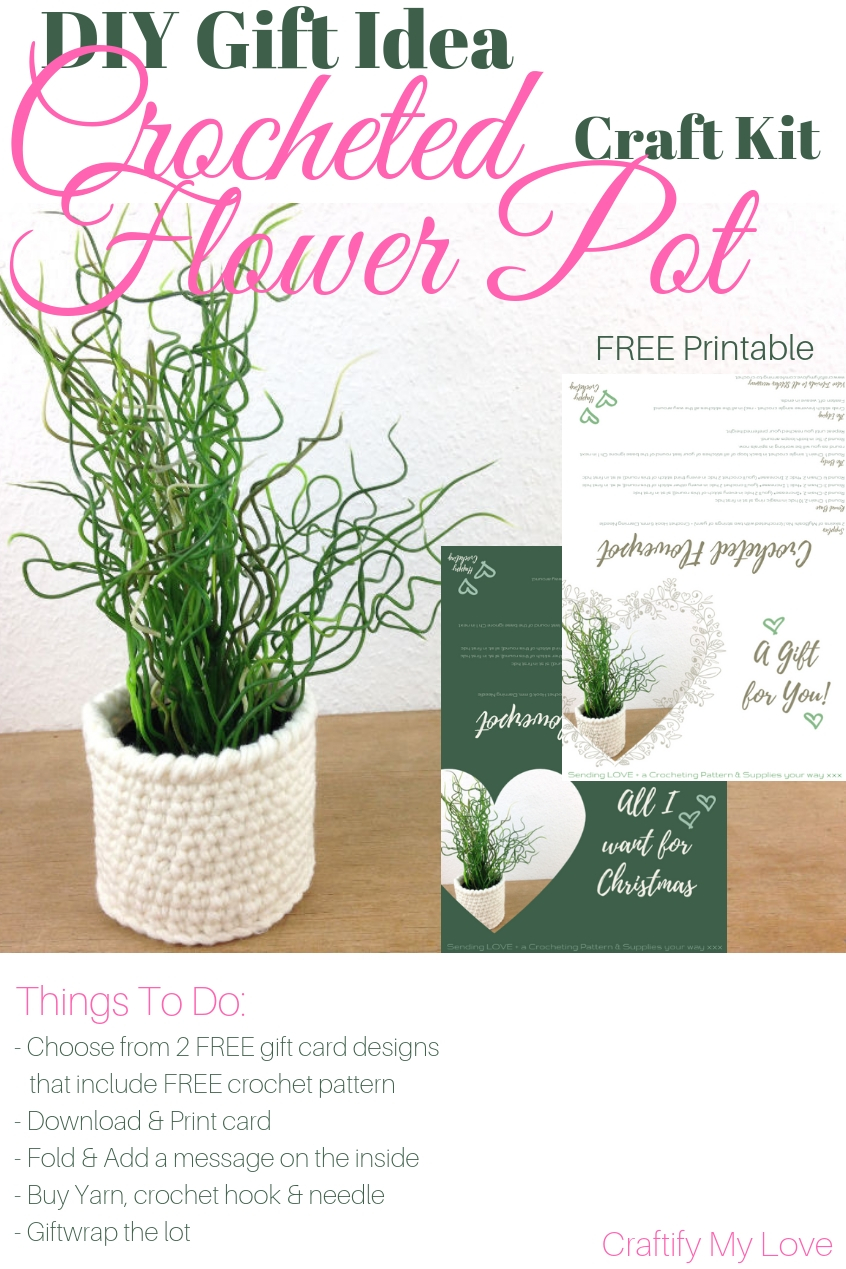
DIY Gift Idea: Crocheted Flower Pot Craft Kit
Crocheting a basket for a friend or giving away a Complete Craft Kit to a creative DIYer can also be a great. Quite matching if you think of today being our Second Day of the Fourth Annual 12 Days of Christmas Series!

I have teamed up with 50 plus bloggers to bring you a goodness of DIY Ideas and Recipes to make your holiday season merrier. There are 12 different posts in the series (I participate in 5) and we have spread them out over a four week period with three posts per week. Now is the time to subscribe!
It’s Day 2 and we are sharing DIY Gift Ideas! You’ll find many more at the end of this post.
Check out my 5 Contributions:
- The Wreath
- DIY Gift Ideas (which you are currently reading)
- Christmas In A Jar
- Pretty Presents
- Sweet Treats
GO HERE for the complete list of Dates and Topics plus a collection of most popular holiday ideas including ornaments, games, recipes and more from all 50 plus talented bloggers!
Learn How To Wrap A Gift HERE and how to DIY hand-printed gift wrapping paper HERE.
Of course, you could sit down and crochet that basket yourself! Give it away in combination with a pretty flower.
Here is What You Need to Assemble the Crochet Craft Kit:
- FREE Download of gift card HERE (it’s a thank you for subscribing to my newsletter and you get to choose between 2 designs).
- Gift card comes already with the FREE crochet pattern.
- Buy 2 skeins of MyBoshi No. 1 HERE or similar yarn.
- Buy a crochet hook in size 5 HERE.
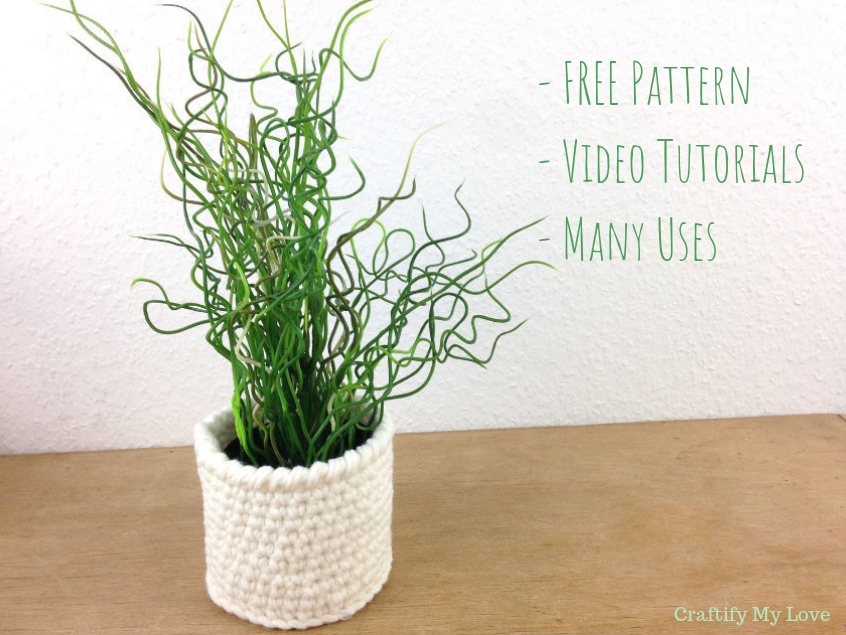
Video Series: Learn how to crochet
If you are new to crocheting or want to freshen up your skills, I have the perfect thing for you. A small video tutorial series that will cover everything you’ll need to crochet yourself a lovely basket or tackle other simple yet super darling crocheting projects.
Free Crochet Pattern for a Basket
Congratulations, you finally made it to the pattern, lol. Sorry for the long intro. So, here goes…
Materials:
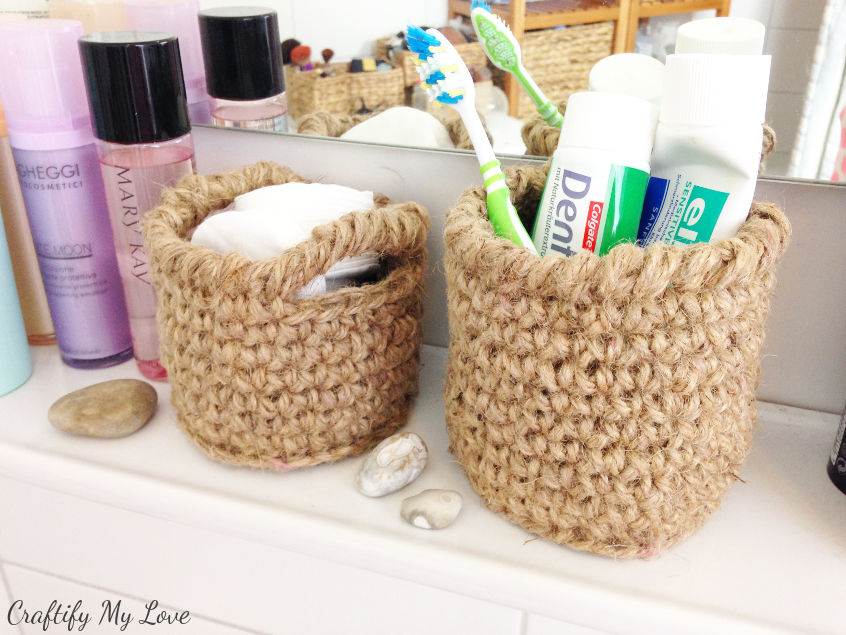
- For those two baskets for my bathroom refresh I used garden twine and found that the complimentary hooks for my project were a 6 and 5 mm hook.
- The white basket was made from two skeins of MyBoshi No. 1 (crocheted with two strings at once for more stability). And I used a crochet hook size H (5 mm).
- My next one will be from t-shirt yarn. I already have 4 skeins from black to grey at home.
Important: You will need to match the hook to the yarn you chose for your basket. If it is a store-bought yarn, you’ll find the number/size of the recommended hook on the paper banderole. For the edging of your basket, you’ll simply use a hook one number down in the scale for easier crocheting. (Or you don’t, I forget all the time and it looks perfectly fine, lol).
Notes:
Your basket will need a base and a body. The base will be crocheted in joined rounds. The body will be crocheted in continuous unjoined rounds. You could also refer to those as crocheting in a spiral (you’ll find a video tutorial HERE).
Stitches & Techniques used:
- Magic Circle
- Single Crochet (sc)
- Half Double Crochet (hdc)
- Reverse Single Crochet (Rsc) or Crab Stitch for the edging (see video tutorial HERE).
Pro-Tips:
- Bookmark my Stitch Dictionary – You’ll find Abbreviations and Video Tutorials for Basic & Advanced Crochet Stitches.
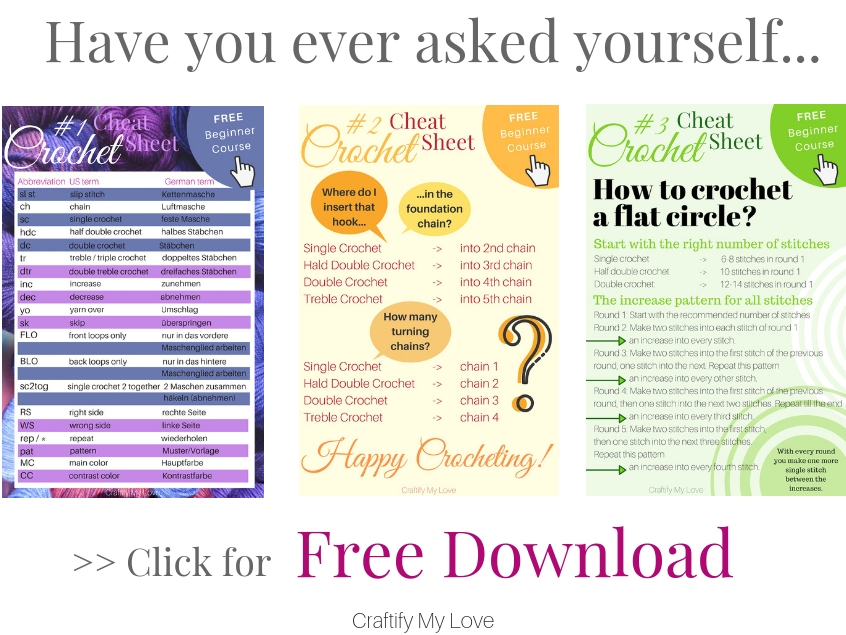
- Download a Set of 3 Crochet Cheat Sheets for FREE as a thank you for subscribing to my newsletter.
Related:
Crocheting the base of a round basket
You can watch a video tutorial HERE.
Crochet the basket in joined rounds. You’ll start with a magic ring and will be working in half double crochets (hdc).
Written Pattern:
Round 1: Chain 2, 10 hdc in magic ring, sl st in first hdc
Round 2: Chain 2, *Increase* (you’ll 2 hdc in every stitch of this round), sl st in first hdc
Round 3: Chain 2, *hdc 1, Increase* (you’ll crochet 2 hdc in every other stitch of this round), sl st. in first hdc
Round 4: Chain 2, *hdc 2, Increase* (you’ll crochet 2 hdc in every third stitch of this round), sl st. in first hdc
Round 5: Chain 2, *hdc 3, Increase* (you’ll crochet 2 hdc in every fourth stitch of this round), sl st. in first hdc
You get the drill, right? Do this until you have reached your preferred circumference for the base of your basket.
Crocheting the body of a basket
You can watch a video tutorial HERE.
- You’ll be crocheting in continuous unjoined rounds now.
- To create a clear division between the base and the body you’ll crochet your first round of the base in those funny third loops a half double crochet produces in the back (see what I mean in this video tutorial HERE). Alternately, you can crochet in the back loops for this first round.
- The body is crocheted in single crochet (sc) or actually in any other stitch you prefer: The waistcoat stitch or center single crochet (Csc) look nice.
Written Pattern:
Round 1: Chain 1, single crochet in funny third loop or back loop of all stitches of your last round of the base. You could add a stitch marker at the end or the round to keep better track. Ignore the Ch 1 in the next round as you will be working in spirals now.
Round 2: From now on Sc in both loops around.
Repeat until you reached your preferred height.
How to crochet basket handles
If you are a visual learner, watch the video tutorial HERE starting at 12:36.
Written Instructions:
- Take a look at your basket and decide where you want your handles to be and how wide you want the opening to be. Mark the beginning and end of the handle opening with a stitch marker (I have this rainbow box) and make a note of how many stitches the opening will be.
- Now crochet single crochets (or the stitch you chose for your baskets body) until the first opening.
- Chain the number of stitches you want the opening to be & add two or four more chain stitches for the hight of the handle (in my example the opening is 6, so I chained 8).
- Skip the number of stitches you decided your opening will be (in my example it’s 6) and start single crocheting until you’ve reached the next stitch marker.
- Repeat steps 3 and 4 on the opposite side if you want your basket to have two handles.
How to crochet an edging for a basket
- Switch to a hook one number smaller (optional, but crocheting will be easier).
- You’ll be crocheting in the opposite direction you normally crochet now, using the Reverse Single Crochet (Rsc) or Crab Stitch for the edging (see video tutorial HERE).
- Start in the same stitch you just finished from the previous round.
A) Basket with-OUT Handles:
Simply Rsc in all the stitches all the way around. If you are a visual learner, watch the video tutorial HERE starting at 19:39.
B) Basket with Handles:
- Rsc until you’ve reached your handle opening.
- Then Rsc the number of chains + add stitches according to the row the chain gap. In my example the row is 6 – 8 – 10:
6 stitches where skipped, 8 chains were made, so I crocheted 10 Rsc in the chain gap – or at least I tried. The rope was so thick, that I only managed 9 Rsc. See? That’s the beauty of crocheting (or any craft really). If the numbers don’t add up, the outcome will still be amazing! - Reverse single crochet (rsc) until the next chain gap,
- Rsc in chain gap,
- Rsc to the end of this round.
Fasten off. Slip ends through the top of the first Rsc. Wrap yarn ends around the edge to mimic a Rsc. And lastly, weave in end.
Done!
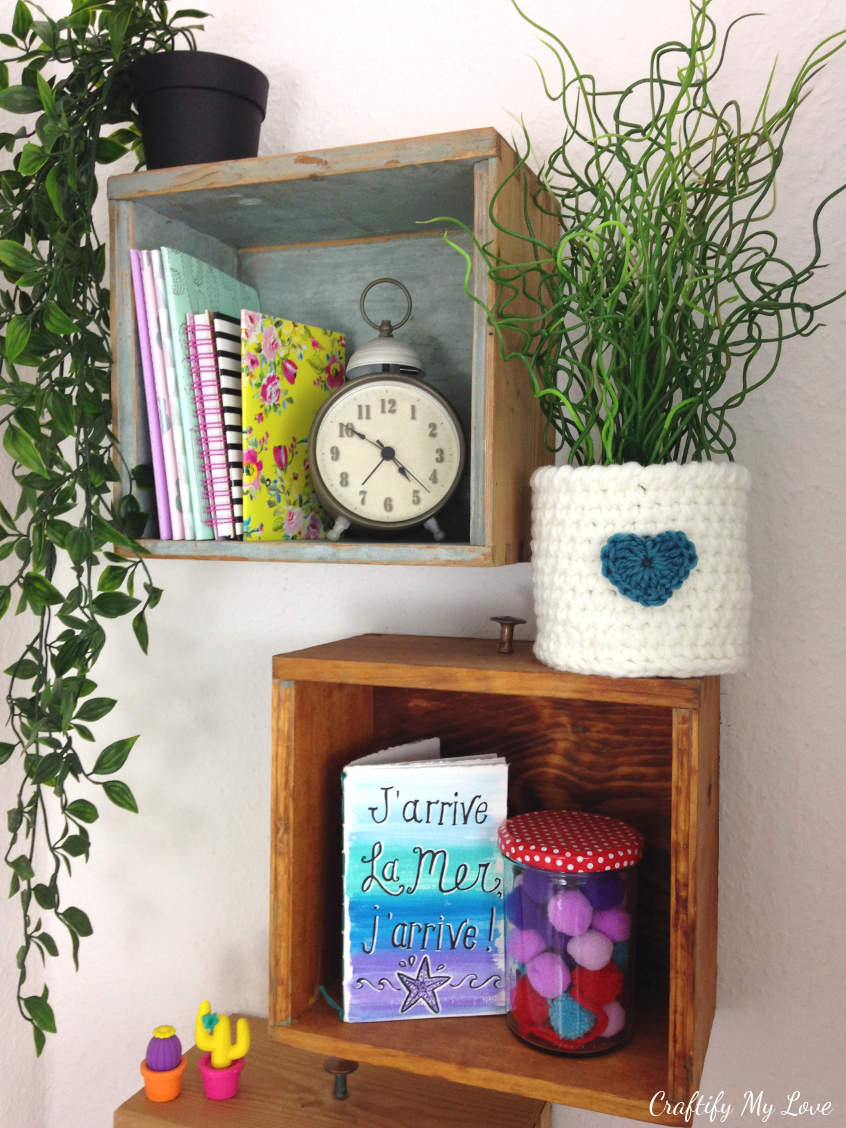
Like the heart embellishment from the photo above? Learn how to crochet a heart HERE. The Water Colour Art J’arrive La Mer, j’arrive! is also available as a download in my Freebie Collection after you subscribed to my newsletter.
What type of yarn will you use for your basket? And will it have handles?
More free crocheting patterns:
- You can find all of my free crocheting patterns HERE.
- Or go and find even more patterns over at AllFreeCrochet.com.
Love,

PS: Grab your set of 3 crocheting printable cheat sheets, now! They + lots more are a thank you for subscribing to my newsletter.
PPS: Don’t forget to PIN this for future reference!
That’s one of the things I love about crochet… when you make your own, you can switch things up by using different yarn, different sized hooks, etc. These will make great gifts!
That is what I thought so, too! A friend asked me to teach her, I’m glad she did.
I am obsessed with crocheted baskets, but have been a bit intimidated to try them. Your instructions are great, I will be attempting these soon.
Hi Rachel, that would be great. I made this tutorial for my friend Gloria who never crocheted before. She is now crocheting these and different other things. You can do it, too!
Very very pretty! Your projects always make me think about learning how to crochet. These round baskets can be used for so many things.
Exactly, Jenny! And they are pretty easy to make. My friend Gloria never crocheted before and is now making basket after basket.
What a great idea! I never knew you could make crocheted baskets! I have knitted before but never crocheted. This makes me want to try it! Pinned 🙂
Kimberly, please give crocheting a try! It’s actually pretty simple once you’ve got the hang out of it. I have a free video class if you’re interested and I am always there for questions.
This is so cool! I’m still not very good at crochet, but I’m loving the way this looks!
Keep on crocheting and your stitches will get more even row after row. I got the hang out of it after I crocheted a dress for my goddaughter.