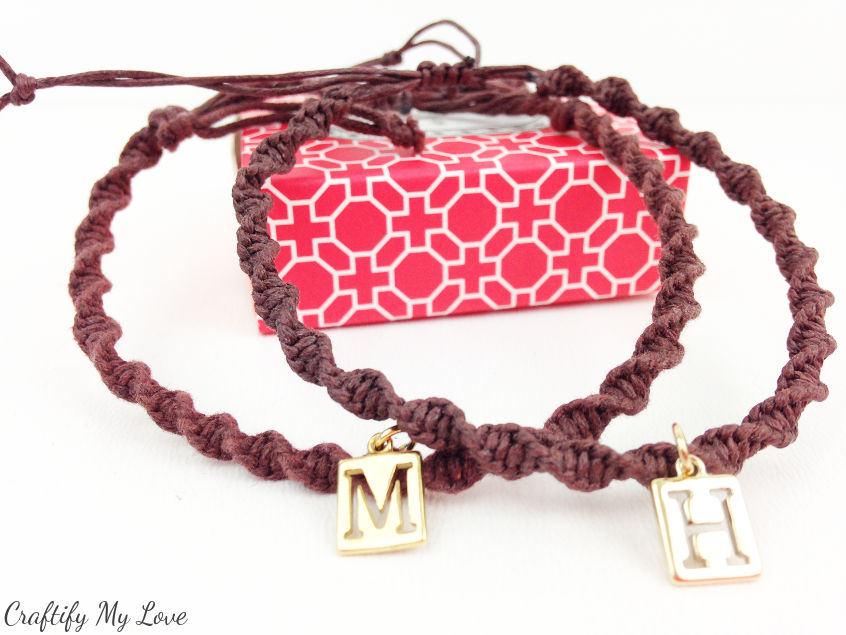
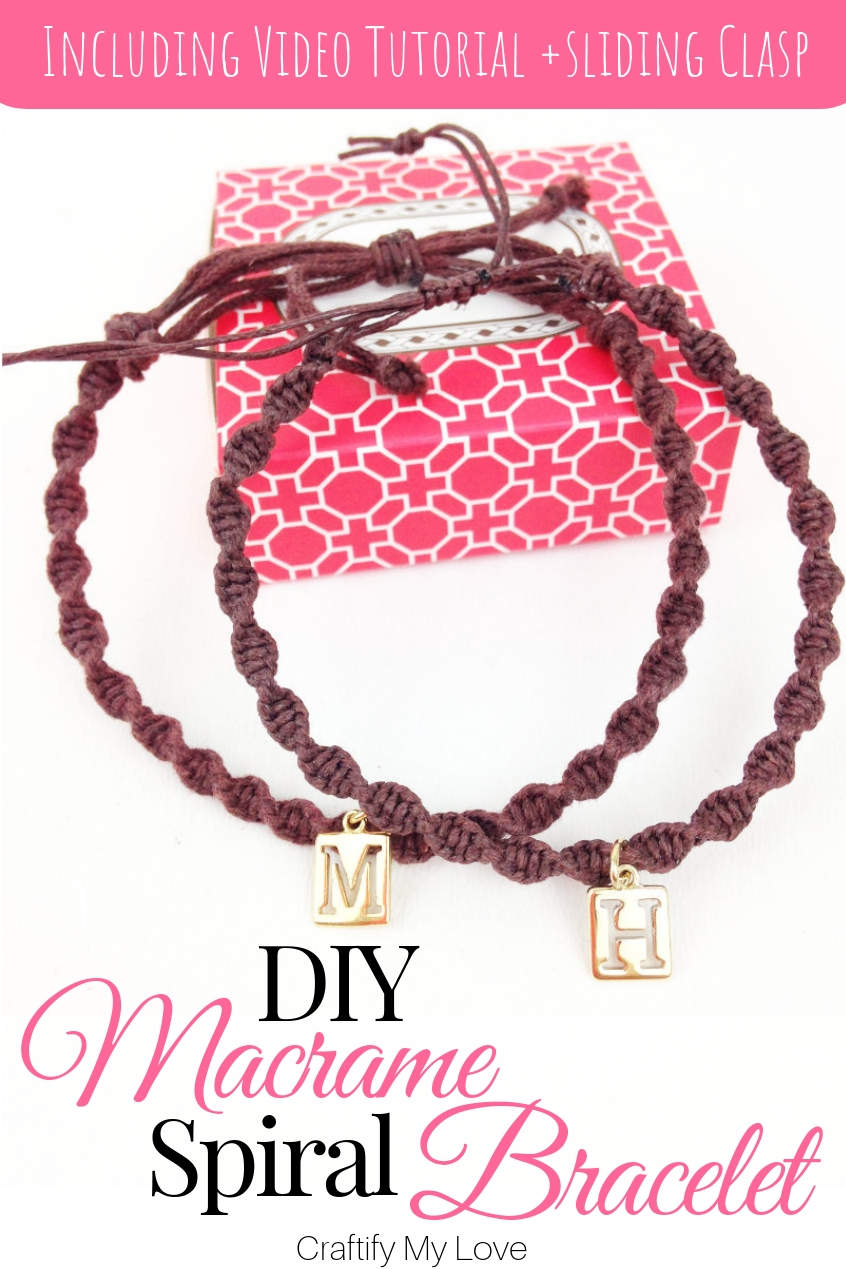
I made this set of macrame spiral bracelets for Markus and me for his birthday in January. I ordered these darling charms on sale before Christmas but have never gotten round to DIY our couples macrame spiral bracelets up until the day before his birthday.
All started with this PIN I stumbled over on Pinterest. After that, I was intrigued and researched a lot of different macrame techniques to DIY a bracelet and ended up falling in love with one of the simplest styles. I took the step by step photo tutorial while I did the first bracelet. The one with the “M” charm. As I wanted to give Markus a perfect gift I made my partners bracelet first in case I messed things up a little. Me being the last-minute crafter you’ve come to know, poor Markus had to wear the “M” bracelet for the first week until I managed to make the second one, lol.
Turns out I did learn a couple of things while I made my first DIY macrame spiral bracelet, so I made sure to incorporate those tips in the video tutorial I’ve put together for you. Also, I think being able to actually see the movements you have to make to tie those macrame half-knots or square knots is way easier to learn from than working only with photos.
Pinterest Challenge

As this craft – as so many – started with inspiration from Pinterest I am sharing it as part of this months Pinterest Challenge by my blogging friend Erlene. Visit her over at My Pinterventures.
You might already know or have guessed what this challenge is about. We challenge ourselves to not just pin but to actually create by the inspiration we’ve found on Pinterest.
See what amazing things this challenge made me actually turn into reality so far:
- IKEA Hack: Wood Slice Side Table
- DIY Stencilled Anthropologie Dresser Knock-off
- Crocheted Boho Hoop Earrings
- A Traditional German Housewarming Gift | Wood Burning Art
- How To Make A Giant Paper Flower + Free Template
To join next month’s #pinterestchallenge, click here to sign-up ⇒ March Pinterest Challenge
Supplies
This post contains affiliate links. That means if you make a purchase through these links, I may receive a small commission at no extra cost to you! You can click here to read my full disclosure.
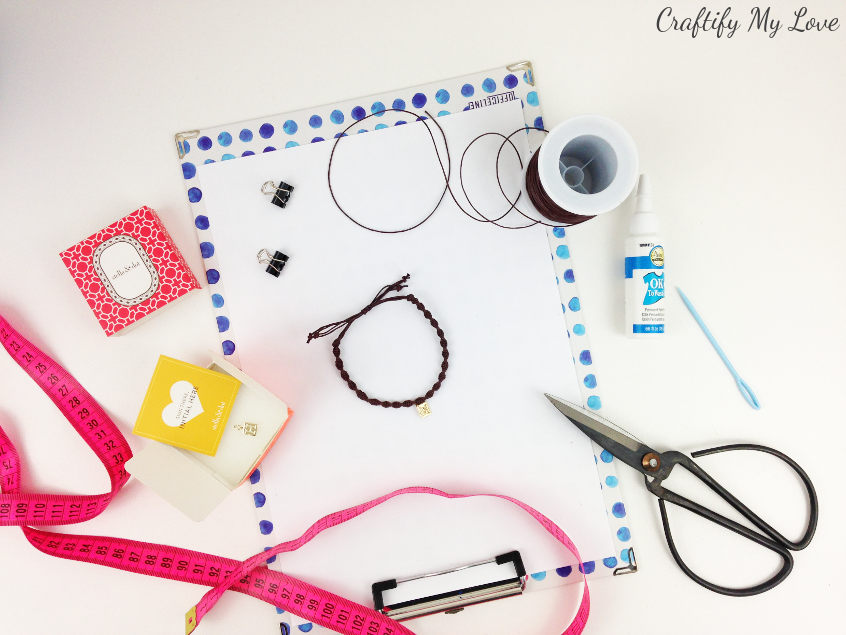
- Waxed cotton cord (this is what I used). Nylon cord, embroidery floss or even jute twine would work, too!
- Scissors
- Clipboard (Tip: Get a multi-pack, add a little chalkboard paint and you’ll end up with a fabulous little chalkboard for your home or as a lovely gift idea!)
- Binder Clips
- Washable Fabric Glue (I brought this one home from my last trip to the US) or a Lighter (if you are using nylon cord)
- Charms (I bought the gold-plated Initial Charm Soho on SALE at Stella & Dot. Last I checked it was still available!)
- Measuring tape (I love my hot-pink one) or ruler
- Tapestry Needle (optional)
- Self Adherent Cling Tape or Band-Aids to protect your skin
Here are the same or similar items I’ve used:
5 Simple Steps on How to Make A Macrame Spiral Bracelet
I don’t know about you, but I still stress myself out when I am planning to craft something I’ve never done before. I tend to procrastinate for ages until I finally get started and while I create I sweat a lot. Embarrassing, really! I wish I could stop with this nonsense, though, as almost all of my creations turn out fabulous. Granted, they don’t always turn out how I envisioned them, but they are perfect nonetheless.
So, please trust me when I say: You can do this!
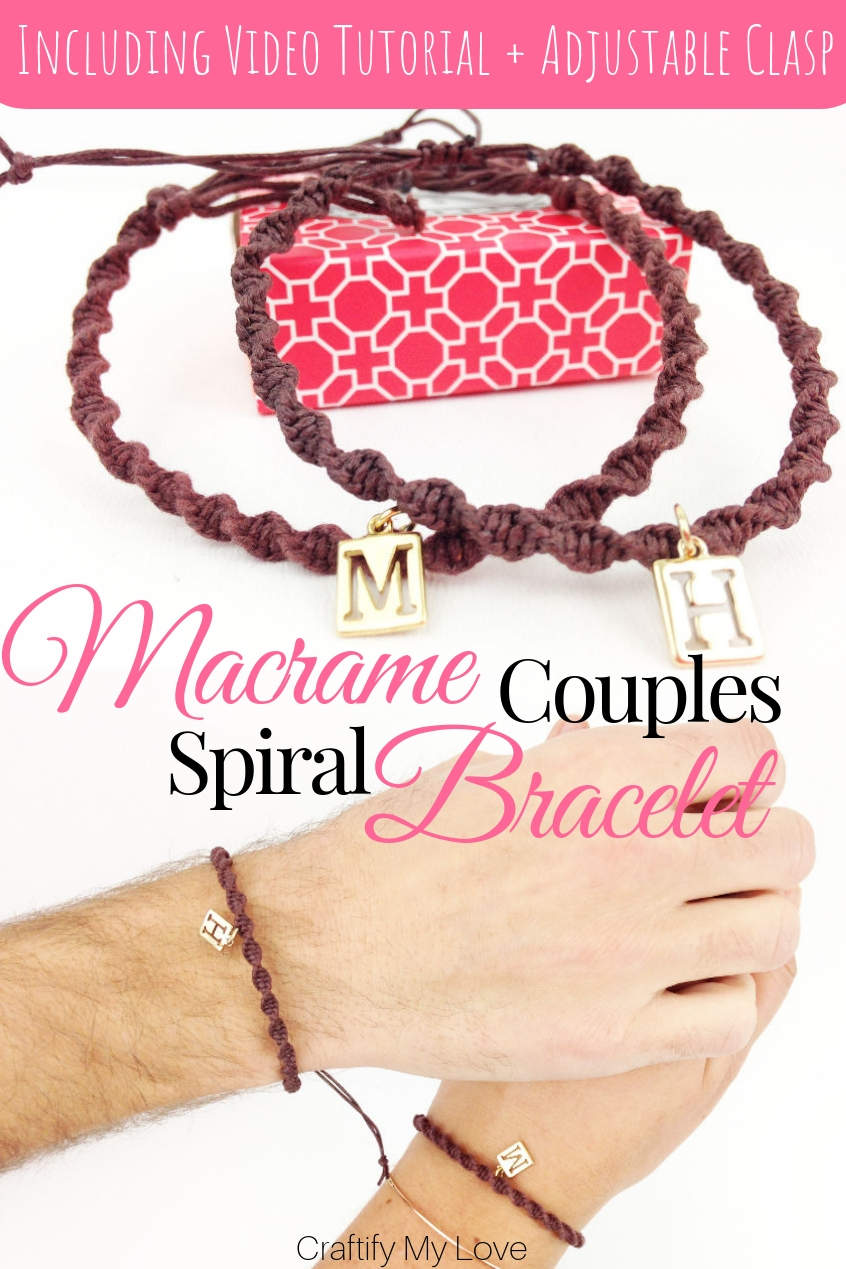
Video Tutorial: DIY macrame couples bracelet
Simply follow along with the detailed step by step instructions and video tutorial (this one’s for you, my lovely visual learners).
Tip: Many nifty tips & tricks included to rock your first DIY friendship bracelet.
If you enjoy Video Tutorials, make sure to sign up to my YouTube channel HERE.
1 – Prep Work
Start by cutting your waxed cotton cord to length:
- 1 x 220 cm / 87 inches (in my photo tutorial I used two 110 cm / 43 inches cords and ended up with too many loose ends when finishing my bracelet – for the second bracelet in my video tutorial I optimized this step)
- 2 x 50 cm / 20 inches
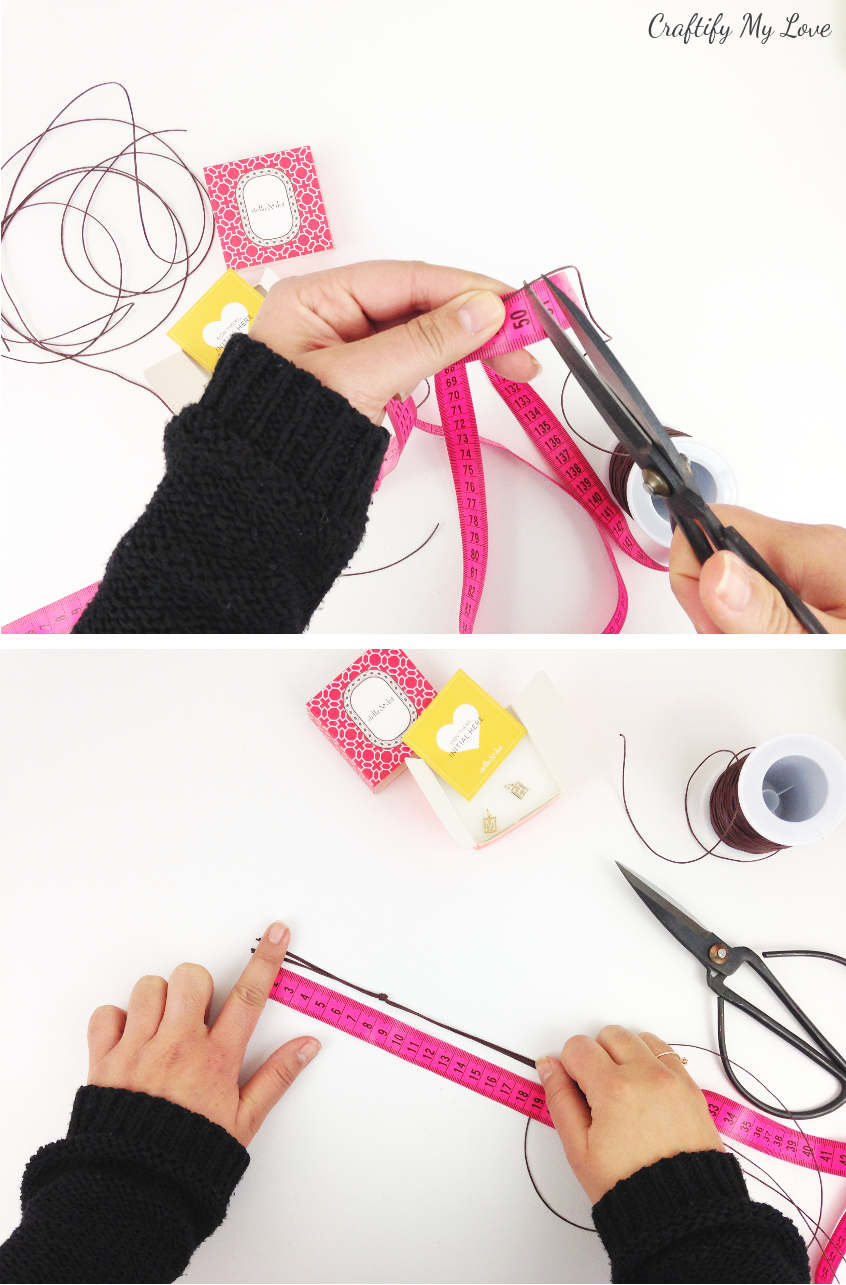
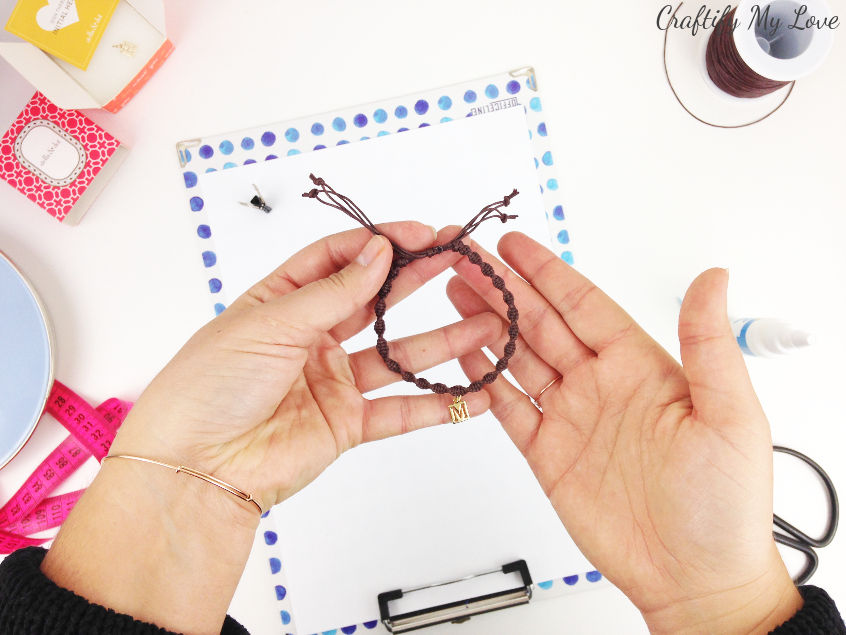
Tie the longest cord around your two shorter cords at about 8 cm / 3 inches. This way you’ll end up with four cords hanging from the starting knot.
Arrange the two shorter cords in the center and the two longer cords on the outside. The shorter cords will be called anchor cords and the longer cords will be called tying cords (see top left image)
2 – How to Tie a Half-Knot that will Naturally Turn into a Spiral
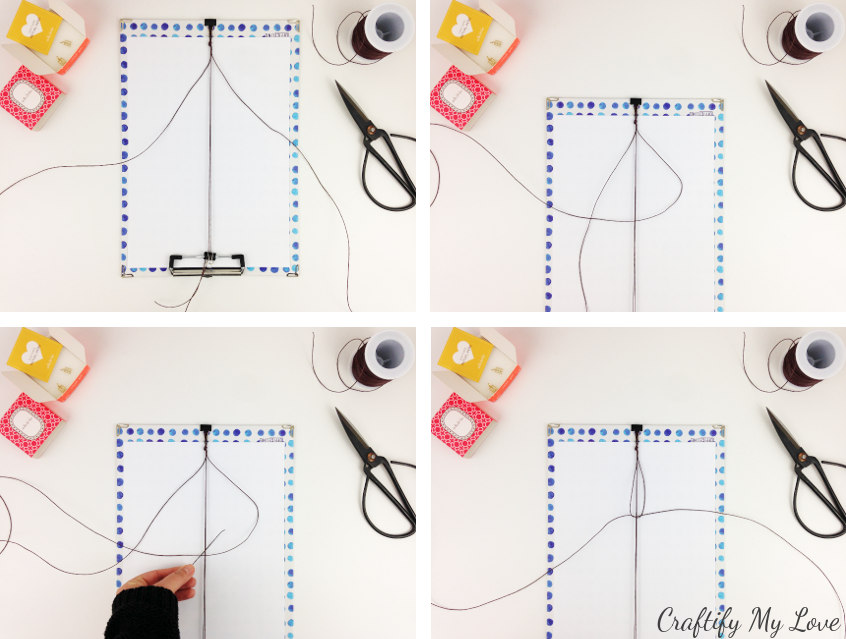
- Pass the right tying cord over both anchor cords. Pass the left tying cord over the top of the right tying cord (see top right image).
- Now pass the left tying cord under the anchor cords and through the loop formed by the right tying cord (see bottom left image).
- Pull on both tying cords to tighten the knot (see bottom right image). You have now completed your first half-knot!
Repeat these steps to create a row of knots. After only a view knots you’ll see that your work will spiral naturally.
Tip: You’ll have to make quite a few knots and you will have to pull on tight I started to get blisters on my middle finger really soon and used some self-adhesive cling tape to protect my fingers.
3 – Adding a Charm to Your Macrame Spiral Bracelet
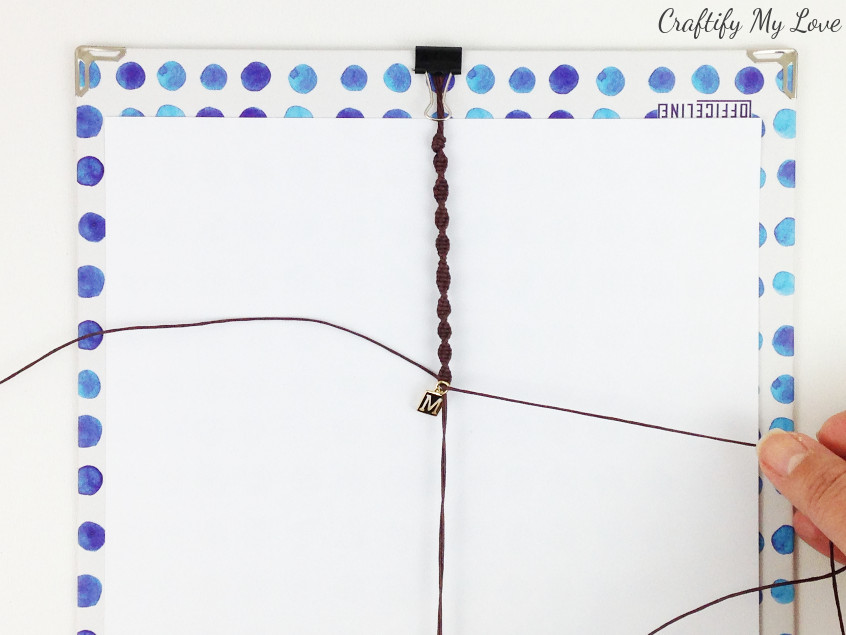
Continue tying knots until you have reached the length where you would like to add your charm (I did after 8 cm / 3 inches of spiral knots). Slip the charm over the right tying cord and perform yet another half-knot.
I scored Stella & Dot’s gold-plated initial Soho Charm on SALE!
You can even customize your charm at Stella & Dot!

Keep on knotting happily away until you’ve accomplished another 8 cm / 3 inches or whatever length you need.
4 – How to Finish Up?
Lay your bracelet around your wrist. If you are happy with the length of your bracelet it’s time to finish things up.
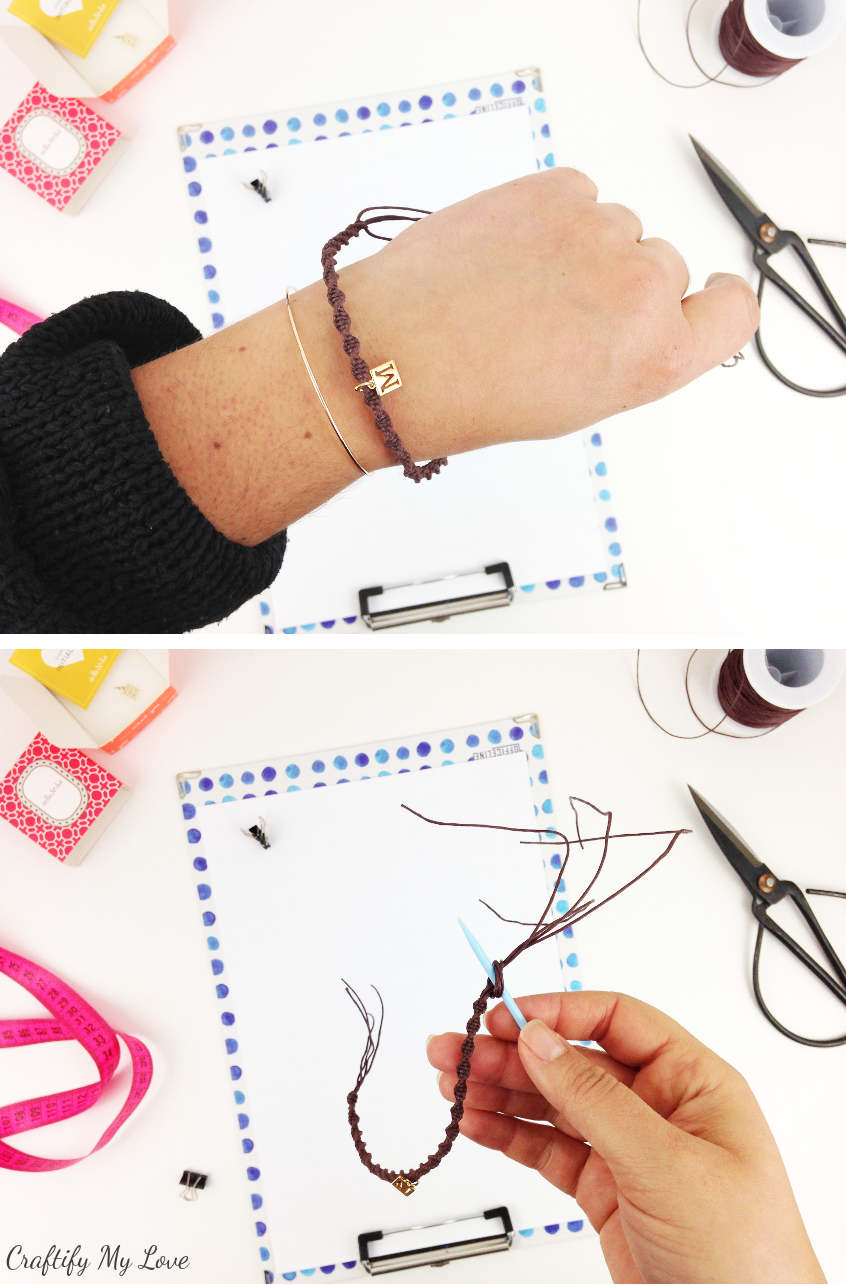
Simply make a regular overhand knot. By using an embroidery needle as a little helper you can easily guide or slide the knot to the very end of your knotted macrame spiral. You’ll need to insert it into the knot before you pull tight.
You’ll find an alternative method (and really my favorite) in the video tutorial where you’ll end up with less loose ends.
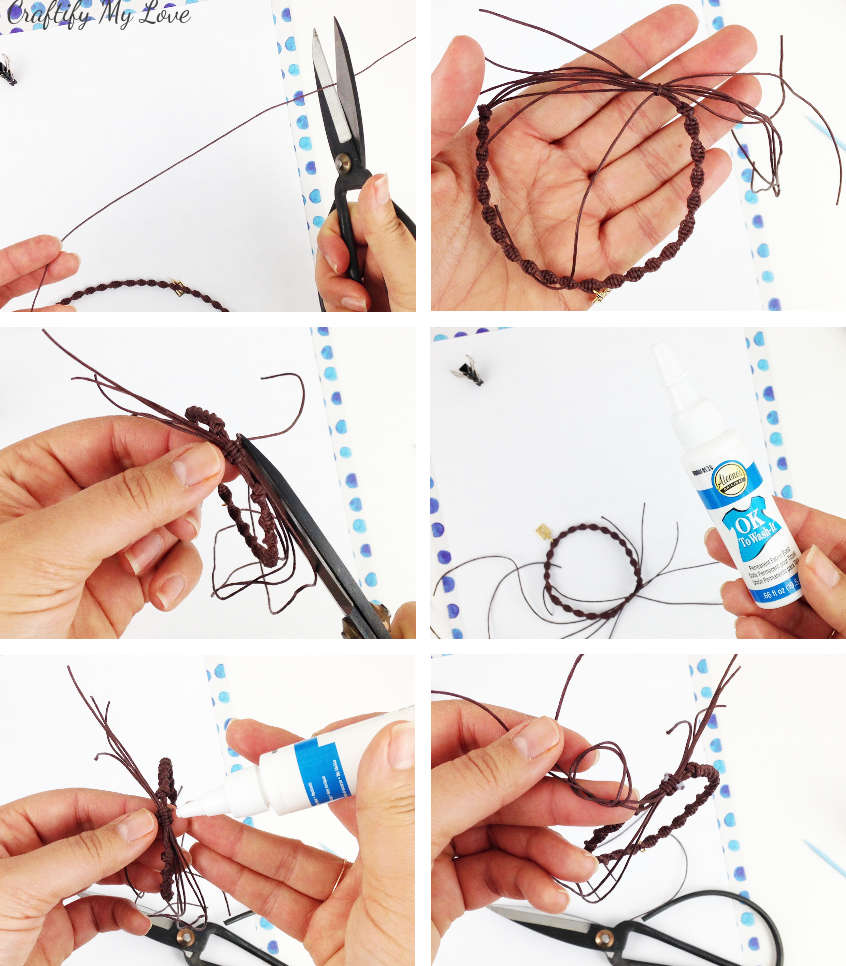
5 – How to Make an Adjustable Sliding Knot Clasp using the Macrame Square Knot
I love to be flexible, so tying the bracelet around Markus’ or my wrist with a permanent knot wasn’t an option. I didn’t want to have to invest in a store-bought clasp – aka there was simply no time to get one, lol. So I simply learned how to make an adjustable sliding knot clasp. I have seen and worn them a million times on those fun cheap bracelets I bought while on a beach vacation. Have you, too?
5 Simple Steps:
- Cut a little over 30 cm / 12 inches of your cord.
- Loop your work around your fingers and hold the ends of it parallel to each other. Place your cord in the inside of your bracelets middle and tie the first square knot (see how to in the video tutorial HERE) to the middle of the parallel ends of your work. Tip: If you don’t pull as hard as for the bracelet knots, the sliding clasp will be easier to operate.
- Repeat making square knots. The number will depend on how wide you want your adjustable sliding knot clasp to be. I’d say about 2 – 4 square knots.
- Cut the ends of the cord you’ve used to tie the square knots closely to your work and dab them with washable fabric glue. Your adjustable sliding knot is complete.
- To finish things up, you’ll tie the two anchor cords together using an overhand knot and trim the ends.
And you’re done!
Remember that in my first try I ended up with four cord ends to each side of my bracelet. Check out the optimized version in my video tutorial. You’ll end up only having two cord ends which means less mess on your wrist, lol.
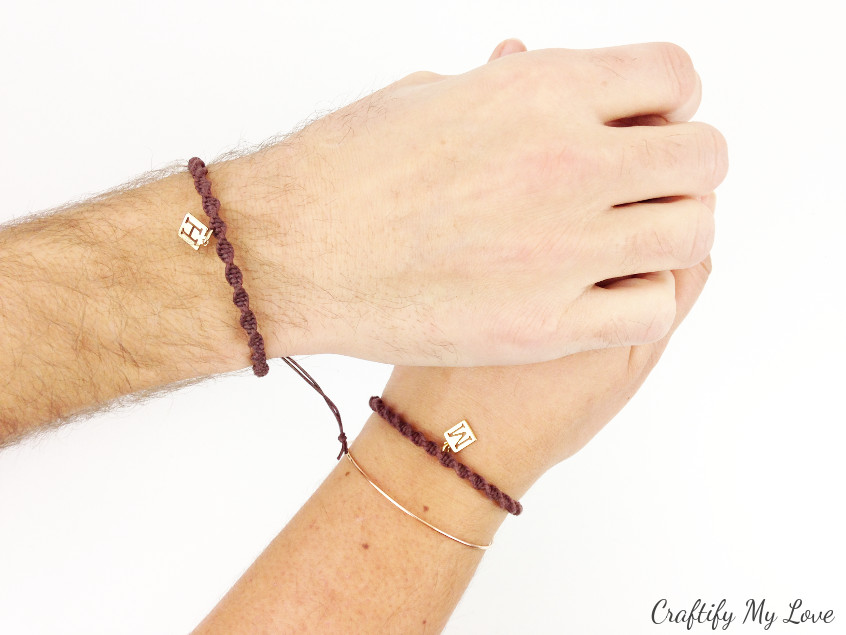
Don’t you think that these macrame spiral bracelets look cute on our wrists? I think there is no need for a bulky bracelet on a man’s wrist. Delicate DIY jewelry looks just as nice.
In case you are now totally into making your own jewelry (find all my tutorials HERE), make sure to check out these other tutorials I’ve put together for you:
- Red Suede Teardrop Earrings
- Crocheted Boho Hoop Earrings
- DIY Dried Flowers Wood Pendant
- Find great inspiration over at FaveCrafts.com
Love,

PS: Don’t forget to PIN this to Pinterest
Now let’s see what other things Pinterest inspired! Head over and visit the other hosts to see what they crafted, cooked, built, or tried!
Erlene – My Pinterventures • Jenny – Cookies Coffee and Crafts
Debbee – Debbee’s Buzz • Bri – Halfpint Design • Julie – Sum of their Stories
T’onna – Sew Crafty Crochet • Beverly – Across the Boulevard • Debra – Shoppe No. 5
Roseann – This Autoimmune Life • Cherryl – Farm Girl Reformed
Leslie – Once Upon a Time & Happily Ever After • Kelley – Simply Inspired Meals
Lydia – Lydia’s Flexitarian Kitchen • Joanne – Our Unschooling Journey
Kristie – Teadoddles • Gail – Purple Hues and Me • Ashley – Emory Farm
Kristie – Love My Little Cottage • Crissy – First Day of Home
Habiba – Craftify My Love • Marie – The Inspiration Vault • Emily – Domestic Deadline
Lauren – Mom Home Guide • Maria – Simple Nature Decor
Alexandra – Eye Love Knots • Lynne – My Family Thyme • Terri – Our Good Life
Marci – Stone Cottage Adventures
Susan – SuzerSpace • Kim – Kimspired DIY • Pili – My Sweet Things
Kelli – K’s Olympic Nest • Erin – The DIY Nuts • Shirley – Intelligent Domestications
Pinterest Inspired Projects
Your bracelets are so cool, Habiba! I love this simple technique of the twisted knot! Macrame is making a trendy comeback and I love how you’ve given us an easy to follow wonderful tutorial!
Oh Gail, thank you for that lovely feedback. Once the video is done it’ll be even simpler to follow the instructions
Your tutorials are always so easy to follow. These bracelets for couples are a great DIY gift idea. I’m thinking Christmas Stockings this year!
Hi Shirley. It’s been awhile. I’m happy you like these bracelets and I am blushing over your compliments. Thank you so much.
What a sweet gift and I love the little charm, it just gives it a little extra. Your tutorials are always great, I can jump right in and make this!
Thank you, Jenny. Markus really likes it and we both wear it day in and day out.
I remember making bracelets just like this when I was in high school (or maybe middle school?). We used embroidery floss in all sorts of colors and this was one of my favorite patterns to make. I love the idea of adding a personalized charm to them! Pinned.
Wenn was in school we made macrame bracelets, too. Also with embroidery floss but a different multi coloured chevron style. They took forever compared to this one, though.
I love your macrame bracelet! I will definitely be giving this project a try. Thanks for sharing!
Lauen, now that makes me super happy! Thank you and please report back if you have any questions or would like to show your finished bracelet.
Habiba, you always create the most wonderfully photographed step-by-step tutorials, and this is surely another! I am like you — crafting puts me in my happy place and is definitely a destressor.
Thank you, Debbee. I really appreciate the compliment. When I want to try something new I’d love to find super detailed tutorials that answer all my questions I might have during the creation process. Mostly I don’t, so I try things out and create those tutorials for others to find on my blog.
Great project, Habiba! Your tutorial and video are so well done. I love your site, by the way. It’s very clean and really pops! Glad I got to meet you on this blog hop. 🙂
Hi Chrissy! Nice to meet you, too. Thank you for all your kind words. Love bright colours and contrast – I guess you can tell by the look of my site ?
What a great gift! Macrame has certainly made a comeback!
It sure has. I’d love to do different crafts using this technique.
I love this project and I love the look of your site! Happy to be in the challenge with you this month!
Hi Erin! So nice to meet you through this challenge. I’m glad you like my bracelets.
I love how you created this. This is so adorable.
Thank you so much my creative friend!
I remember making macrame bracelets with my cousins. I haven’t made one is years and this brings back so many fun memories. What a fun way to make a couples bracelet.
Thank you, Erlene. I remember making them when I was a young girl, too. We made them in a chevron pattern.
I would so wear one of these-don’t even mind the messy cord one. Would be such a fun project to do with friends especially since you included a video (Thank you by-the-way. I am one of those people who need to pause every 5 seconds LOL). Not sure how you get such amazing photos. Do you have a tutorial on that?
Hi Kelly! Thank you so much for your nice words. I am wearing the messy cord one and I don’t mind either. I have photos taken in forever on how I take my pics but not managed to write the post. If you want, I could write you a short message with the gist or sit down and finally get that post up. Have a fab weekend my friend.
Hi Kelly! Thank you so much for your nice words. I am wearing the messy cord one and I don’t mind either. I have photos taken in forever on how I make my pics but haven’t managed to write the post just yet. I could message you a sum up or sit down and finally get that post up.
These are adorable and I would so wear one. Not sure I would have the patience to make one (because I know it would take a lot of oopsies before I got it right LOL) but I sure would buy one.
With all the tips I am sharing in my video you won’t be making any oopsies, Kelli.
I love that you made matching bracelets for you and your sweetie! It’s been ages since I attempted macrame. At one time I was quite the wizard with it. (OK, not really) Thank you for the step by step directions! pinning -Marci @ Stone Cottage Adventures
Hi Marci, my mom once made an amazing owl walk hanging using macrame technique and other stuff. I’m sad she can’t teach me as she simply can’t remember how she did it. I wish she had had a blog back then, lol. Thank for your lovely note.
I knew I liked you!! I get so nervous when I try a new craft or project. I have so many projects that I start and then get scared to finish. Terrible!!
These bracelets are just perfect. When my PC and I first met, we bought each other similar bracelets made of hemp or jute. I still have mine and like to wear it on beach vacations. Ha!! Not sure why! But something about them says vacation, sunbathing, beach. Love that you personalized yours with little charms. A darling project. And a really lovely post.
Oh, Leslie, I always love receiving your wonderful messages. I feel we would be really good friends and could help each other out finishing those projects if we were to live closer together. I’d make you a BFF bracelet to accompany your other bracelet on those lovely beach days.
These are lovely, I’ve not made anything like this for years, you’ve got me all inspired – thanks! Pinning.
Hi Julie, that’s what I am here for…to inspire others to do something creative they haven’t done (in a while). Thanks for your support.
Such a pretty project, Habiba! I haven’t done macrame in years. Your video and step by step tutorial are so well done that they make me feel like I could give it a try! Pinned!
Thank you, Lynne. I’m glad my tutorial is inspiring to you and I hope you f und the time to really give it a go. They are fun to make and look adorable when you wear it.
These are so cute and remind me of summer camp. Only we didn’t have nice macrame cord like you used! or charms…Now I want my own set!
Hi Lydia, I think you could do your very own set in a little over an hour. Why don’t you go ahead and make them?
I was just recently teaching my daughters how to make macrame bracelets. I bet they would love them with their initial included!
What great timing! Easter is coming up soon. Those charms would make a nice little treat, right?
Your bracelets look great! It also looks like a fun.
Thank you. They were fun to make.
[…] برای خودت و دوستات دستبند بساز […]