
During January’s Craft Room Challenge I definitely needed some creative moments, too. Who can only clean & purge, right? I decided on making a three-piece wall art for my craft space and would love to show you today how to make this darling crocheting inspired string art.
Keep on reading for a simple step by step tutorial. It is my first string art project and I think it turned out pretty good. What do you think?
If you are more into sewing, you’ll find the sewing themed part of my craft room decor here. And the painting inspired one is explained in detail here.
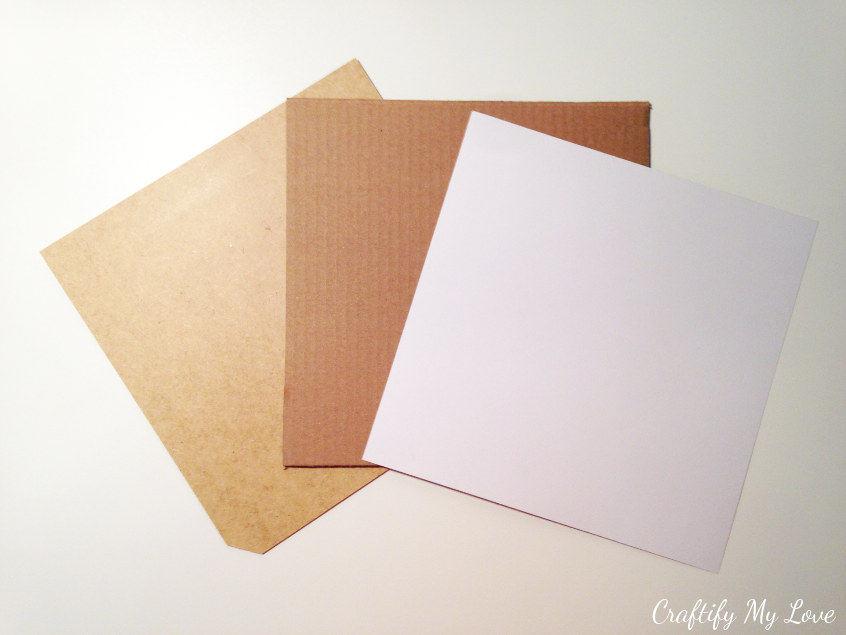
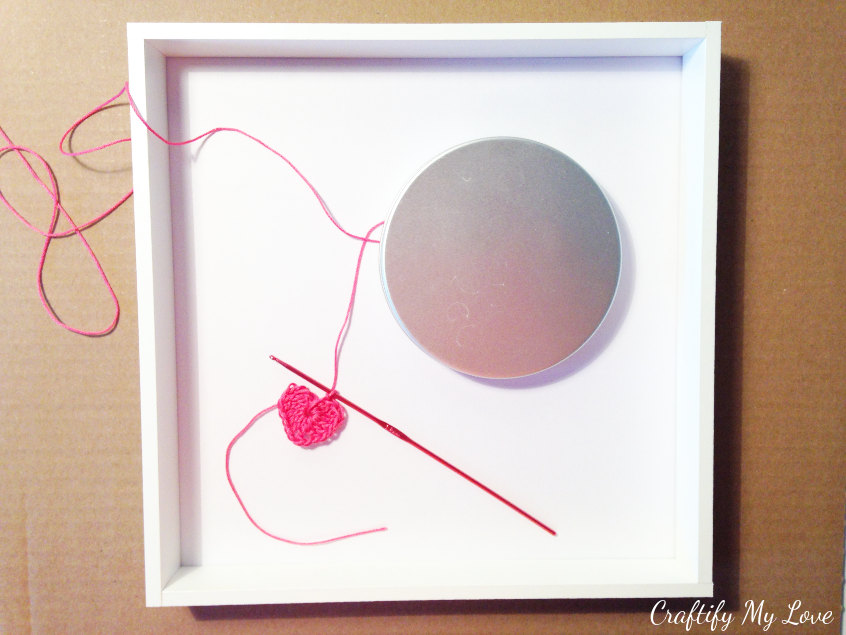
Supplies
- IKEA frame RIBBA
- cardboard (recycled from this delivery)
- white cardstock
- tissue paper
- spray glue or glue stick
- E6000 (or any other heavy-duty glue)
- nails
- crocheting yarn in several colours
As I only had to buy the IKEA frame, this is yet another perfect project for Megan’s monthly Craft Room De-Stash Challenge. This is a challenge where we’re supposed to use up parts of our gigantic supply stash and are only allowed to buy extra stuff for $10. Check.
Tools
- Scissors
- Hammer
- Crocheting Hook
- circle template (I used a lid)
- pencil
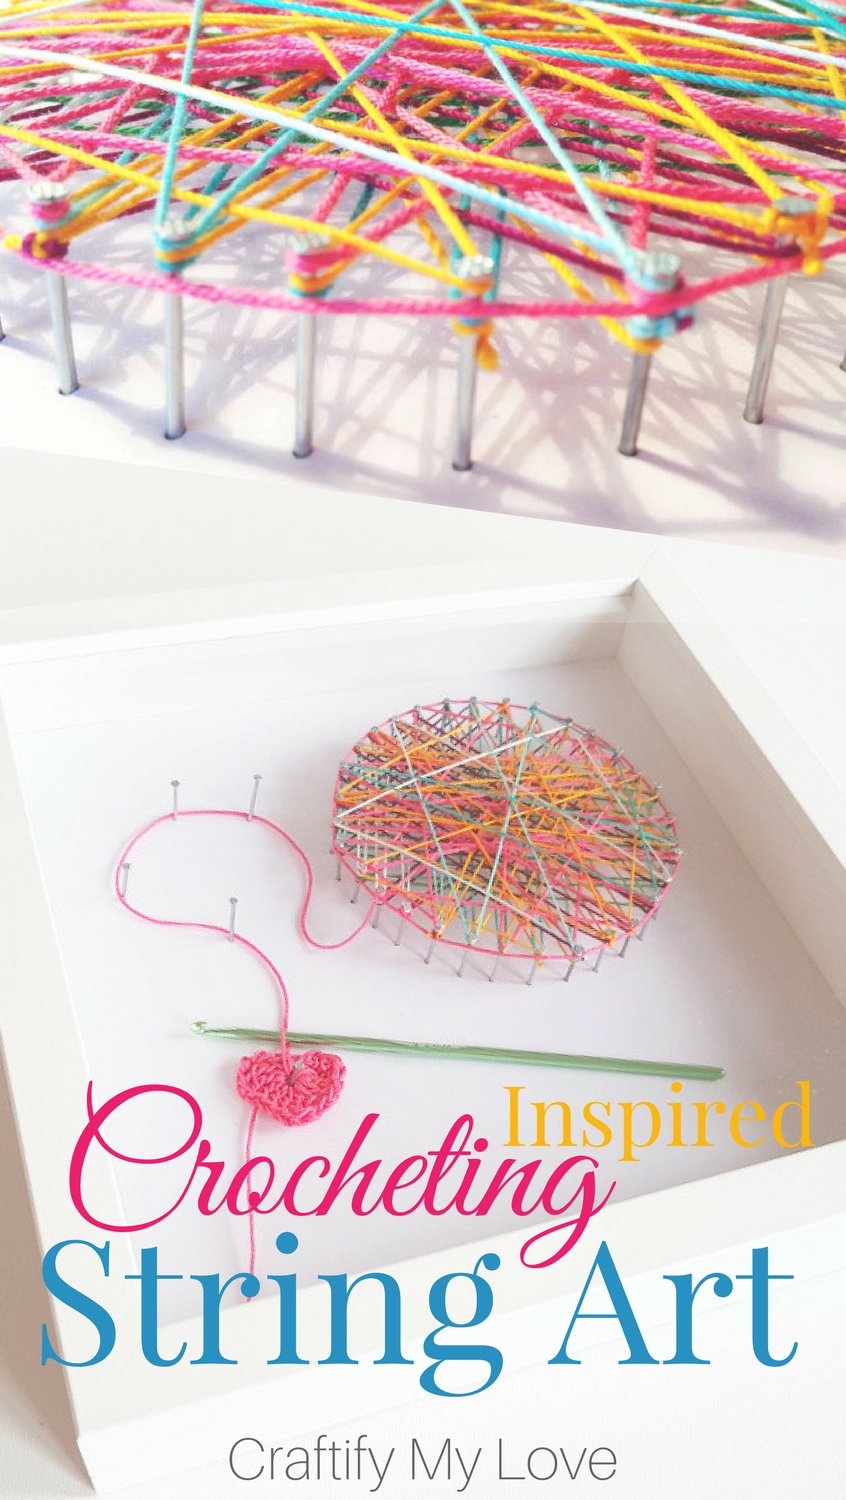
How To Make Crocheting Inspired String Art
It’s pretty simple, really! Take these 5 steps to create your very unique craft room wall art:
1 – Preparing The Base
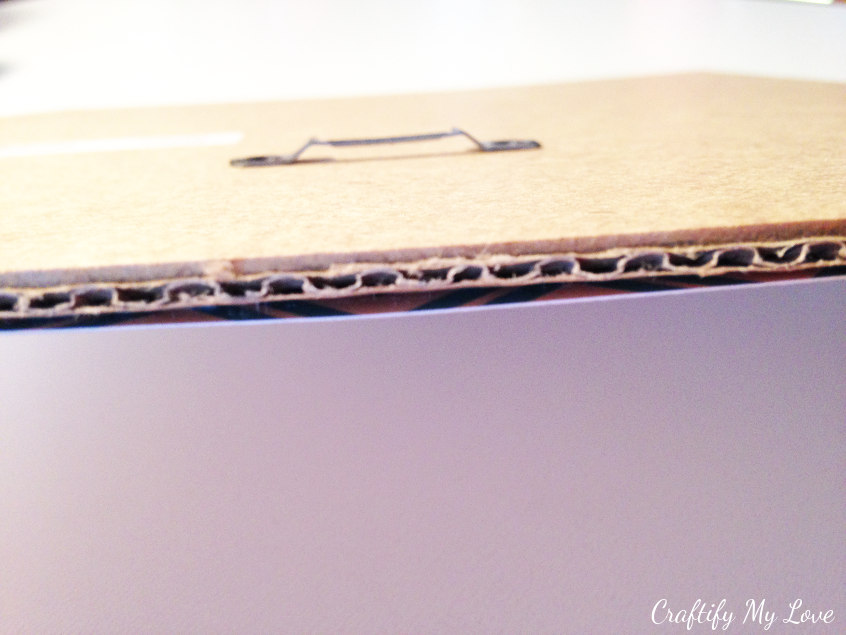
Most string art projects are made with a wooden base. But I wanted it to be inside of an IKEA Ribba frame so I had to make this work.
The base of the Ribba frame is plywood but not thick enough to make the nails stick tightly. So I added a rather thick layer of cardboard to it. A white card-stock paper went on top of it.
What I didn’t do, but you most definitely should:
Add yet another layer of paper: Tissue paper! This way you can trace the outline of your circle on it and can simply rip the paper away, once all your nails are in place.
I marked the outline directly on the white cardstock (it was very early in the day and I obviously wasn’t thinking straight, yet) and had to erase it later. For that, I needed to pull out all the nails and put them back in *add massive eye roll here*.
Glue the layers together with either a spray glue or glue stick. You don’t want to see the glue lines from a more liquid glue on the top of your cardstock.
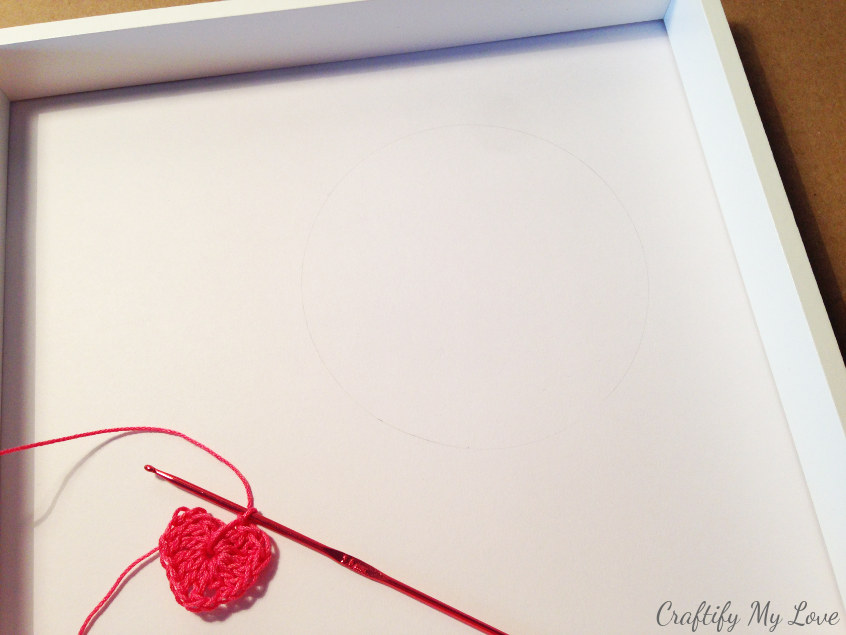
2 – Decide On The Design
Find a circle template (I used the lid of a big jar) to decide on the place of your string art ball of yarn and the crocheted heart.
You’ll find the YouTube tutorial on how to crochet this small heart here or directly in this post when you scroll further down.
Trace the circle with a pencil. If you are using that above-recommended sheet of tissue paper, you can use a pen as well and make the line thicker.
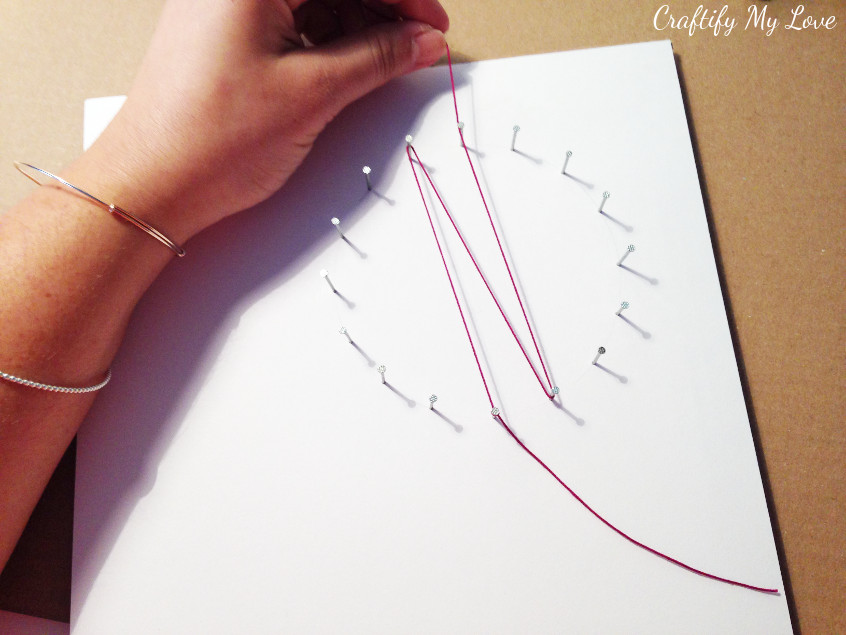
3 – Hammer Down Those Nails
Now it’s time you start pushing in those nails. Instead of painfully measuring the spaces in-between, for an even circle you could add them in this manner:
- 12 o’clock
- 6 o’clock
- 3 o’clock
- 9 o’clock
After that, you’ll find it way easier to add more nails to it evenly without using a ruler. Promise!
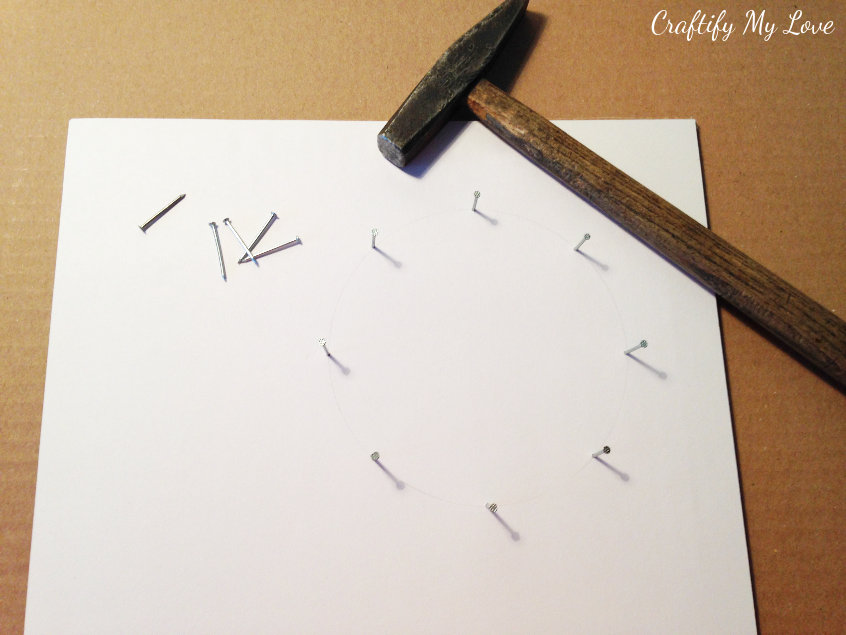
Simply fill in the gaps until you’re happy with the outcome.
Don’t stress if your nails are a bit crooked, you won’t see as soon as the yarn is added.
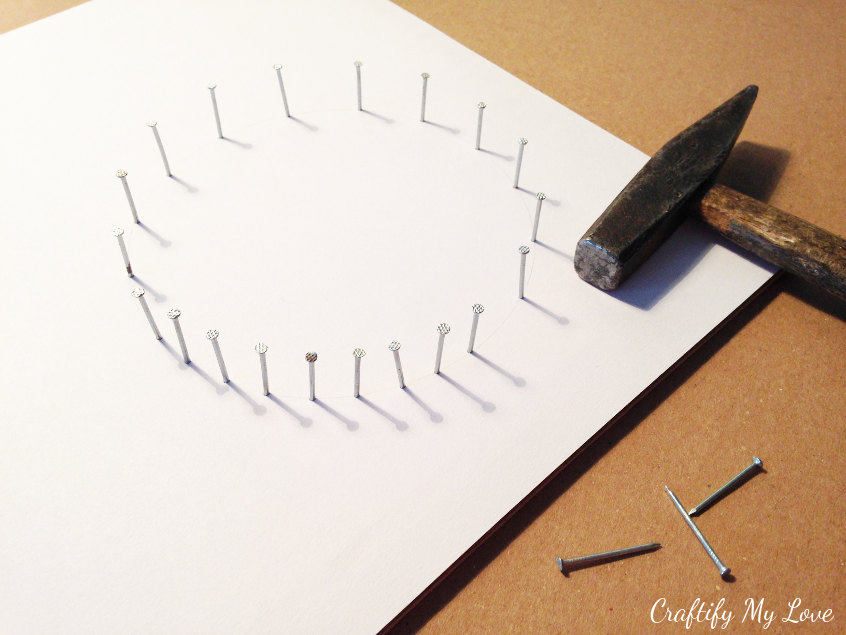
Make sure to drive the nail completely through the base of your crocheting inspired string art. This way the nails will be set firmly into the wood and will hold the pressure when stringing the yarn around them.
Needles to say, you’ll be needing a protection for your workspace so you won’t ruin your table. A piece of that cardboard would do just fine or a self-healing cutting mat (one of my favourite tools when crafting!! And boy, do I wish I had a pink one like this.)

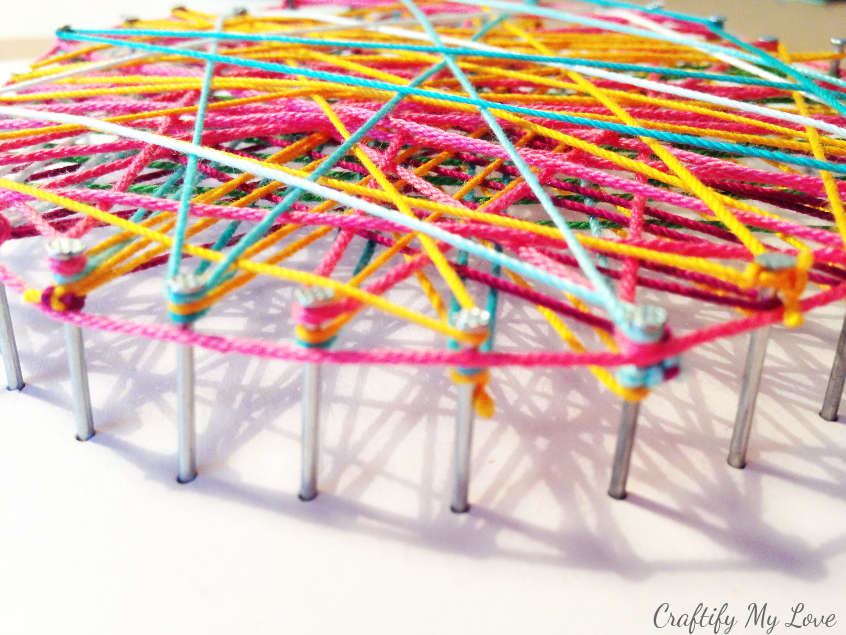
4 – Crisscross Yarn Around Nails
Tie your first colour of yarn around one nail. Don’t cut the end off just yet. You might need it for a colour change later.
Start zigzagging happily away until you’re ready for your first colour change.
Tie your second colour to yet another nail and keep on stringing.
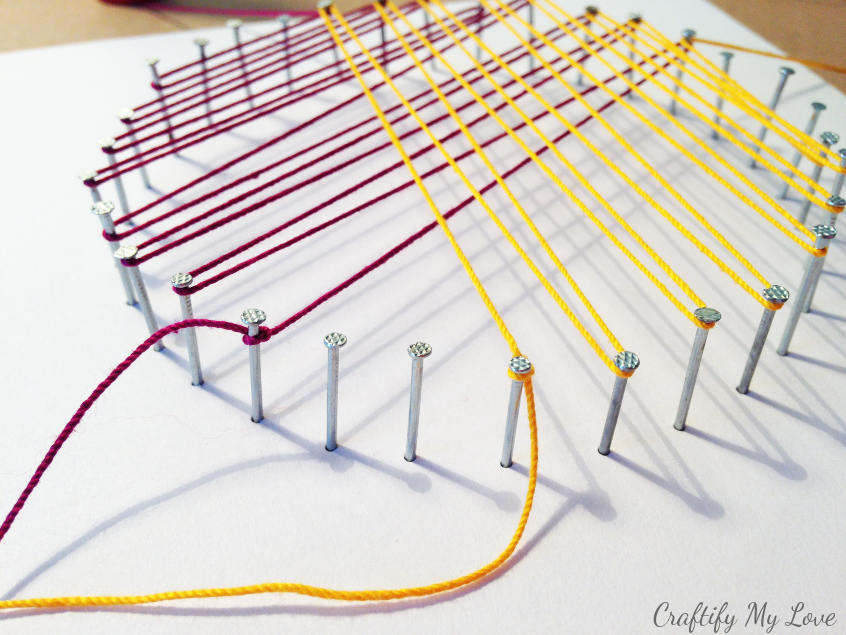
Place something heavy on the loose strings, so they won’t come undone. Once you return to that nail with another colour, you can tie the two strings together and secure your work by doing so. Aim for as little knots as possible.
If you plan on using the same colour later again, don’t tie a knot just yet.
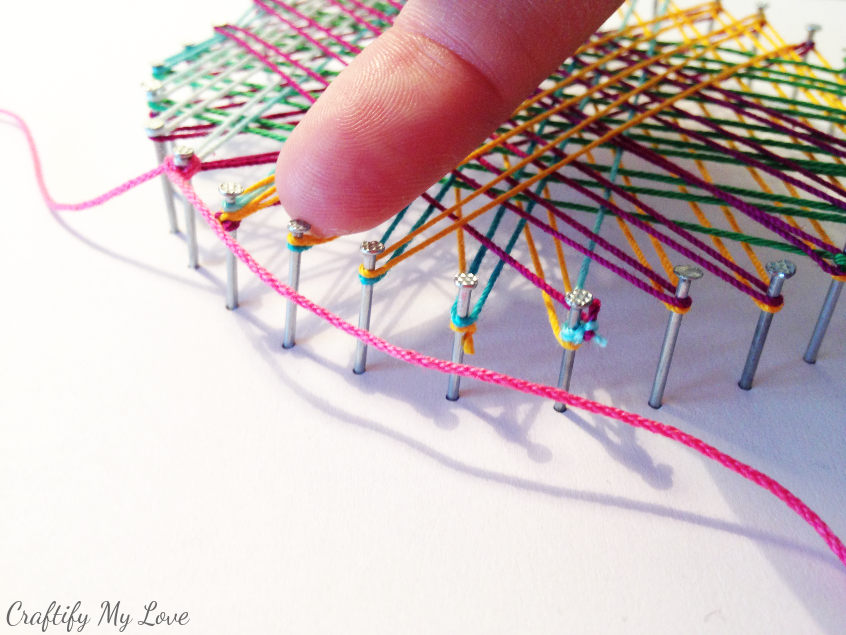
You can push the strings slightly down a bit using your fingernail. This way you’ll be able to add several layers and create an even more interesting pattern.
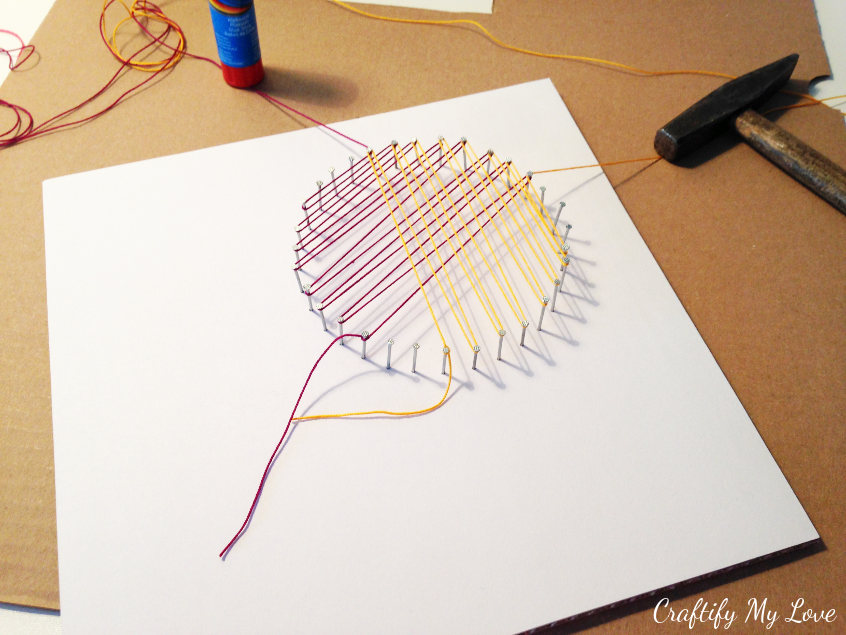
In the beginning, I thought I wanted to create an even pattern, mimicking the way a ball of yarn is wound up. But throughout this crocheting inspired string art project, I realized that I actually liked it even better, when it was a total crazy mess.
The crazier, the better!

To finish your string art off, you should add a border around it. I used the very long tail of my previously crocheted heart element (see video tutorial here or further down).
You can either twirl the string around every nail or simply lay it tightly around the entire circle (which is what I did because I had way too many layers of string on some nails already).
5 – Add Crocheted Heart and Crocheting Hook
Lay the yarn leading to your crocheted heart in a bent way on your artwork and give it guidance with two to three nails.
One nail through the heart (now that sounds awful, right?) and you’re almost done.
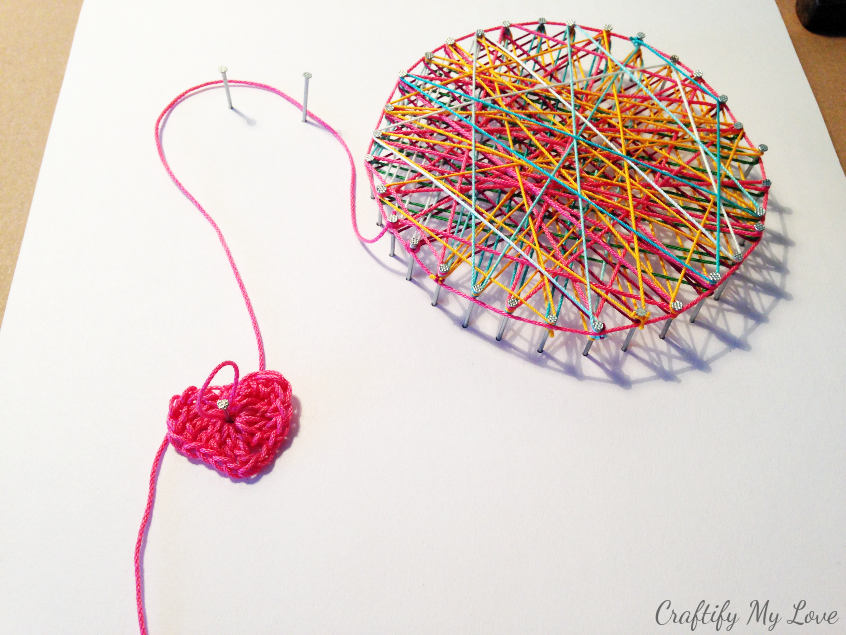
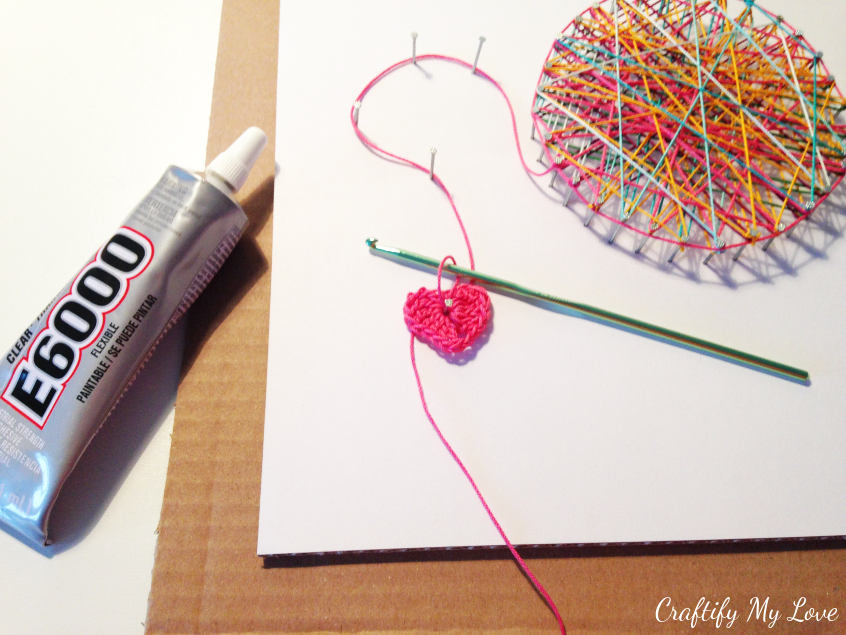
Glue a crocheting hook (you don’t need anymore – check thrift stores if you don’t want to part with your good ones) to your string art. Make sure it goes through the last stitch of your crocheted heart for a more realistic look.
Now, all that’s left to do is the assembly of your IKEA RIBBA frame. And you’re done!
I think this crocheting inspired string art would be the perfect gift for Mother’s Day, don’t you think? That is if your Mum enjoys crafting of course 😉
Love,

PS: Don’t forget to PIN this to Pinterest.
How To Crochet A Heart
Crocheting a small heart is super easy! You can do it in about 4 minutes. Simply follow along with this little video tutorial I’ve made just for you!
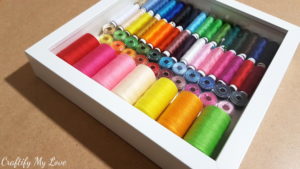
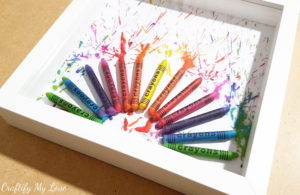
Craft Room Wall Art – Set of 3
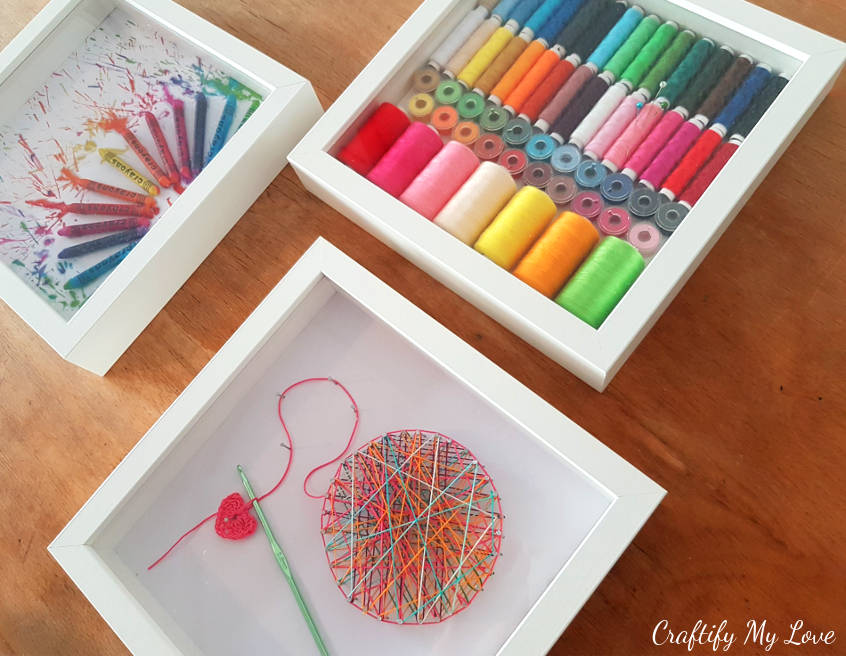
Next to this crocheting inspired string art I’ve made a piece that is representing my love for sewing and one that stands for my paper and paint crafting skills.
Sewing Inspired Craft Room Decor
Painting Inspired Wall Art
Craft Room De-Stash Challenge
If you’d like to join in the Craft Room De-Stash Challenge, you can request to join our Facebook group here!
What a wonderful project! I love all the vibrant colors! -Marci @ Stone Cottage Adventures
visiting from the de stash challenge
Marci, I love those colours, too. They make me happy, whenever I pass this little piece of art.
I admire string art, and I appreciate the tutorial (and the video) on this! Yours turned out so pretty Habiba. I like the way you went around the perimeter too.
I was always swooning when I stumbled over images of string art and wanted to give it a try. It’s not difficult at all, you should try it Florence.
What a great tutorial. Your project turned out fantastic. Plus the colors are so bright and happy looking. If I were your mother I would love this gift 🙂
The funny thing is, you’re right, my mum would liberals gift even though she doesn’t crochet at all, lol. She would love the colours, te heart and the fact that I sat down and made it for her.
Fabulous! I loved your thread art box last month….. now the three are done and they look really great together.
Thank you Dione! Can’t wait to share the video I took while I messed with the crayons, lol. What a mess I’ve created…but it was sooooo much fun for sure.
This is absolutely adorable. Thanks so much for the inspiration as I want to make this for a friend.
See, that’s what I craft for. To inspire my friends out there to get crafty and either create the exact same thing or something similar. Thank you so much for your feedback, you really made my day!
What a cool project! I absolutely love it!
Thank you Michelle!!! I had so much fun doing my first string art. Ever.
WOW!! That is beautiful!
Thank you so much, Deborah.
Your string art project turned out a great! I love the three frames you’ve made!
Thank you for the lovely comment. I am very fond of my little art project ?
Love your string art project! The little heart makes it so special.
Sharon, thank you so much ? the heart was a spontaneous addition. I think those are always the best ??
I absolutely love this! It’s such a fun way to represent the art of crochet. Your thread art is wonderful as well. Such great ideas for craft room decor!
Awwww, thank you so much for your kind words, Kristie. I have even more ideas in mind to add to my craft space. So stay tuned ?
What a great way to add color to a room!
I thought so, too! Bright colours make me happy.
I love the way this turned out Habiba! I really like how it looks in the shadow box. Nice!
Thank you so much, Ola! I like it, too, and it won’t get dusty, lol.
This is such a gorgeous piece of art, and PERFECT for a craft room! I love how bright and vibrant it is! Pinned!
Thank you so much, Megan, for your nice words and support ?????
Considering most of my destash projects have been crocheted to attempt to dwindle my stash… I really need to make one of these!
Haha, yeah Emily, I think you’re right about that.
Nice post 🙂