How it all began
I once had a big project going on. I was so fed up of winter and was craving summer and all the blooming flowers that I decided I’ll make myself an ever-blooming rose-bush for my bedroom. On one of my walks I collected some big branches and brought them home. All that was left was crafting gazillion little paper roses to decorate the bush with. As I love butterflies, too, I bought myself a biology poster and cut them out and glued them to the bush. Absolutely darling to wake up to this magnificence every morning, I tell ya!
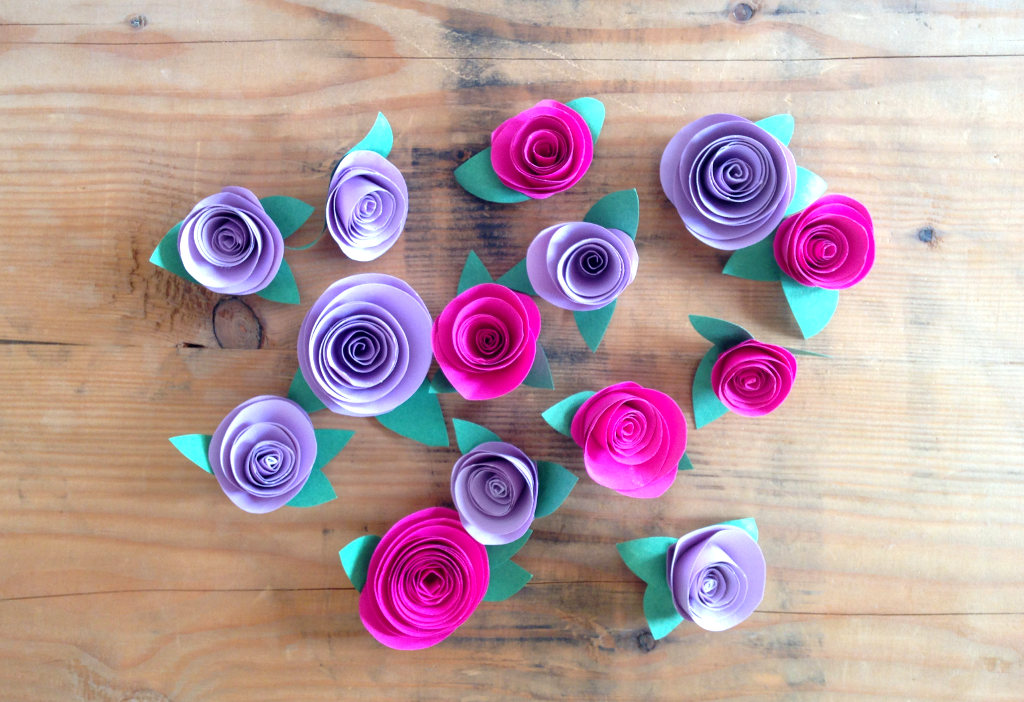
More and more paper roses
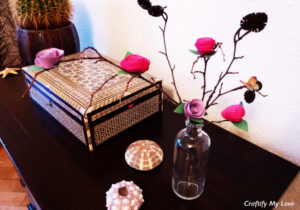
Throughout the years I realized that my paper roses come in handy every now and then. I recreated them so often, trying out new materials, having new projects in mind, you name it! I applied them to a heart-shaped spring wreath I bought on a farmers marked to make it a little bit more unique. And I made several ever-blooming mini rose bushes. They make for a good gift especially for Mother’s Day I think.
A German tradition
I even gave some to my friend for her daughters first day at school. Why? See, we have this tradition in Germany, to give our children on their first day of school a large cornet, filled with sweets and little toys. As crafting became more and more trendy, moms (and they might even let sometimes help their little ones, too, if they don’t want to keep all the sparkle to themselves, lol) started to make them on their own. And my friend asked me for advice on how to craft the cornet with the same rose theme her daughter’s back-pack had.
Crafty Habiba to the rescue:
We brainstormed and I came up with the idea to add some paper roses. Easy, peasy!
Materials you’ll need
- paper (either pretty patterned craft paper, construction paper in your colour of choice, or even old book pages or magazines will work, let your mind be creative!)
- pencil, optional
- scissors
- (paper craft) glue
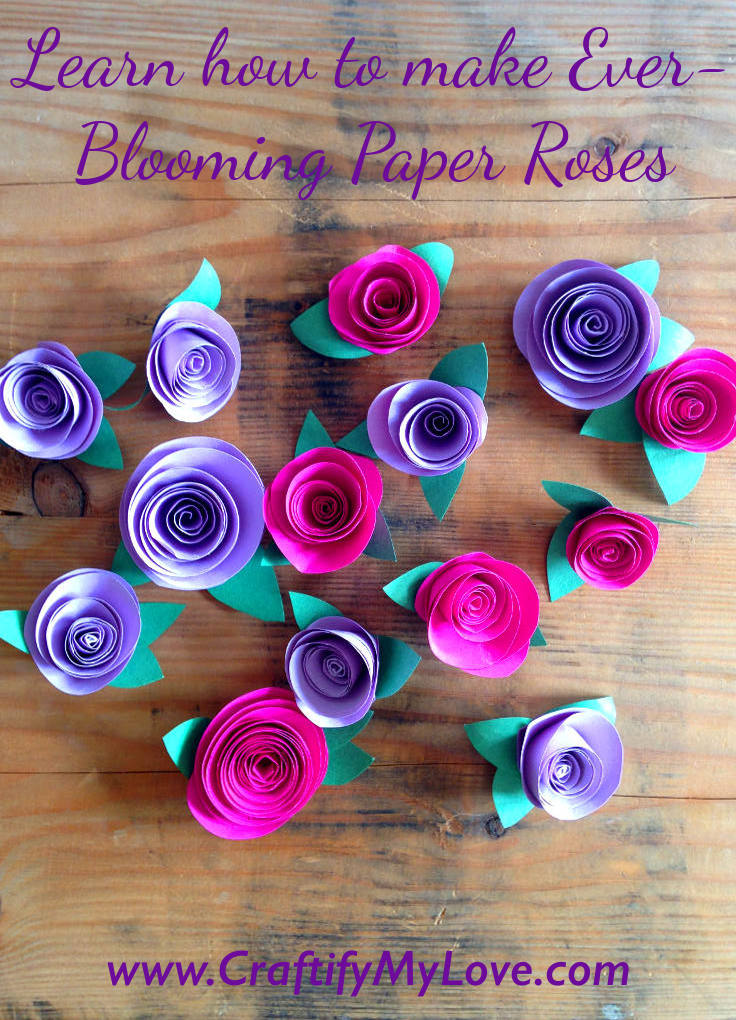
How to make paper roses
In this tutorial I’ll show you how to make them out of crafting paper. But I also made some out of book pages and magazines. That works great, too! You just might want to use less glue the thinner the paper, else everything will soak through and take hours to dry.
As I am a pack rat when it comes to crafting supplies, I have tons of paper at home, so I never did have to buy it. Bonus! How about you?
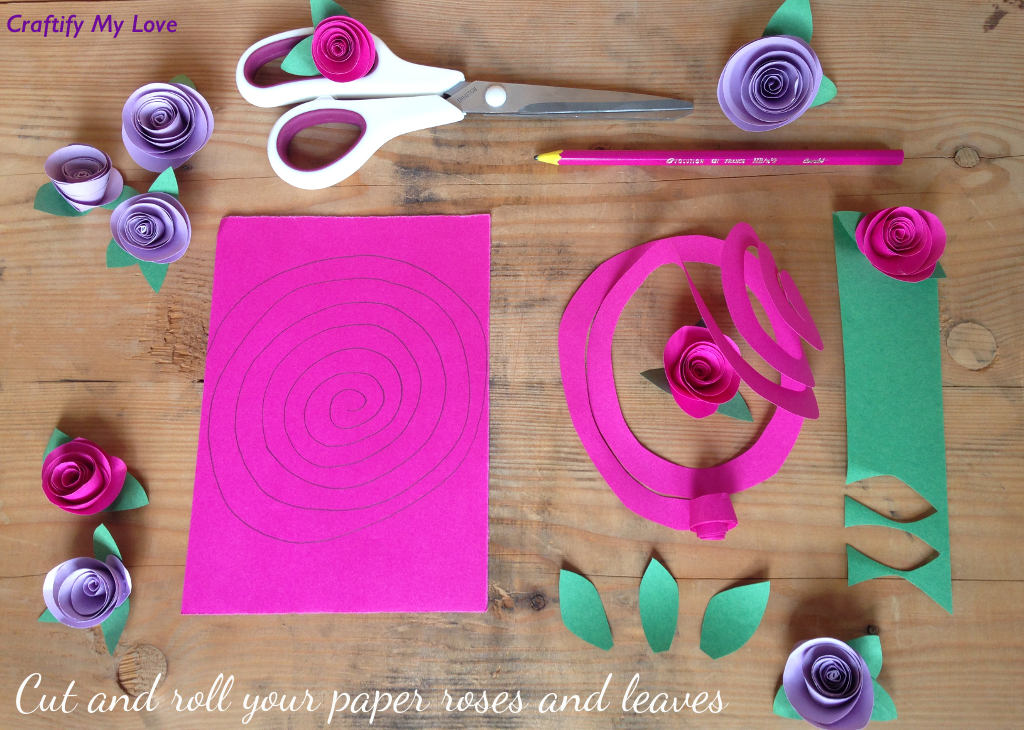
- Find a piece of paper you want to make your rose from.
- You could either draw a spiral on it with a pencil or start cutting with you scissors right away.
In the beginning I drew on the lines and after a couple of roses I felt pro enough to go freestyle 😉 - Messy is Good: Please don’t worry if your spiral’s not even. As you might see, this gives the roses a more natural look!!! Theres ups and down in the “petals”.
- Once you have cut out your paper spirals, start rolling them up tightly. Begin from the outer end and work yourself towards the middle of the spiral.
- Can you see the little almost round circle of paper I left in the middle? That’s the base for the rose.
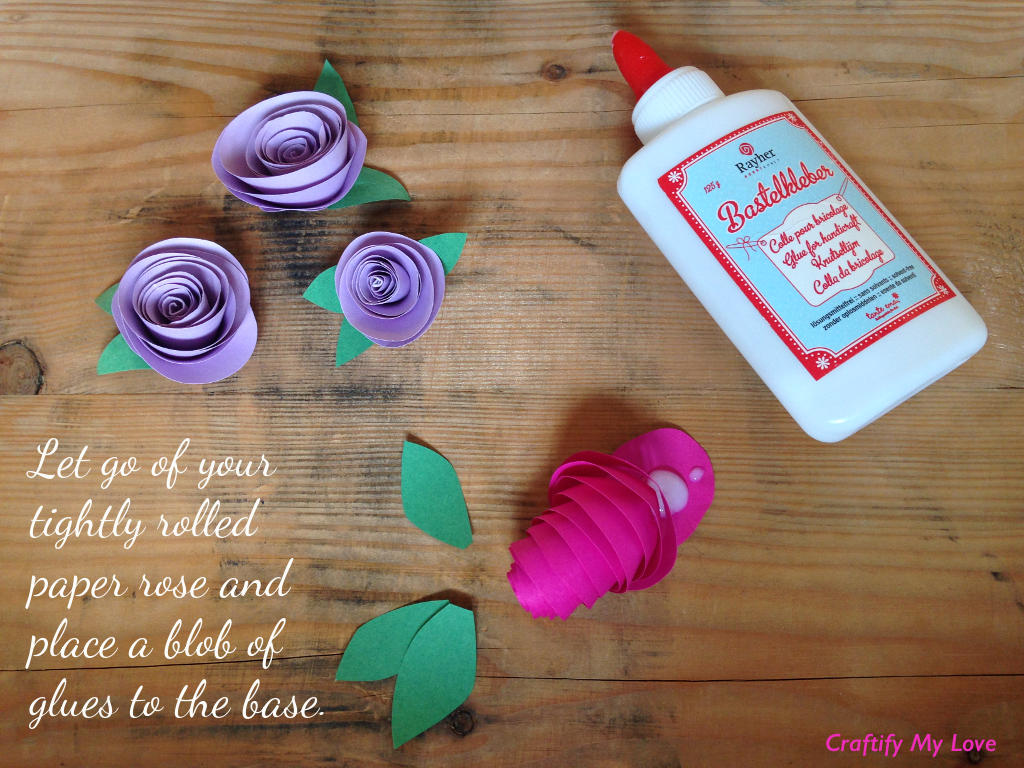
- Let go of your tightly rolled paper spiral. It will unfurl slightly and look more like a rose now.
- place a blob of crafting glue on the base and press your rose on it.
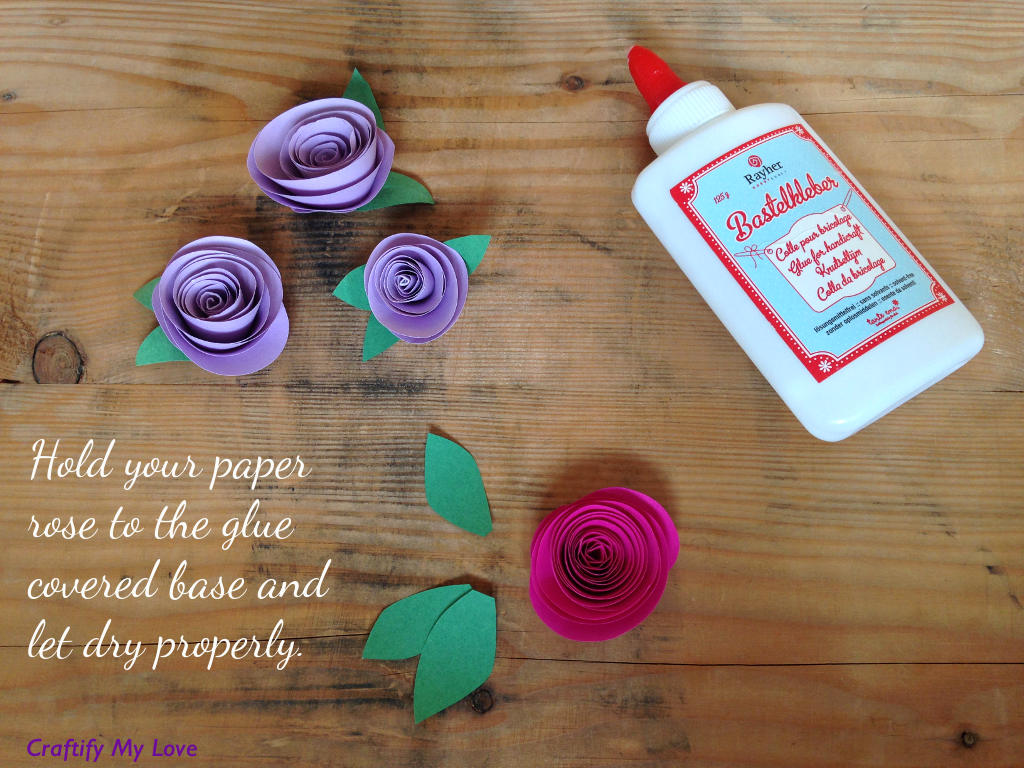
- Let it dry properly.
If you love flowers same as I do, you might also like:
- How to make a GIANT Paper Flower
- Crafting with natural flowers isn’t bad either 😉
- Tassel Flowers are a good way to use scrap yarn.
- Check out all my Flower Crafts HERE.
Add some leaves for a more natural look!
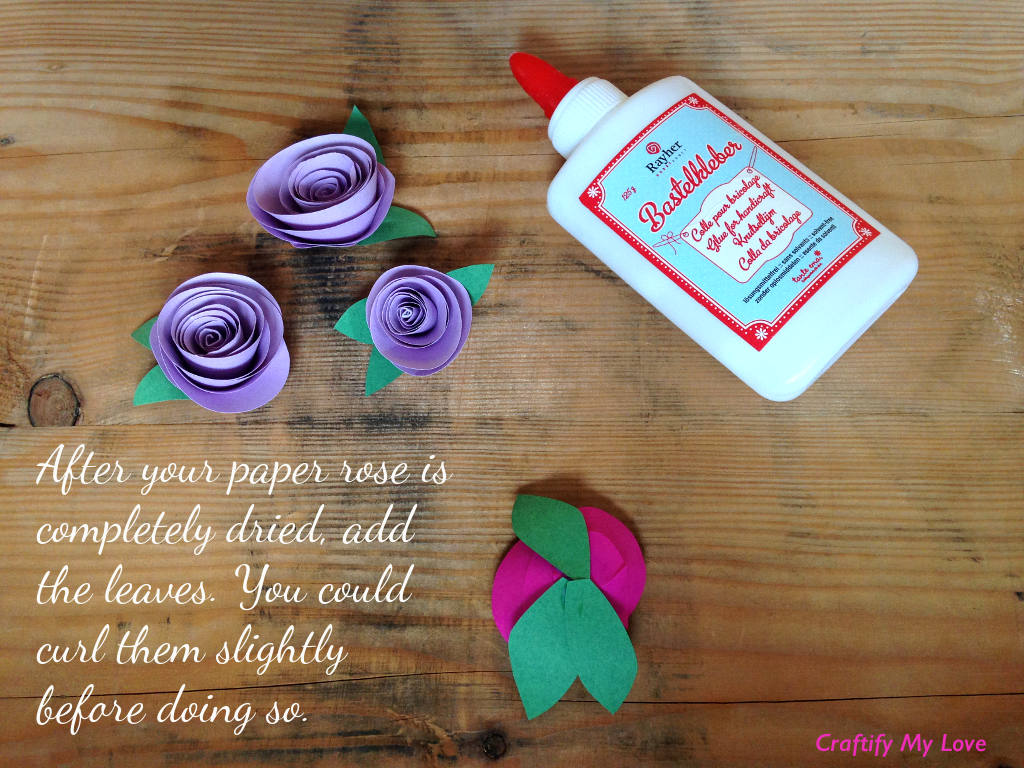
- Cut a couple leaves from a green paper.
- Vary in number of leaves per paper rose. I’d suggest between 1 and 3 per rose.
- Glue them under the base of your fully dried paper rose.
- Curl them slightly by scraping over them with your finger nail or a scissor (as you would do similarly with a ribbon)
And your done!
Now repeat as often as you need them, although I’d recommend working in bulk in order to stay sane ;-)!
Love,

PS: Let me know what you made out of these paper roses! And what sort of paper did you use?
PPS: Care to learn how to make Felt Flowers? Start here for a series of 5.

A little inspiration…
Heart-Shaped Spring Wreath in Lavender and Pink

Ever-blooming rose bush
Would love to see a picture of your bedroom rose bush!
That one sadly doesn’t exist anymore and can you believe it? I never, neeeeeever took a photo of it. I am a little frustrated about this fact!
These look so pretty and simple to make!
Thank you Valerie! And yes, they are easy to make, just give it a go!!
Hi !! I seen your flower craft on Ms. Shauna Mothers Day book reading . Your flowers were very Beutiful I will be trying them in the near future. Thank you for sharing !!
Hello again, Sabrina! Wow – I’d really love that!!! And if you like, send me a photo of your work – I always love seeing projects of my new friends!