I always considered myself an ok-ish knitter but for the love of god, I just couldn’t crochet! Several teachers at school tried to teach me but oh my, aaaaall those stitches, loops, bows, and wool would swim into a big blur in front of my eyes and I somehow was never able to see where the hook needed to go.
And then there came the day I needed to learn how to crochet! And fast!
This post contains affiliate links. That means if you make a purchase through these links, I may receive a small commission at no extra cost to you! You can click here to read my full disclosure.
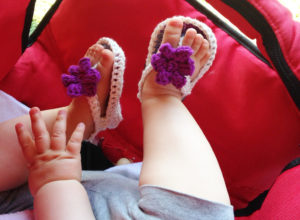
I remember it as if it where yesterday. I spent my summer vacation with my lovely friends in the south of England when I received a text from my very good friend and mother of my goddaughter. She sent me an image of the most adorable little baby flip flops and asked me “Do you think you can make these flippies for my little Moth? It would be perfect if she could wear them this summer!”. I checked the calendar, yup – it’s already summer. I looked closely at the image, and, oh noooooooo – they were crocheted!!!! But how could I ever say no, right?
For those out there who still are getting to know me, I am a very helpful person and if asked nicely won’t almost never deny being of support for friends and family. And I think there’s literally next to nothing I wouldn’t do for my goddaughter.

Sooooo – although a little scared (yes, I am not ashamed to admit that I get scared by crafting projects!! Even quite often to be honest…) I started researching and looked on Pinterest for free patterns. I found them easy enough, but then there was the problem of them being written in some sort of crazy foreign language I’ve never read or heard before (I mean, duh –> “ch 3. turn. dc in each of next 2 sts. * 2dc in next st. dc in each of next 3 sts. repeat from * 11 times. dc in each remaining sts to the end. 63 sts” – seriously, WTF??).
So what to do, right?
Ask google. That’s what! And google told me, that there are a gazillion crocheting videos on YouTube. And that is how I learned to crochet. Finally. As an adult of 33 years. I’ll make it really easy for you and link to great short tutorials on how to do the various stitches you’ll need to make this beanie and loop.
For the puff stitch beanie I even found a complete tutorial on YouTube from B.hooked crochet – How to crochet a puff stitch hat which is very, very similar to my pattern – if you’re not that into beanies or you want to make a kiddies hat, you even might want to follow the instructions from B.hooked crochet completely.
Anyways, these videos might help you visual peeps out there tremendously! I recommend to watch them first in total and then step by step, pressing pause whenever you do your own crocheting…
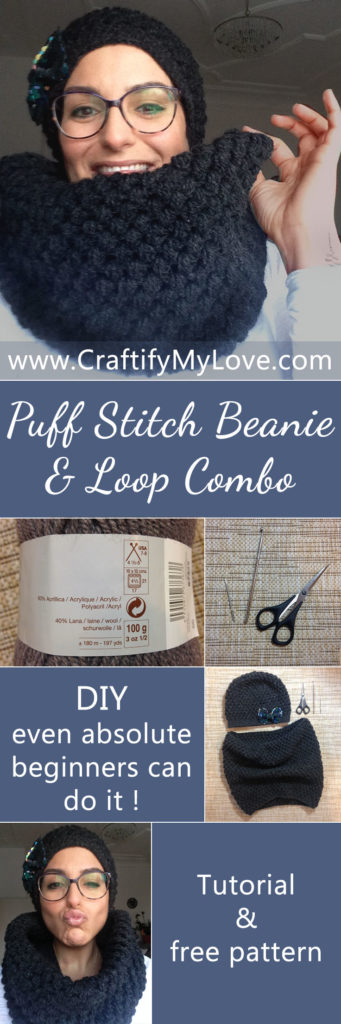
How to puff stitch your own beanie & loop combo
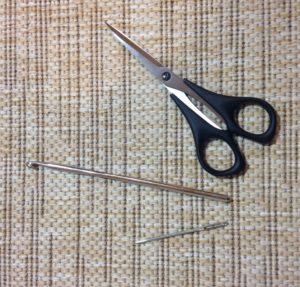
Supplies you’ll need
Next to no crocheting skills – trust me! Really, this is a project an absolute beginner can handle. Of course it will take you longer than us sweeties who crochet on a regular basis, but I promise you, you’ll make it!
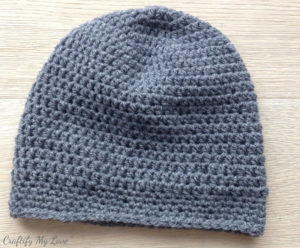
- 1 ball of wool for the hat (I used Katia TIROL wool in 11 – very dark grey)
- 3 balls of wool for the loop
- crochet hook (USA H, English 6, Metric 5,00 – or matching to the wool you use)
- scissors
- darning needle

Stitches, abbreviations, and video tutorials
Need to freshen up your crocheting skills? I’ve put together a crochet course on YouTube for you.
- ch – chain – (Video Tutorial)
- join with sl st- join with a slip stitch – (Video Tutorial)
- pf st – puff stitch – B.hooked crochet explains in the very beginning how to puff stitch
- sc – single crochet – Bobby Thomson from Crochet Guru teaches you how to single crochet
- fasten off – (Video Tutorial)
- Rd – round
- st(s) – stitch(es)
How to Crochet a Puff Stitch Beanie
Rd 1: Ch 3 and join to form a ring. Make 6 Pf sts in the center of the ring. Join with the top two loops of the first Pf st with a slst.
Rd 2: Make 2 pf sts in between each stitch in the chain 1 gap spaces. (12 sts)
Rd 3: Make 1 pf st in the first ch 1 gap space, make 2 pf sts in the next space. *Make 1 pf st in the next ch 1 gap space, make 2 pf sts in the next space. Repeat from * and join with a slst. (18 sts)
Rd 4: Make 1 pf st in the first 2 ch 1 gap spaces, make 2 pf sts in the next space. *Make 1 pf st in the next 2 ch 1 gap spaces, make 2 pf sts in the next space. Repeat from * and join with a slst. (24 sts)
Rd 5: Make 1 pf st in the first 3 ch 1 gap spaces, make 2 pf sts in the next space. *Make 1 pf stitch in the next 3 ch 1 gap spaces, make 2 pf sts in the next space. Repeat from * and join with a slst. (30 sts)
Rd 6: Make 1 pf st in the first 4 ch 1 gap spaces, make 2 pf sts in the next space. *Make 1 pf stitch in the next 4 ch 1 gap spaces, make 2 pf sts in the next space. Repeat from * and join with a slst. (36 sts)
Rds 7-19: Make 1 pf stitch into each ch 1 gap space. Join with a slst to complete each round. (36 sts)
Rds 20: Ch 1. Sc into first pf st (place stitch marker – you could buy one, or use a safety pin or a ribbon or basically any piece of wool, preferably in another color), sc into ch 1 gap space. *Sc into the next stitch, sc into the next ch 1 gap space. Repeat from *. Do not join, continue working in spiral. (72 sts)
Rds 21 – 24: Sc into every stitch. Once you have reached the stitch marker on the 24th round, slst into the next 2 sts to finish up the round.
Fasten off and weave in your ends. Done!
Pssssst…here’s a little secret for you, my brave crocheting beginners: When you don’t end up having the same amount of stitches after each round (I refer to the number in brackets at the end of each line), the world won’t end! Chances are you wont’t even see a difference when you’re done. Look closely at your work, and see for yourself. If you’re happy with the results, then well done! You’ve just finished your first crocheting project. I am really proud of you!!!!
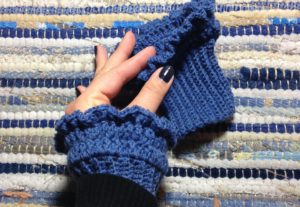
How to Crochet a Puff Stitch Loop or Infinity Scarf
Rd 1: Ch 102 and join to form a ring. Place stitch marker – you could buy one, or use a safety pin or a ribbon or basically any piece of wool, preferably in another color. Ch 1 and sc one round. Join with a slst to complete the first round.
Rd 2: Pf st into every other st from Rd 1. Join with the top two loops of the first pf st with a slst.
Rd 3 – 31: Make 1 pf st into each ch 1 gap space. Join with a slst to complete each round.
Rd 32: Ch 1. Sc into first pf st (place stitch marker – you could buy one, or use a safety pin or a ribbon or basically any piece of wool, preferably in another color), sc into ch 1 gap space. *Sc into the next stitch, sc into the next ch 1 gap space. Repeat from *. Do not join, continue working in spiral.
Rd 33: Sc into every stitch. Once you have reached the stitch marker on the 33th round, slst into the next 2 sts to finish up the round.
Fasten off and weave in your ends. Done! You’ll never have a cold neck ever again 😉
Let’s recap real quick
- It doesn’t matter how good of a crocheter you are. If you really want it, you can do it!
- Freshen up your skills or even start learning how to crochet with my FREE Crochet Course today!
- It’s an easy enough pattern and you’ll only need to know 5 crocheting techniques to do it.
- You can use almost any wool to make this project happen. But remember, if you change wool you might need to alter the pattern a bit.
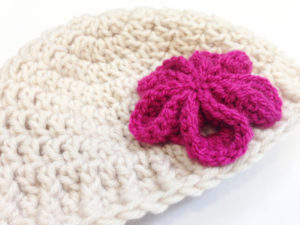
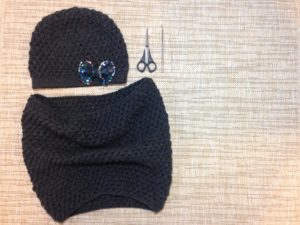
- Get creative!!! Add a little sparkle or flower power to your beanie. You can either add self made accessories (say a crocheted flower like this one from B.hooked crochet – you might even go a little crazy and add some sequins or beads to it), or use a brooch (I got my sparkly little bow tie from my friend Arthur who runs Der Naehmaschinist – he doesn’t own a shop yet, so don’t be shy, just send him a message) or barrette. Depending on the size of your accessory, you might want to add a little stitch here or there. I recommend you use a see-through thread.
- You’ll get many compliments and your peeps might beg you to crochet a hat or loop or both for them, too.
Need help?
No problemo, my friend! Just send me an E-Mail or comment on this post and I’ll do my best to help you through your project.
Please, spread the love!

Other crocheting projects you might enjoy